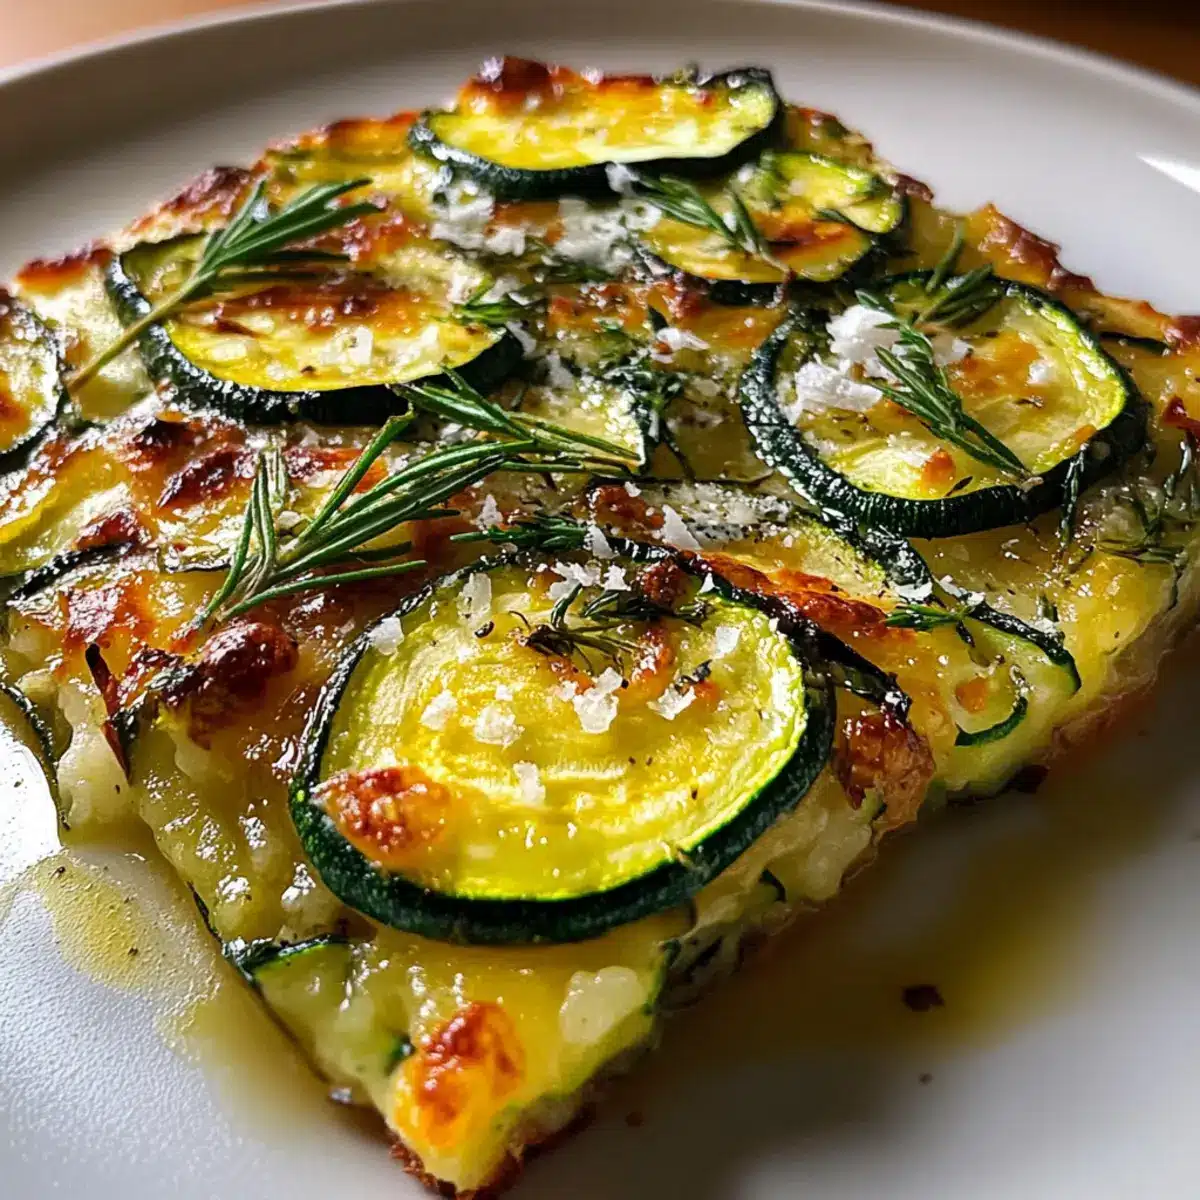
As I pulled a warm, golden slice from the oven, the fragrant aroma of Italian Zucchini Scarpaccia filled my kitchen, instantly transporting me to a sun-soaked terrace in Italy. This delightful dish, featuring tender zucchini enveloped in a crispy crust, is as easy to make as it is satisfying. Perfect for showcasing summer’s bounty, it’s a wonderful appetizer that doubles as a comforting main course. Two of the best parts? It’s vegetarian-friendly and comes together in just one bowl, making clean-up a breeze. Whether you’re sharing it at a casual dinner with friends or enjoying it solo with a glass of wine, this recipe promises to bring a taste of Italy to your home. Curious to know how to create this savory delight? Let’s dive into the recipe!
Why Make Italian Zucchini Scarpaccia?
Simplicity at Its Best: This recipe is incredibly straightforward, requiring just a single bowl and minimal prep time to whip up a delectable dish.
Versatile Delight: The Italian Zucchini Scarpaccia shines on its own as a light main course, but also pairs beautifully with a side salad or roasted vegetables for a complete meal.
Rich, Savory Flavor: With the harmonious blend of zucchini, nutty Parmesan, and fragrant thyme, each bite delivers a burst of wholesome taste that is sure to impress.
Perfect for Entertaining: This dish is ideal for gatherings! Serve it warm as a tantalizing appetizer or slice it up for a delightful brunch and watch your guests rave.
Customizable Experience: Feel free to switch up the herbs and cheeses based on what you have on hand or personal preferences. It’s a great way to explore your culinary creativity!
Elevate your next meal with Italian Zucchini Scarpaccia, and you’ll find it’s a go-to recipe that everyone will cherish. Have leftover slices? You’ll love storing them in an airtight container for a quick, satisfying snack later.
Italian Zucchini Scarpaccia Ingredients
• Discover what makes this dish special!
For the Batter
- Zucchini – Provides moisture and tender texture; other summer squashes can be used as a substitute.
- All-Purpose Flour – Forms the base and structure of the batter; gluten-free flour may work but affects texture.
- Cornmeal – Adds texture and a subtle corny flavor; can be replaced with fine breadcrumbs for a different texture.
- Baking Powder – Essential leavening agent that allows the batter to puff lightly; no substitutions recommended.
- Salt – Enhances all flavors and prevents blandness; essential for the success of the dish.
- Black Pepper – Adds warmth and depth; white pepper can be substituted for a milder flavor.
- Eggs – Bind the ingredients and contribute to a rich, golden color; egg replacements can be used for a vegan option (e.g., flax egg).
- Whole Milk – Hydrates the flour and adds richness; substitute with almond milk or other plant-based milk for a dairy-free version.
- Olive Oil – Improves moisture and contributes flavor; other oils can be used, but they will alter the taste.
For the Flavor
- Parmesan Cheese – Adds savory umami flavor and contributes to a crispy top; alternate with Pecorino Romano or mozzarella for different flavors.
- Fresh Thyme – Provides aromatic flavor; use 1 teaspoon of dried thyme if fresh is unavailable.
- Pine Nuts (optional) – Adds a buttery crunch; any chopped nuts can be used for a different texture.
- Garlic – Infuses the batter with a subtle savory note; omit if you prefer a milder flavor.
Get ready to savor every bite of this delightful Italian Zucchini Scarpaccia!
Step‑by‑Step Instructions for Italian Zucchini Scarpaccia
Step 1: Preheat the Oven
Begin by preheating your oven to 375°F (190°C). While the oven warms, take a moment to generously grease a 9×13-inch baking pan with some olive oil, ensuring that the bottom and sides are well-coated. This will help the Italian Zucchini Scarpaccia release easily after baking.
Step 2: Mix Dry Ingredients
In a large mixing bowl, combine 1 cup of all-purpose flour, 1/2 cup of cornmeal, 2 teaspoons of baking powder, 1 teaspoon of salt, and 1/2 teaspoon of black pepper. Whisk these ingredients together thoroughly until they are well blended and free of lumps. This crucial step sets the stage for the perfect base of your scarpaccia.
Step 3: Whisk Wet Ingredients
In another bowl, crack open 2 large eggs and whisk them together with 1 cup of whole milk and 1/4 cup of olive oil until smooth. Make sure there are no visible egg streaks; achieving an even mixture is essential for incorporating moisture into the Italian Zucchini Scarpaccia and connecting the flavors.
Step 4: Combine Wet and Dry Ingredients
Gently pour the egg mixture into the bowl with the dry ingredients. Using a spatula, fold them together just until combined—careful not to overmix, as you want the batter to maintain a light and airy texture. This harmony of wet and dry elements is what makes your scarpaccia truly delightful.
Step 5: Add Zucchini and Flavorings
Now, fold in 2 cups of grated zucchini, 2 minced garlic cloves, 1 cup of grated Parmesan cheese, and 2 teaspoons of fresh thyme into the batter. Use a gentle motion to ensure everything is incorporated without deflating the mixture. The zucchini adds moisture while the cheese and thyme bring rich flavors to your Italian Zucchini Scarpaccia.
Step 6: Pour and Drizzle
Pour the batter into your prepared baking pan, spreading it evenly with a spatula for a uniform bake. Once spread, drizzle a little olive oil on top to enhance the flavor during baking, ensuring that your scarpaccia will come out beautifully golden and crispy.
Step 7: Bake to Perfection
Carefully place the baking pan into the preheated oven and bake for 35–40 minutes. Keep an eye on it; your Italian Zucchini Scarpaccia is ready when it’s golden brown on top and firm to the touch. A toothpick inserted into the center should come out clean, signifying it’s baked perfectly.
Step 8: Cool and Serve
Once baked, remove the pan from the oven and let it cool for about 10 minutes on a wire rack. This cooling period allows for cleaner slicing. After cooling, cut the scarpaccia into squares or rectangles, serve warm, and enjoy the savory comfort of this delightful dish with friends or family!
Italian Zucchini Scarpaccia: Flavor Variations
Feel free to get creative with this dish and discover exciting new flavors! Each variation invites you to make this recipe uniquely yours.
- Cheese Swap: Use mozzarella or feta for a different flavor explosion. Ricotta also adds creaminess for a delightful twist!
- Veggie Boost: Toss in bell peppers or spinach for a colorful, nutrient-packed enhancement. These additions not only increase the health factor but also add lovely textures!
- Herb Adventure: Experiment with rosemary or basil instead of thyme for a refreshing taste. Dried herbs work too—just remember, a little goes a long way!
- Nuts for Crunch: Sprinkle in some toasted walnuts or chopped hazelnuts for extra crunch and depth. Add them while folding in the flavors, so every bite is a little surprise!
- Spice it Up: Want some heat? A pinch of red pepper flakes or jalapeños will give your scarpaccia a zesty kick. It’s a great way to add some excitement without overwhelming the original flavors!
- Gluten-Free: Swap the all-purpose flour for gluten-free flour blends. Keep in mind that the texture may slightly differ, but the flavor will still shine through!
- Dairy-Free: For a dairy-free version, substitute dairy-free cheese or simply leave it out altogether. The zucchini’s natural flavors will still shine bright!
- Garlic-Free Option: If you prefer a milder flavor, simply omit the garlic or swap in garlic powder for a subtler touch.
No matter how you customize your Italian Zucchini Scarpaccia, it’s bound to be a flavorful experience. Consider pairing it with a fresh garden salad or some zesty roasted vegetables for a lovely meal!
How to Store and Freeze Italian Zucchini Scarpaccia
Fridge: Store leftover Italian Zucchini Scarpaccia in an airtight container for up to 3-4 days. Make sure it cools completely before sealing to preserve its moisture.
Freezer: Wrap slices tightly in plastic wrap and then in aluminum foil to prevent freezer burn. It can be frozen for up to 2 months.
Reheating: To enjoy, thaw in the fridge overnight and reheat slices in the oven at 350°F (175°C) for about 10-15 minutes, ensuring they are heated through and the crust is crispy.
Room Temperature: If serving at a gathering, it’s best to keep the scarpaccia out for no more than 2 hours to ensure freshness and quality before cooking.
What to Serve with Italian Zucchini Scarpaccia
To elevate your meal, consider these delightful accompaniments that beautifully complement the comforting flavors of this savory bake.
-
Mixed Green Salad:
A light mix of greens with a citrus vinaigrette adds freshness and balances the richness of the scarpaccia. -
Roasted Cherry Tomatoes:
The sweet, slightly charred tomatoes create a burst of flavor, enhancing the savory notes of the zucchini. -
Creamy Yogurt Dip:
A cool, tangy yogurt dip, perhaps with herbs, provides a delightful contrast, offering creaminess to each delicious bite. -
Herbed Quinoa:
Nutty quinoa topped with fresh herbs brings a pleasing texture and adds a wholesome grain element, making the meal feel complete. -
Crispy Garlic Bread:
The crunchy exterior with garlicky goodness not only adds crunch but serves as the perfect vehicle for enjoying any leftover scarpaccia. -
Chilled White Wine:
A glass of crisp Sauvignon Blanc or Pinot Grigio pairs beautifully, cutting through the dish’s richness while enhancing the meal’s overall freshness.
Expert Tips for Italian Zucchini Scarpaccia
-
Avoid Overmixing: Keep the batter light and airy by mixing the wet and dry ingredients just until combined, which is crucial for your Italian Zucchini Scarpaccia’s texture.
-
Cool for Clean Slices: Allow the scarpaccia to cool for 10 minutes before slicing. This minimizes crumbling and ensures beautiful, clean edges for serving!
-
Adjust Baking Time: Ovens can vary, so watch your scarpaccia closely! It should be firm to the touch and golden brown, ensuring perfect doneness every time.
-
Add Extra Flavor: Feel free to experiment with different cheeses or vegetables. This versatility can elevate your Italian Zucchini Scarpaccia to new delicious heights!
-
Nutty Crunch: If you’re using pine nuts, toast them lightly before adding to enhance their flavor. This adds a delightful buttery crunch to each bite!
Make Ahead Options
Italian Zucchini Scarpaccia is the perfect dish for meal prep enthusiasts! You can prepare the batter and store it in the refrigerator for up to 24 hours before baking, keeping the flavors fresh and vibrant. Simply mix your dry ingredients and wet ingredients separately, then combine them just before pouring into the baking pan. Additionally, you can grate and prep the zucchini up to 3 days in advance; just remember to place it in an airtight container to maintain its moisture. When you’re ready to bake, just follow the final steps of pouring the batter into your pan and baking at 375°F (190°C) for 35-40 minutes. By prepping ahead, you’ll enjoy effortless cooking during your busy weeknight dinners!
Italian Zucchini Scarpaccia Recipe FAQs
What type of zucchini should I use for Italian Zucchini Scarpaccia?
Absolutely! When selecting zucchini, look for ones that are firm and glossy without any soft spots or blemishes. Smaller zucchinis tend to be sweeter and more flavorful, making them ideal for this recipe. If you can’t find zucchini, feel free to substitute other summer squashes, like yellow squash.
How should I store leftovers of Italian Zucchini Scarpaccia?
For storing leftovers, place them in an airtight container and keep them in the refrigerator for up to 3-4 days. Ensure they have cooled completely before sealing to maintain moisture. You can warm individual pieces in the oven to revive their crispiness when you’re ready to enjoy them again.
Can I freeze Italian Zucchini Scarpaccia?
Yes! To freeze, tightly wrap slices in plastic wrap, then cover them with aluminum foil to prevent freezer burn. They will stay fresh for up to 2 months. When you’re ready to savor them, thaw in the refrigerator overnight, then reheat in the oven at 350°F (175°C) for about 10-15 minutes until heated through and crispy.
What if my batter is too thick or too thin?
If your batter seems too thick, it may be due to too much flour. You can add a bit more milk to reach a smoother consistency. Conversely, if it’s too thin, add a little more flour, one tablespoon at a time, until it reaches the desired thickness. Remember, the key is to blend until just combined to keep the batter light!
Is Italian Zucchini Scarpaccia suitable for vegetarians?
Very! This recipe is naturally vegetarian, making it a great option for those who avoid meat. If you’d like to make it vegan, simply swap the eggs with flax eggs (1 tablespoon of ground flaxseed mixed with 2.5 tablespoons of water) and use plant-based milk instead of whole milk. Enjoy the deliciousness without compromising your dietary needs!
Can I substitute ingredients in the Italian Zucchini Scarpaccia?
Absolutely! This dish is quite versatile. You can replace the Parmesan cheese with Pecorino Romano or mozzarella for different flavor notes, and you can use whole wheat flour for a heartier base. Experiment with other vegetables like bell peppers or spinach for added nutrition and to tailor the dish to your taste preferences!
Savory Italian Zucchini Scarpaccia: Easy, Delicious Comfort!
Ingredients
Equipment
Method
- Preheat your oven to 375°F (190°C) and grease a 9x13-inch baking pan with olive oil.
- In a bowl, combine flour, cornmeal, baking powder, salt, and black pepper. Whisk until blended.
- In another bowl, whisk together eggs, milk, and olive oil until smooth.
- Pour the egg mixture into the dry ingredients and fold together until just combined.
- Fold in grated zucchini, minced garlic, grated Parmesan cheese, and thyme until incorporated.
- Pour the batter into the prepared baking pan, spread evenly, and drizzle with olive oil.
- Bake for 35–40 minutes until golden brown and firm to the touch. A toothpick should come out clean.
- Let cool for about 10 minutes, then cut into squares or rectangles and serve warm.
Leave a Reply