You won’t believe how effortless it is to whip up a batch of No Bake Chocolate Peanut Butter Fudge Bars that taste like an upgraded peanut butter cup! Picture three enchanting layers that each deliver a delightful crunch, creaminess, and rich chocolate flavor—all without needing to turn on your oven. These bars are not only quick to prepare, taking just 20 minutes, but they also make for an impressive treat at any gathering, perfect for satisfying that sweet tooth or impressing friends and family. I can’t wait for you to experience the joy of creating this layered dessert that’s bound to become a staple in your home. Curious about how to create this chocolatey bliss? Let’s dive into the recipe!
Why Are These Fudge Bars So Irresistible?
No Bake Convenience: You’ll appreciate how easy these bars are to whip up without even turning on the oven, making them perfect for last-minute cravings.
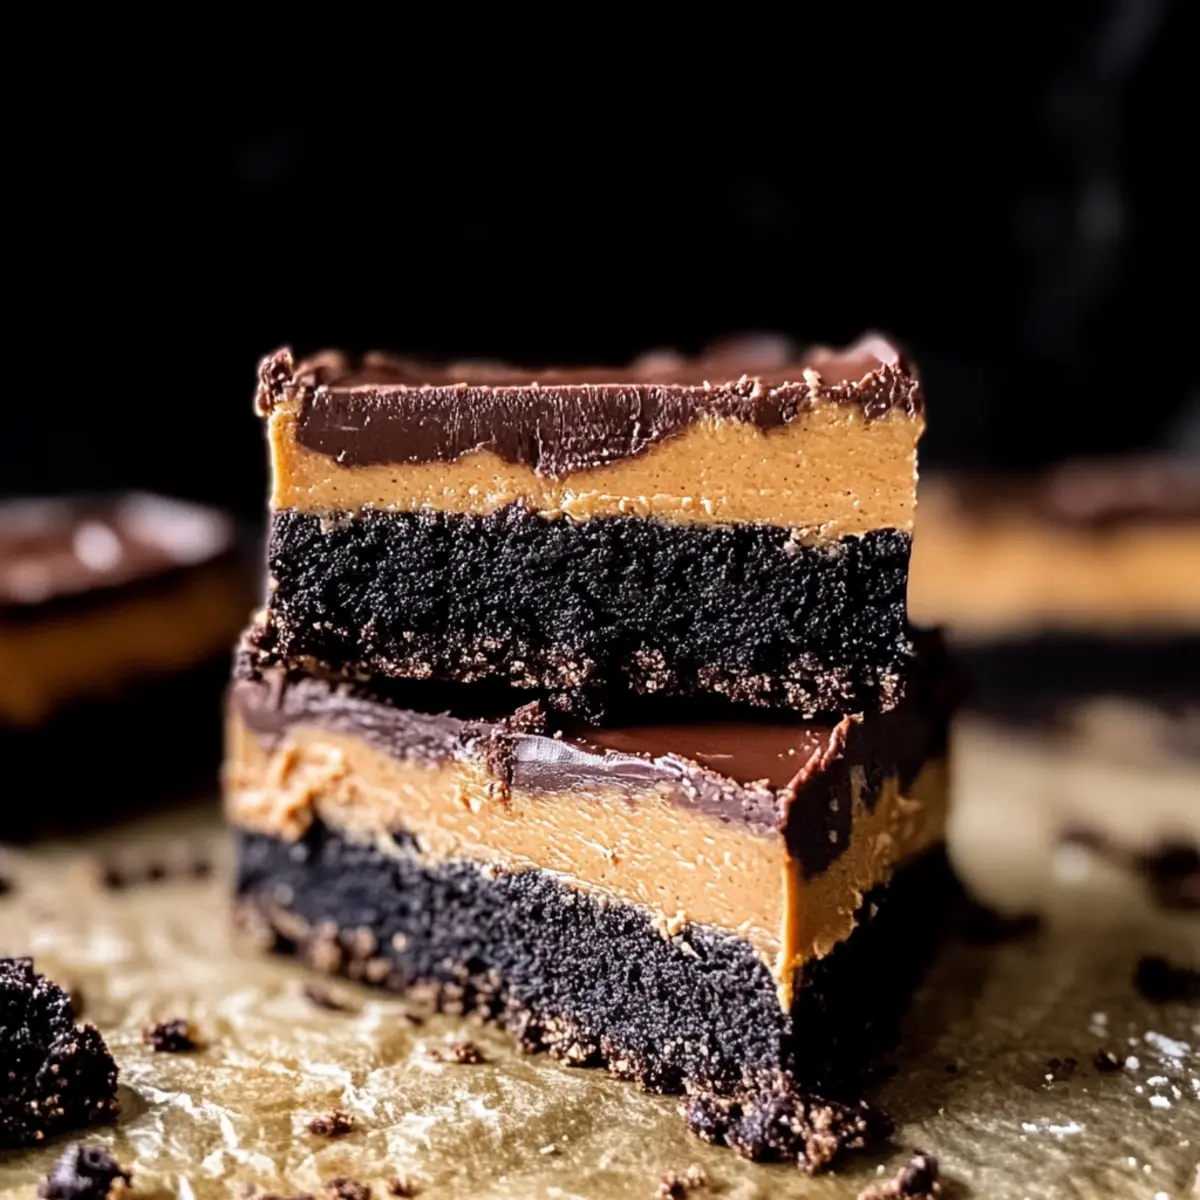
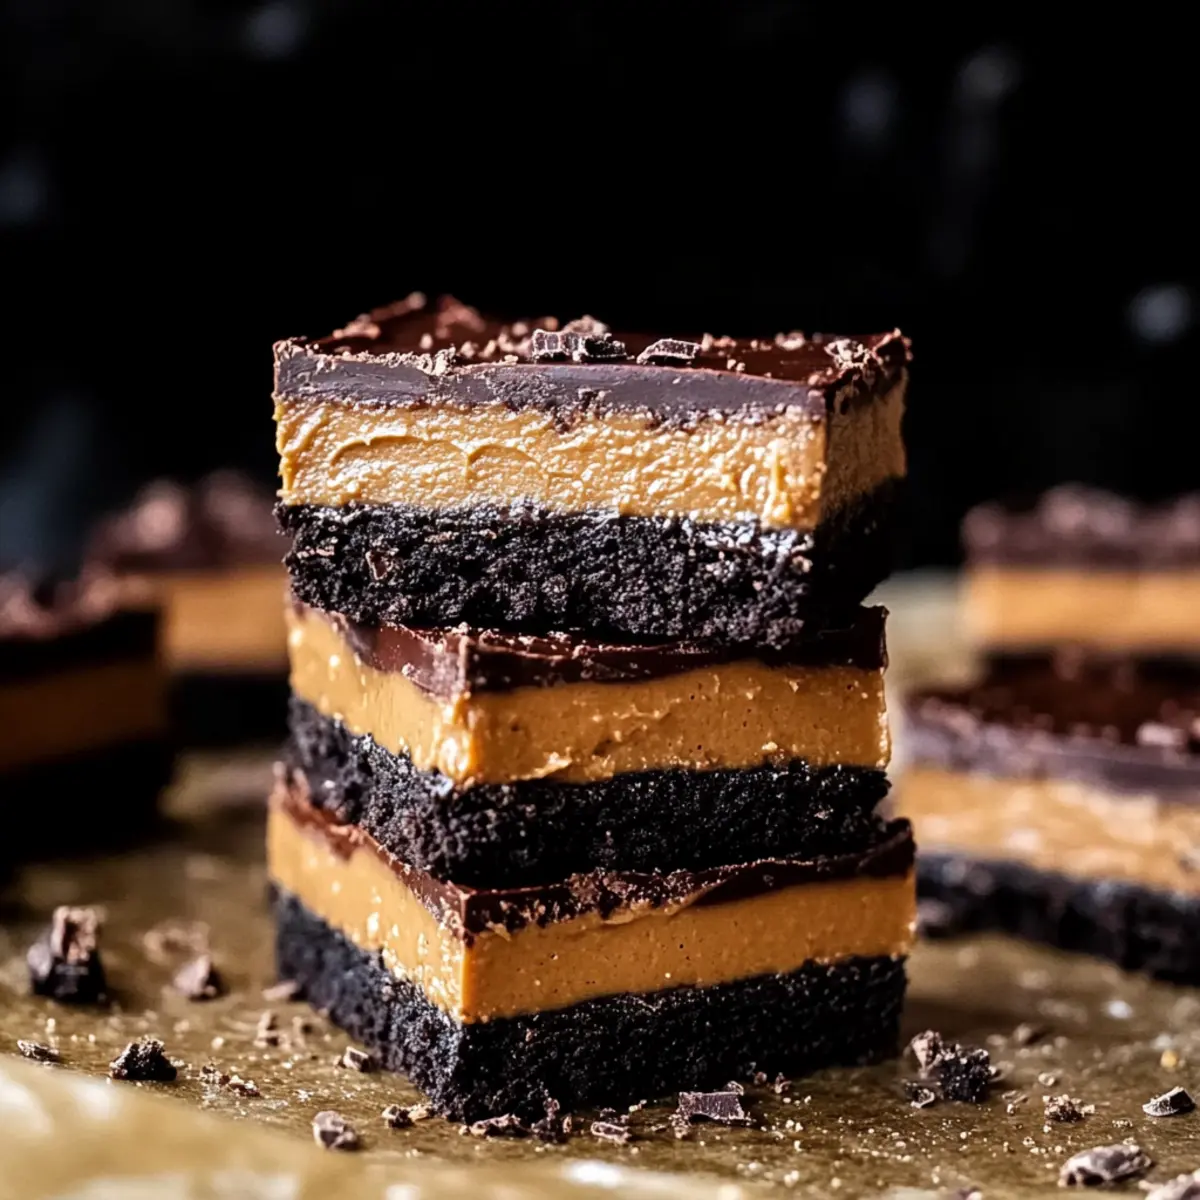
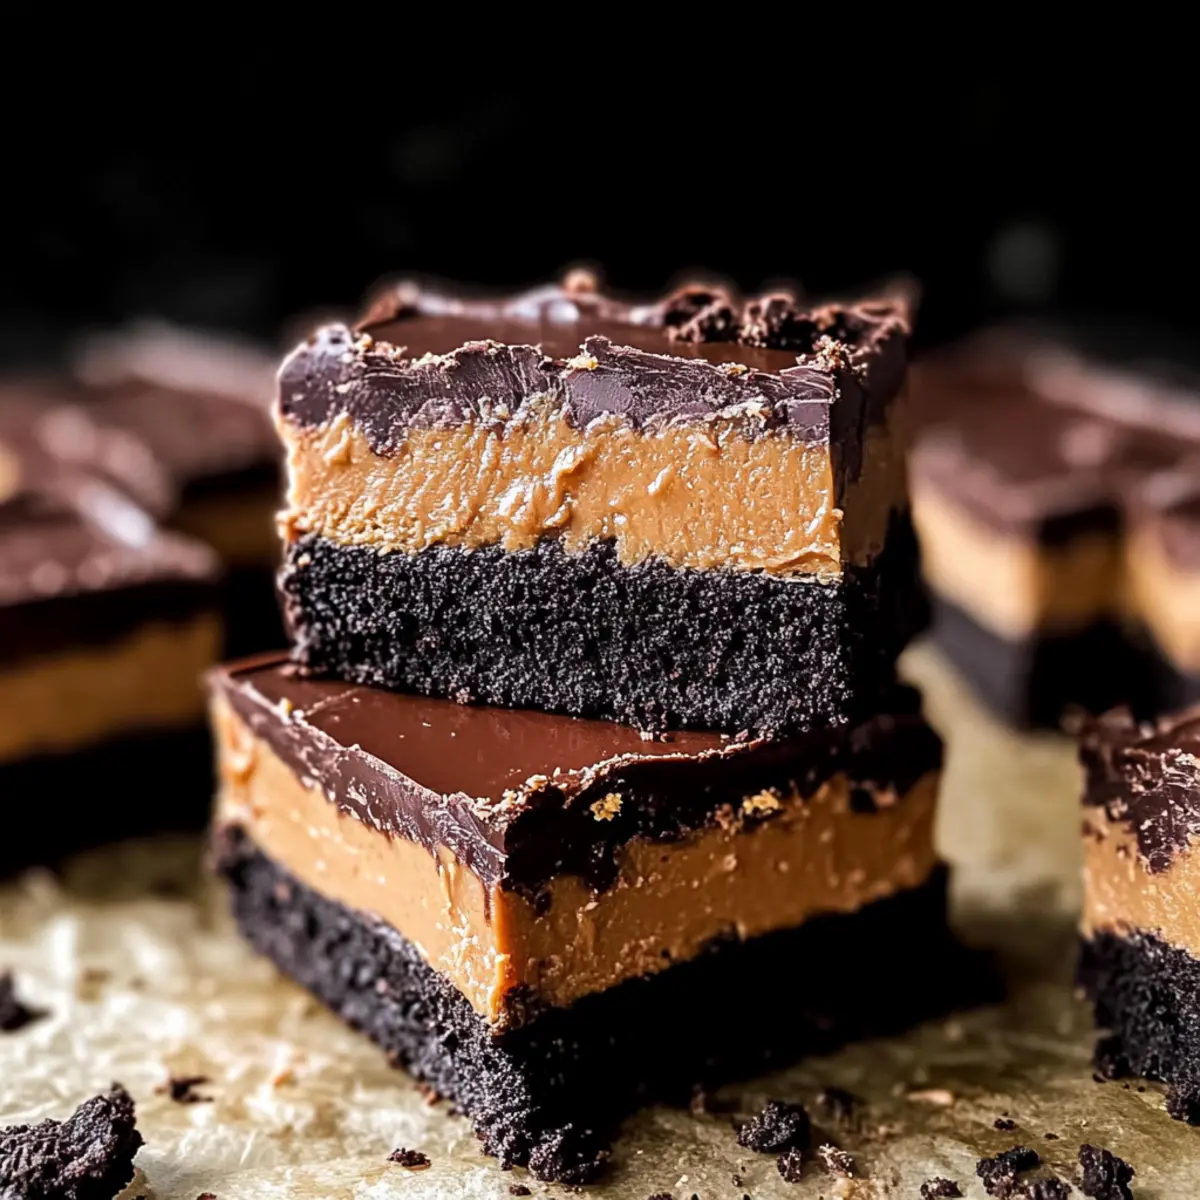
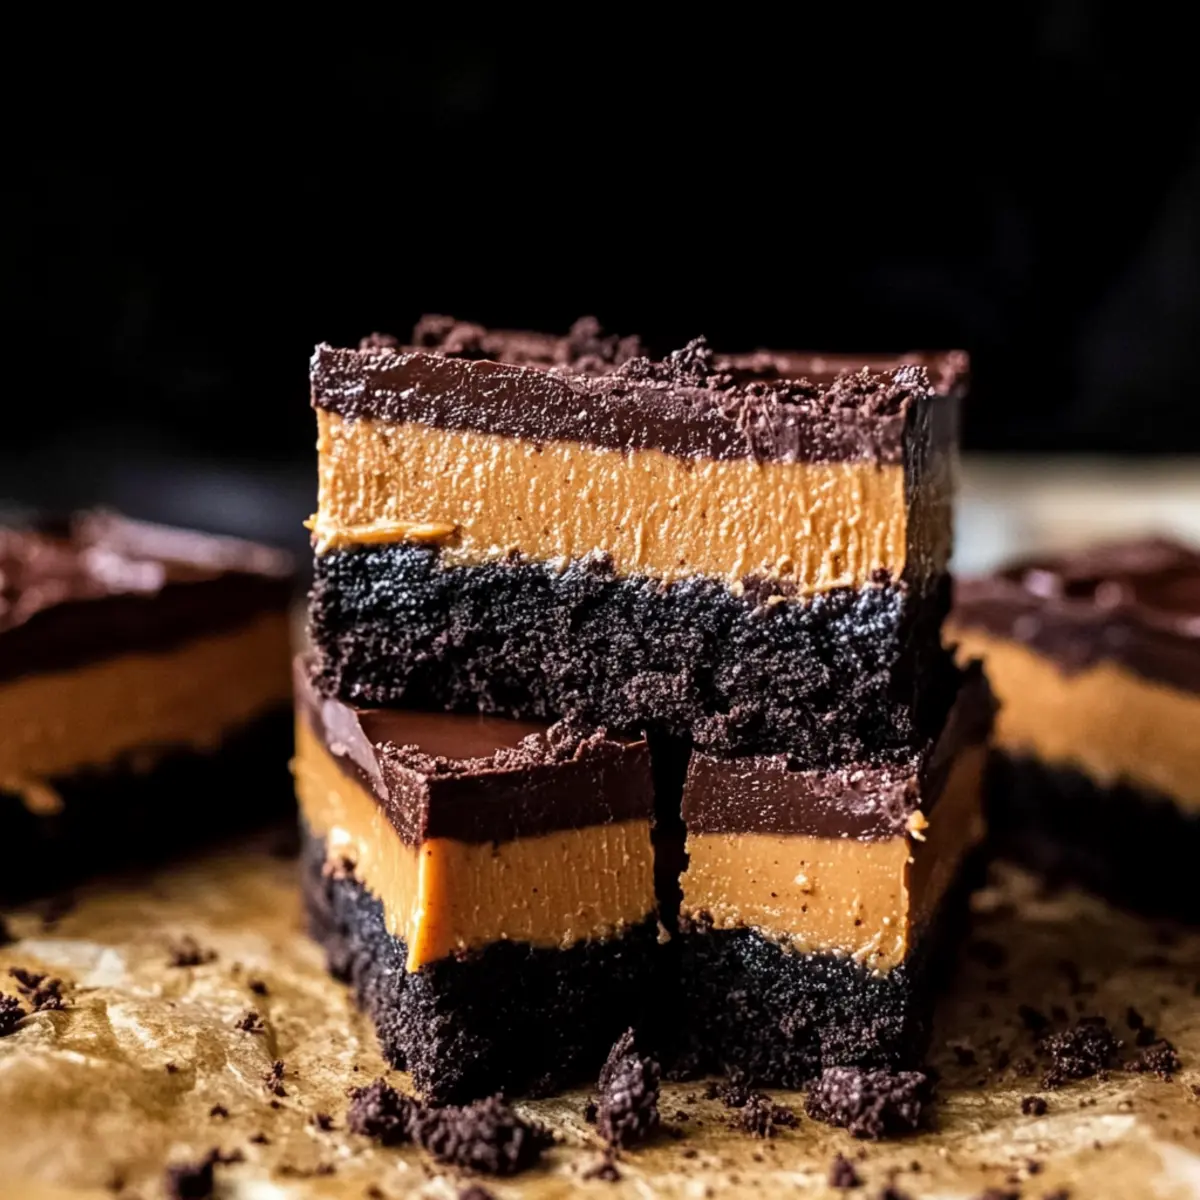
Decadent Layers: Each bite showcases a heavenly combination of crunchy Oreo base, creamy peanut butter middle, and smooth chocolate topping.
Crowd-Pleasing Treat: Whether for family gatherings or potlucks, these fudge bars are sure to be a hit with friends and loved ones.
Quick Preparation: In just 20 minutes, you can create a delightful dessert that looks as fabulous as it tastes.
Versatile Options: Customize your fudge bars by swapping out the peanut butter or crust for a unique twist—try using almond butter or even topping with crushed nuts! For more delectable ideas, check out these Harvest Marble Chocolate Chip Cookies for another treat everyone will love!
Chocolate Peanut Butter Fudge Bars Ingredients
• Get ready for a delightful treat!
For the Oreo Crust
- Oreo cookies – Ground into crumbs, these provide a sweet, crunchy base for the bars.
- Butter – Melted to bind the crust together; unsalted is typically best for flavor.
For the Peanut Butter Layer
- Processed creamy peanut butter – A must for that rich, creamy layer; avoid natural types for better consistency.
- Powdered sugar – This sweetens the peanut butter layer and helps it to set firmly.
For the Fudge Layer
- Chocolate (Baker’s or Couverture) – Creates the smooth fudge topping; off-brand baking chocolate is economical and recommended.
- Butter – Used for extra creaminess in the fudge; unsalted is the way to go.
These mouthwatering Chocolate Peanut Butter Fudge Bars are sure to impress and satisfy every sweet tooth!
Step‑by‑Step Instructions for Chocolate Peanut Butter Fudge Bars
Step 1: Prepare the Oreo Crust
Start by crushing the Oreo cookies into fine crumbs using a food processor or by placing them in a sealed bag and rolling with a rolling pin. In a mixing bowl, combine the cookie crumbs with melted butter until everything is moistened. Line an 8×8 inch pan with parchment paper, then firmly press the crumb mixture into the bottom, creating an even layer. This delightful crust will serve as the perfect foundation for your Chocolate Peanut Butter Fudge Bars.
Step 2: Make the Peanut Butter Layer
In a clean mixing bowl, whisk together the processed creamy peanut butter and powdered sugar until the mixture is perfectly smooth and free of lumps. This step is crucial for achieving that rich, creamy layer. Once blended, spread the peanut butter mixture evenly over the crust, ensuring that it reaches all corners of the pan. The contrast between the crunchy base and creamy filling sets the stage for your tasty dessert.
Step 3: Freeze
Place the pan in the freezer for about 30 minutes, allowing the peanut butter layer to firm up. You’ll know it’s ready when the layer feels solid to the touch. Freezing helps ensure the layers don’t mix when you add the fudge topping later. This is a great time to tidy up your workspace and prepare the ingredients for the next layer while you wait.
Step 4: Prepare the Fudge Layer
To create the luscious fudge topping, melt the chocolate and butter together in a microwave-safe bowl, heating in short bursts of 20 seconds, stirring in between until it’s completely smooth. Avoid using chocolate chips as they don’t melt to the desired consistency. Once combined, let it cool slightly before pouring over the frozen peanut butter layer, ensuring it spreads evenly across the top for that decadent finish.
Step 5: Set in Fridge
Transfer the pan back to the fridge and let the fudge layer set for at least 1 hour. The fudge should be firm and glossy when ready. Make sure to resist the temptation to dig in just yet—the time in the fridge ensures all three layers adhere beautifully, making for a perfect slice later.
Step 6: Slice & Serve
Once the layers are set, take a large knife and run it under hot water to warm the blade. Carefully slice into bars, wiping the knife clean between cuts for precise edges without losing the filling. These delightful Chocolate Peanut Butter Fudge Bars are now ready to be served—enjoy their rich flavors at your next gathering or as a sweet treat at home!
Tips for the Best Chocolate Peanut Butter Fudge Bars
- Crust Consistency: Make sure to press the Oreo crust firmly into the pan to create a sturdy base that won’t crumble when slicing the bars.
- Peanut Butter Choice: Stick with processed creamy peanut butter for a smooth layer; natural varieties can make the filling too runny.
- Melting Chocolate: Avoid chocolate chips; instead, use baking chocolate for a perfectly smooth fudge topping that sets well.
- Slicing Technique: Use a large, hot knife to slice the bars cleanly, as this helps prevent the soft filling from smearing.
- Storage Tips: Keep your Chocolate Peanut Butter Fudge Bars in the fridge, wrapped tightly in plastic wrap, to maintain freshness for up to a week.
Make Ahead Options
These Chocolate Peanut Butter Fudge Bars are perfect for busy home cooks looking to save time during hectic weeks! You can easily prepare the Oreo crust and peanut butter layer up to 24 hours in advance; simply store the components separately in the refrigerator wrapped tightly to maintain their freshness. If you’re short on time, the complete bars can be made up to 3 days ahead and kept in the fridge—just remember to cover them tightly with plastic wrap to prevent any drying. When you’re ready to serve, finish by slicing the bars with a hot knife for neat edges, ensuring they’ll be just as delicious as when they were first made!
What to Serve with No Bake Chocolate Peanut Butter Fudge Bars
Pair these decadent treats with delightful accompaniments to create an unforgettable dessert experience.
- Fresh Berries: The tartness of strawberries or raspberries beautifully balances the richness of the fudge bars, adding a burst of freshness.
- Vanilla Ice Cream: A scoop of creamy vanilla ice cream adds a luscious warmth to every bite, making for an indulgent combination that feels comforting.
- Espresso or Coffee: Serve with a strong espresso or freshly brewed coffee to enhance the chocolate flavors, elevating your tasting experience.
- Nutty Caramel Sauce: Drizzling a homemade or store-bought nutty caramel sauce will add dimension and sweetness, perfectly complementing the layers.
- Salted Whipped Cream: Top with a dollop of lightly salted whipped cream to introduce a light, airy texture that contrasts the dense bars beautifully.
- Chocolate-Covered Pretzels: For additional crunch, pair with chocolate-covered pretzels; their salty-sweet flavor provides a delightful contrast to the fudge.
- Milkshake: A chocolate or vanilla milkshake creates a nostalgic dessert feel and pairs wonderfully, pleasing all ages.
- Coconut Flakes: Lightly toasted coconut flakes sprinkled on the fudge bars add an exotic twist and texture that your guests will love.
- Chopped Nuts: Crushed peanuts or almonds lend a satisfying crunch and nutty flavor that will tie in beautifully with the peanut butter layer.
Enjoy these pairing ideas, and watch as your Chocolate Peanut Butter Fudge Bars shine even brighter during your next gathering!
How to Store and Freeze Chocolate Peanut Butter Fudge Bars
- Room Temperature: These bars are best enjoyed chilled. If left at room temperature, serve within 2 hours to prevent the fudge from becoming too soft.
- Fridge: Store your Chocolate Peanut Butter Fudge Bars in an airtight container or wrap tightly with plastic wrap. They will stay fresh for up to 5 to 7 days in the refrigerator.
- Freezer: For longer storage, freeze the bars by placing them in a single layer in a freezer-safe container. They can be kept for up to 2 months. Thaw in the fridge before serving.
- Reheating: To enjoy the bars slightly softer, let them sit at room temperature for about 10-15 minutes before serving. This will enhance their creamy texture without sacrificing flavor.
Chocolate Peanut Butter Fudge Bars Variations
Feel free to explore these exciting twists and creative swaps to make your fudge bars even more delightful and personalized!
-
Nut Butter Swap: Use almond or cashew butter instead of peanut butter for a nutty twist. Each choice brings a unique flavor profile that can surprise your palate!
-
Alternative Crust: Replace Oreos with any chocolate wafer cookies to create different flavors. The crust can change the whole essence of the bars and make each batch a little adventure.
-
Add Some Heat: For a kick, sprinkle a pinch of sea salt or cayenne pepper on the fudge layer. The spicy note complements the sweetness and surprises the taste buds.
-
Drizzle & Decorate: Top with a drizzle of caramel or melted chocolate after the bars have set. This not only enhances flavor but also adds an eye-catching finish that impresses.
-
Crunchy Texture Boost: Fold in chopped nuts or crispy rice cereal into the peanut butter layer for added crunch. This lovely textural contrast makes every bite an experience to savor.
-
Switch Up the Chocolate: Use white chocolate for a sweeter flair or dark chocolate for a richer taste. A dark chocolate fudge layer introduces a delightful depth that balances nicely with the peanut butter.
-
Fruity Influence: Incorporate a layer of raspberry or strawberry jam beneath the fudge layer for a fruity burst. This fruity addition pairs beautifully with the richness of chocolate and peanut butter.
-
Double the Layers: Create an extra layer of your choice like a creamy vanilla layer between the peanut butter and fudge. This additional layer makes for a triple-decker flavor that’s bound to wow your family and friends.
For more inspiration, consider adding a drizzle to your treats like in these delightful Butter Board Sweet ideas, or bake up a batch of festive Christmas Fudge Ingredient for special occasions!
Chocolate Peanut Butter Fudge Bars Recipe FAQs
How do I choose ripe ingredients for my fudge bars?
Absolutely! When selecting your ingredients, ensure that the butter is fresh and at room temperature for easy mixing. For the peanut butter layer, using Jif or a similar processed creamy peanut butter is ideal because it provides the right consistency. Avoid natural peanut butter, as it may lead to a runny filling that won’t set properly.
What is the best way to store leftover fudge bars?
You’ll want to keep your Chocolate Peanut Butter Fudge Bars refrigerated to maximize their freshness! Store them in an airtight container or wrap them tightly with plastic wrap. They can last in the fridge for up to 5 to 7 days but are best enjoyed within this timeframe to maintain their creamy texture.
Can I freeze these fudge bars? If so, how?
Absolutely! To freeze your Chocolate Peanut Butter Fudge Bars, first cut them into individual servings and arrange them in a single layer in a freezer-safe container. Make sure they are well-wrapped with plastic to prevent freezer burn. They can be frozen for up to 2 months. When you’re ready to enjoy, simply thaw them in the fridge for a few hours or at room temperature for about 10-15 minutes.
What can I do if my fudge layer doesn’t set properly?
Very! If your fudge layer isn’t setting, it may be due to using chocolate chips, which don’t melt into a smooth mixture. Ensure you use baker’s chocolate or couverture for the best results. If it still seems too soft after cooling in the fridge, you can try re-melting it gently and adding a bit more butter, then smoothing it out again over the peanut butter layer and refrigerating until it firms up.
Are these bars safe for pets or certain dietary restrictions?
It’s essential to keep in mind that chocolate is toxic to dogs and cats. If you’re looking for peanut butter options, use only xylitol-free peanut butter, as xylitol is harmful to pets. Additionally, these bars contain gluten from the Oreos; consider using gluten-free chocolate cookies if you need a gluten-free version. Always check ingredient labels to avoid allergenic reactions.
Irresistible Chocolate Peanut Butter Fudge Bars in 20 Min
Ingredients
Equipment
Method
- Prepare the Oreo crust: Crush Oreo cookies into fine crumbs, combine with melted butter, line the pan, and press firmly.
- Make the peanut butter layer: Mix creamy peanut butter and powdered sugar until smooth, then spread evenly over the crust.
- Freeze for 30 minutes to firm the peanut butter layer.
- Prepare the fudge layer: Melt chocolate and butter together until smooth, then cool slightly before pouring over the peanut butter layer.
- Set in the fridge for at least 1 hour until the fudge is firm.
- Slice & serve: Use a hot knife to cut into bars and enjoy the treat.
Leave a Reply