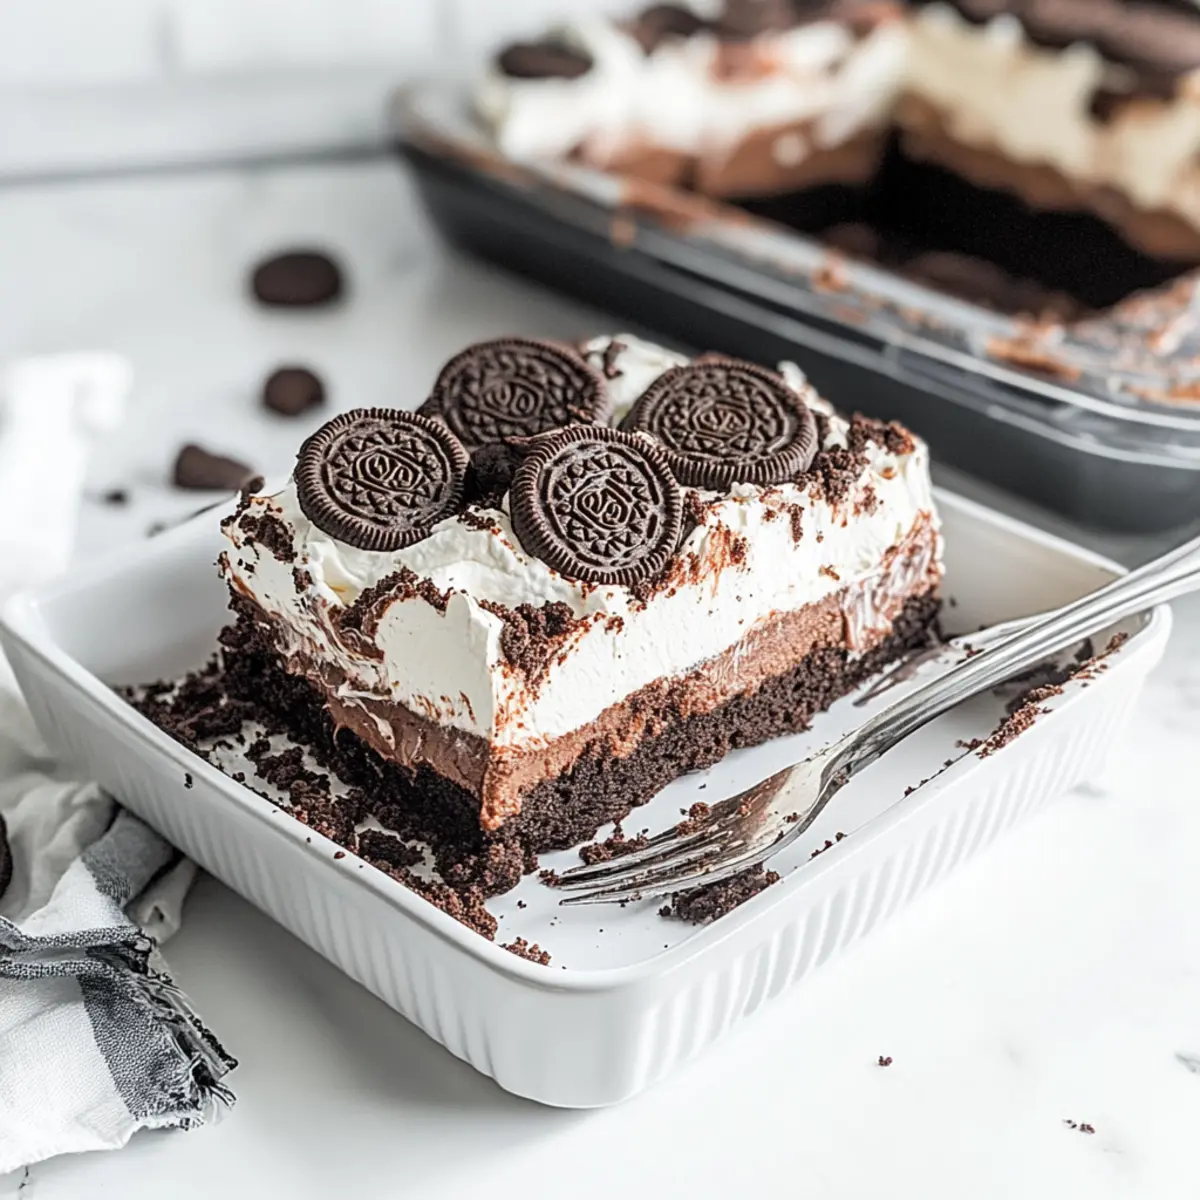
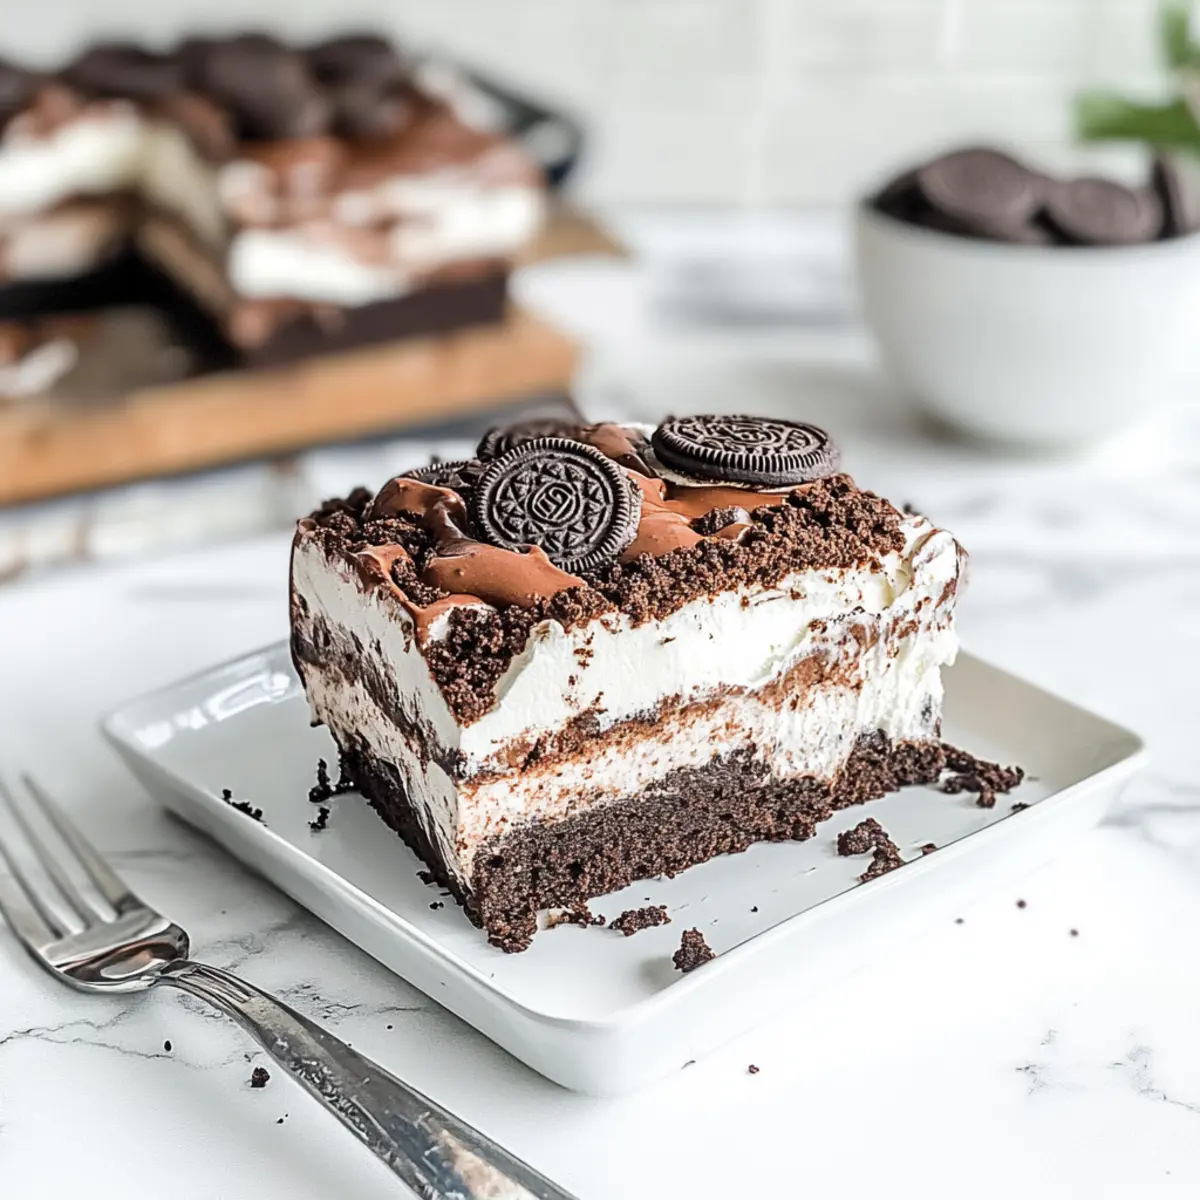
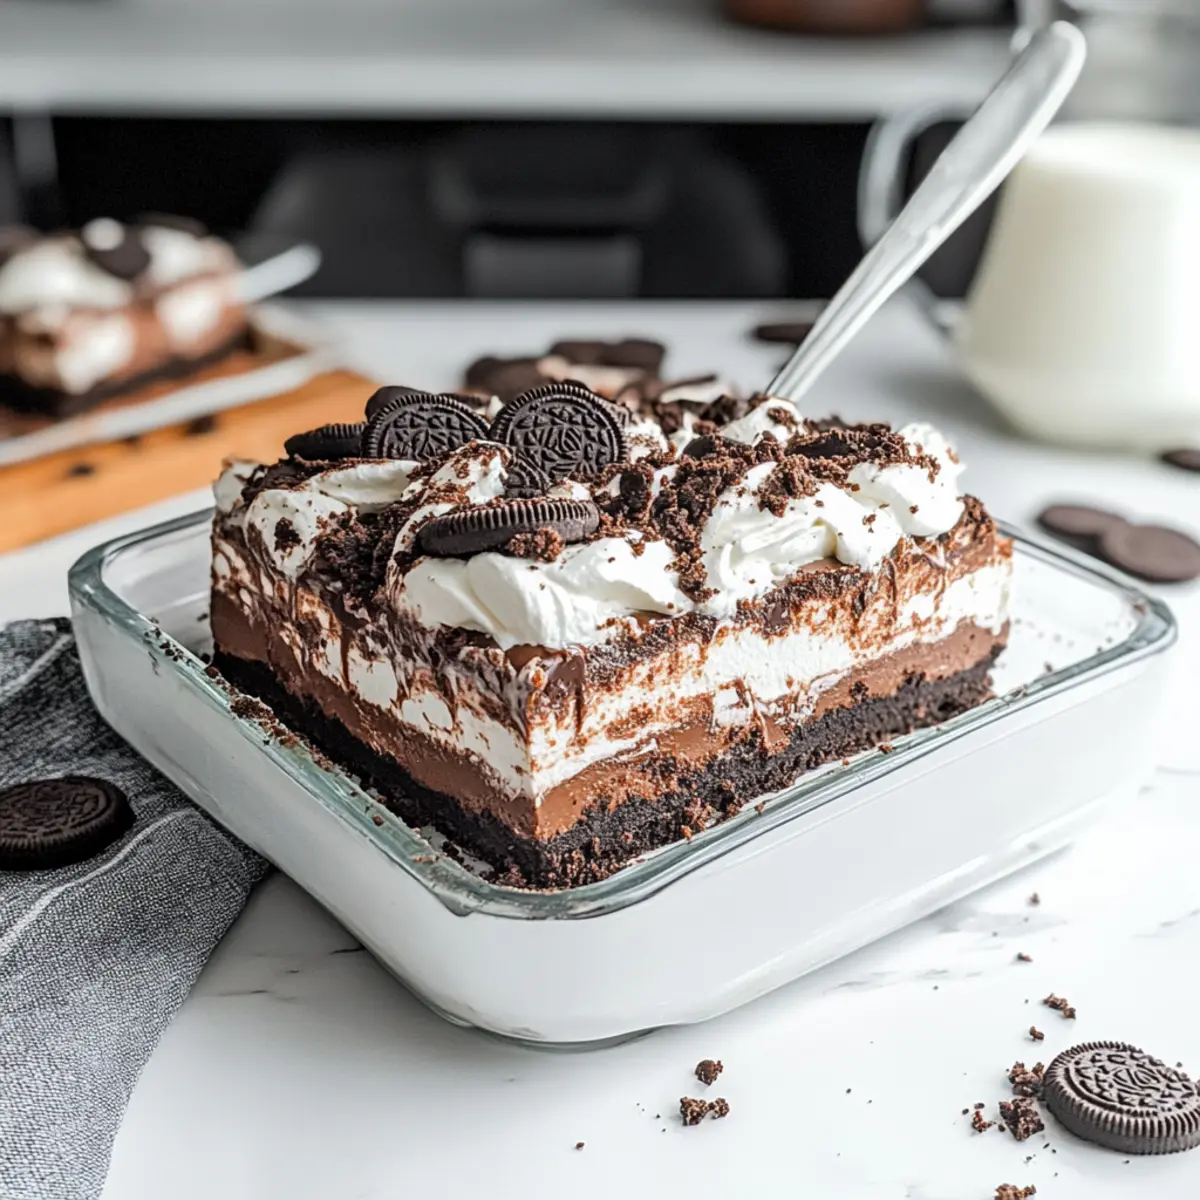
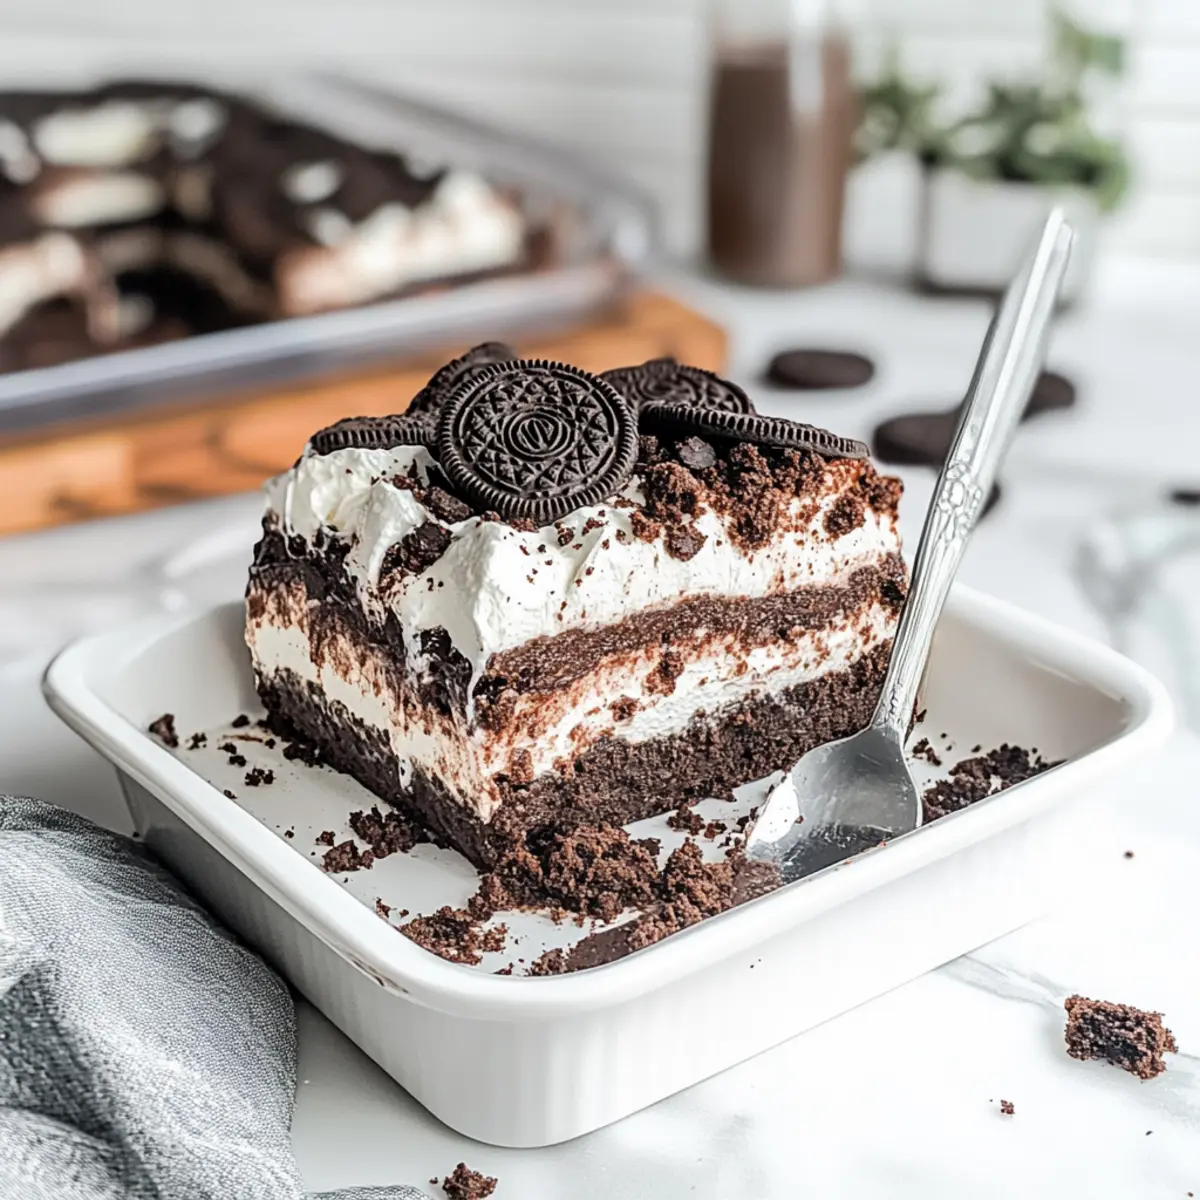
As I sift through my collection of dessert recipes, I’m always drawn to the ones that require no baking—like this delightful Chocolate Oreo Lush. With its tempting layers of crunchy Oreo cookies, silky chocolate pudding, and fluffy whipped topping, this decadent no-bake dessert is a true crowd-pleaser. What I love most is that you can whip it up ahead of time, making it perfect for everything from summer barbecues to birthday celebrations. This layered delight effortlessly combines sweet and creamy textures, leaving everyone eagerly coming back for seconds. Curious about how to make your own Chocolate Oreo Lush and perhaps even add your personal twist? Let’s dive in!
Why is Chocolate Oreo Lush a Must-Try?
Decadent Layers: This no-bake dessert boasts layers that seamlessly blend the crunch of Oreos with a silky chocolate pudding, ensuring every bite is a flavor explosion.
Make-Ahead Wonder: Prepare it in advance and chill, making your next gathering stress-free. Just slice and serve when guests arrive!
Versatile Flavors: Try variations like adding fresh strawberries or a hint of espresso powder for unique spins. It’s your canvas to create!
Crowd-Pleasing Delight: Loved by both kids and adults, this luscious treat is sure to entice everyone at the table.
Easy to Customize: From caramel drizzles to nut butter swirls, each person can make it their own.
Pair this indulgence with a scoop of vanilla ice cream for an extra touch of bliss or check out this delightful recipe for Chocolate Truffles Decadent for another sweet option!
Chocolate Oreo Lush Ingredients
• Get ready to create a delicious, creamy dessert!
For the Crust
- Oreos – The primary ingredient that adds a satisfying crunch and delightful chocolate flavor.
- Butter – Must be melted to ensure easy mixing, adding richness to the crust.
For the Filling
- Cream Cheese – Essential for creating a smooth filling; ensure it’s at room temperature to avoid lumps.
- Heavy Cream – Adds that luxurious smoothness, making the filling irresistibly creamy.
- Powdered Sugar – Sweetens without grittiness; feel free to substitute with a sugar alternative for lighter options.
- Cool Whip – Provides fluffiness; can be traded for homemade whipped cream, but keep in mind it may wear down faster.
For the Pudding Layer
- Instant Chocolate Pudding – This layer is a breeze to prepare; use instant for easy setup!
- Milk – Whole milk is recommended for richness when mixing the pudding.
For Garnish
- Chocolate Curls – An optional decorative touch that adds visual appeal and a hint of extra chocolatey goodness.
This Chocolate Oreo Lush is not just a dessert; it’s a delightful experience waiting to happen!
Step‑by‑Step Instructions for Chocolate Oreo Lush
Step 1: Prepare the Crust
Start by crushing 36 Oreo cookies in a food processor until they resemble fine crumbs. In a mixing bowl, combine the crumbs with melted butter until well blended. Press this mixture firmly into the bottom of a 9×13 dish, creating an even layer. Chill the crust in the refrigerator for about 5 minutes to set while you prepare the next layer.
Step 2: Make the Cream Cheese Filling
In a large mixing bowl, beat room temperature cream cheese with heavy cream, vanilla extract, and powdered sugar until the mixture is smooth and creamy. This process should take about 2-3 minutes on medium speed. Once the filling is well combined, gently fold in 8 ounces of Cool Whip until fully integrated. Spread this luscious cream cheese layer evenly over the chilled crust.
Step 3: Chill the Cream Cheese Layer
Place the assembled crust and cream cheese layer back in the refrigerator and chill for 10 minutes. This helps the filling firm up, ensuring distinct layers when you slice the Chocolate Oreo Lush later. Use this time to prepare the chocolate pudding to keep everything moving smoothly.
Step 4: Prepare the Chocolate Pudding
In a separate bowl, whisk together one package of instant chocolate pudding mix with 2 cups of cold milk for about 2 minutes, until the mixture thickens. This should take around 1-2 minutes of vigorous stirring. Once thickened, carefully pour the pudding layer over the chilled cream cheese filling, spreading it evenly with a spatula for a smooth surface.
Step 5: Add the Final Whipped Topping
After allowing the pudding to set for about 10 minutes, take the dessert out of the refrigerator. Top the pudding layer with the remaining Cool Whip, spreading it gently for an even layer. This fluffy topping adds delightful texture to your Chocolate Oreo Lush and should cover the pudding completely for a beautiful finish.
Step 6: Garnish and Chill
For a finishing touch, sprinkle crushed Oreos over the top and add chocolate curls if desired. Cover the dish tightly with plastic wrap or a lid and refrigerate the complete Chocolate Oreo Lush for at least 1 hour. This chilling time allows the layers to meld together, making each slice a delicious experience.
Step 7: Serve and Enjoy
Once chilled and set, slice your Chocolate Oreo Lush into squares and serve chilled. The layers should be distinct and beautiful, showcasing the crunchy crust, creamy filling, and smooth pudding. Pair with a scoop of vanilla ice cream for a delicious contrast, and enjoy sharing this indulgent treat with family and friends!
Chocolate Oreo Lush Variations & Substitutions
Get ready to elevate your Chocolate Oreo Lush with these creative and delicious options!
-
Fruity Twist: Add fresh bananas or strawberries between the layers for a burst of sweetness and freshness.
-
Mocha Flavor: Stir in 1 teaspoon of espresso powder to the cream cheese mixture for a delightful coffee kick.
-
Nutty Indulgence: Introduce nut butter like peanut butter or Nutella for creamy richness and added depth.
-
Tropical Escape: Replace some of the crushed Oreos with shredded coconut for a sunny, tropical vibe.
-
Minty Fresh: Incorporate a few drops of peppermint extract into the cream cheese filling for a refreshing mint chocolate dessert.
-
Syrupy Sweetness: Drizzle caramel or chocolate sauce in between layers for an enticingly gooey texture.
-
Crunchy Texture: Fold in crushed pretzels or graham crackers to the chocolate pudding layer for an added crunch factor.
-
Vegan Version: Use dairy-free cream cheese and whipped toppings, and swap conventional Oreos for vegan-friendly varieties.
As you explore these variations, consider pairing your creation with a scoop of vanilla ice cream or check out these indulgent treats like Harvest Marble Chocolate Chip Cookies for a delightful dessert duo!
Make Ahead Options
These delightful Chocolate Oreo Lush layers are perfect for meal prep! You can prepare the crust and cream cheese filling up to 24 hours in advance, allowing the flavors to meld beautifully. Simply crush the Oreos and mix with melted butter, then press the mixture into your dish. Once you’ve prepared the cream cheese layer, store it covered in the refrigerator until you’re ready to add the pudding layer. When you’re ready to serve, simply whisk together the instant pudding with cold milk (just before layering) and finish with whipped topping and garnishes. This way, you’ll have a show-stopping dessert that’s equally delicious and stress-free!
Expert Tips for Making Chocolate Oreo Lush
Use Fresh Ingredients: Always use fresh cream cheese and heavy cream for the best flavor and creaminess in your Chocolate Oreo Lush.
Chill Layers Thoroughly: For beautifully distinct layers, ensure each layer is adequately chilled before adding the next. This also helps with cutting clean slices.
Avoid Lumps: Start with cream cheese at room temperature to prevent lumps in your filling. Mixing well is key for that smooth texture!
Customize Wisely: While adding flavors like fruit or nut butter, ensure that modifications don’t alter the pudding’s texture, which could affect the entire dessert.
Cover Tight: If preparing a day in advance, cover the Chocolate Oreo Lush tightly to maintain freshness and prevent drying out or absorbing other fridge odors.
What to Serve with Chocolate Oreo Lush
Nothing pairs better with a creamy dessert than delightful accompaniments that enhance the overall dining experience.
-
Vanilla Ice Cream: The cool, creamy scoop perfectly balances the richness of the lush, elevating each bite into bliss.
-
Fresh Berries: Strawberries or raspberries add a refreshing tartness, creating an enticing contrast to the sweet chocolate layers.
-
Chocolate-Covered Strawberries: Indulge in this decadent combo that perfectly complements the luscious chocolate pudding, offering a romantic touch.
-
Mint Chocolate Chip Cookies: Their refreshing mint flavor and crunchy texture provide a delightful alternative to traditional dessert pairings.
-
Espresso or Coffee: A cup of freshly brewed coffee pairs beautifully, enhancing the dessert’s cocoa notes while providing a satisfying contrast.
-
Caramel Drizzle: Drizzling warm caramel over each slice adds a rich sweetness that harmonizes with the Oreo and chocolate combination.
-
Nutty Brownies: For the chocolate lovers, serving with fudgy brownies provides a chewy, chocolatey addition to the creamy layers.
-
Creamy Cheesecake: Combining textures of creamy cheesecake with the Oreo Lush gives that extra layer of indulgence for any dessert table.
With these tempting options, you’ll create a memorable dessert experience that leaves everyone wanting more!
How to Store and Freeze Chocolate Oreo Lush
Fridge: Store any leftovers in an airtight container for up to 4 days. If you plan to eat it later, it’s best to cover with plastic wrap to prevent drying.
Freezer: You can freeze your Chocolate Oreo Lush for up to 2 months. Be sure to wrap it tightly in plastic wrap, then in aluminum foil to prevent freezer burn.
Thawing: When ready to enjoy, transfer it to the fridge to thaw overnight. The texture may change slightly, but the flavor will remain delightful!
Serving: Once thawed, serve chilled. If you want to freshen it up, add a dollop of whipped cream or additional crushed Oreos on top.
Chocolate Oreo Lush Recipe FAQs
How do I choose ripe ingredients for my Chocolate Oreo Lush?
Absolutely! For the best taste, use fresh cream cheese and heavy cream. Ensure the cream cheese is at room temperature for easy mixing, preventing lumps in your filling. Additionally, selecting good quality Oreos, without any dark spots or broken cookies, will greatly enhance the flavor of your crust.
What is the best way to store Chocolate Oreo Lush?
Very! Store any leftovers in an airtight container in the refrigerator for up to 4 days. You can simply cover it with plastic wrap or a lid to keep it fresh and delicious. If you want to save it for later, make sure it is tightly wrapped to prevent drying out or absorbing other odors from the fridge.
Can I freeze Chocolate Oreo Lush?
Of course! You can freeze your Chocolate Oreo Lush for up to 2 months. To do this, wrap the dessert tightly in plastic wrap, followed by aluminum foil to protect against freezer burn. When you’re ready to enjoy it, transfer it to the fridge to thaw overnight for the best texture and flavor.
What if my cream cheese filling turns out lumpy?
Don’t worry; it happens sometimes! If your filling is lumpy, it’s usually due to the cream cheese being too cold. To fix this, make sure to always start with cream cheese at room temperature—let it sit out for about 30 minutes. Mix it well before adding any other ingredients. If lumps form, you can blend the filling in a mixer until smooth.
Can I customize the recipe for dietary restrictions?
Absolutely! If you’re looking to make adjustments, you can substitute the heavy cream with a light coconut cream for a dairy-free option or switch powdered sugar for a sugar alternative. If you’re catering to allergies, ensure your Oreos are free from allergens and double-check the pudding mix ingredients if using boxed.
How do I serve the Chocolate Oreo Lush for the best presentation?
To serve your Chocolate Oreo Lush beautifully, slice it into squares and top with a dollop of whipped cream or additional crushed Oreos just before serving. This adds a touch of elegance and enhances the already irresistible layers. Enjoy sharing this delightful treat with your guests!
Feel free to explore other flavors and enjoy every creamy bite of your Chocolate Oreo Lush!
Chocolate Oreo Lush: A No-Bake Dream Dessert Delight
Ingredients
Equipment
Method
- Crush 36 Oreo cookies in a food processor until fine crumbs. Combine with melted butter and press into the bottom of a 9x13 dish. Chill for 5 minutes.
- In a bowl, beat cream cheese with heavy cream, vanilla extract, and powdered sugar until smooth. Fold in Cool Whip and layer over cooled crust.
- Chill the cream cheese layer for 10 minutes. Prepare pudding by whisking chocolate pudding mix and milk until thickened. Spread over the cream cheese layer.
- Top pudding with remaining Cool Whip and garnish with crushed Oreos and chocolate curls if desired. Refrigerate for at least 1 hour.
- Slice and serve cold, optionally pair with vanilla ice cream.
Leave a Reply