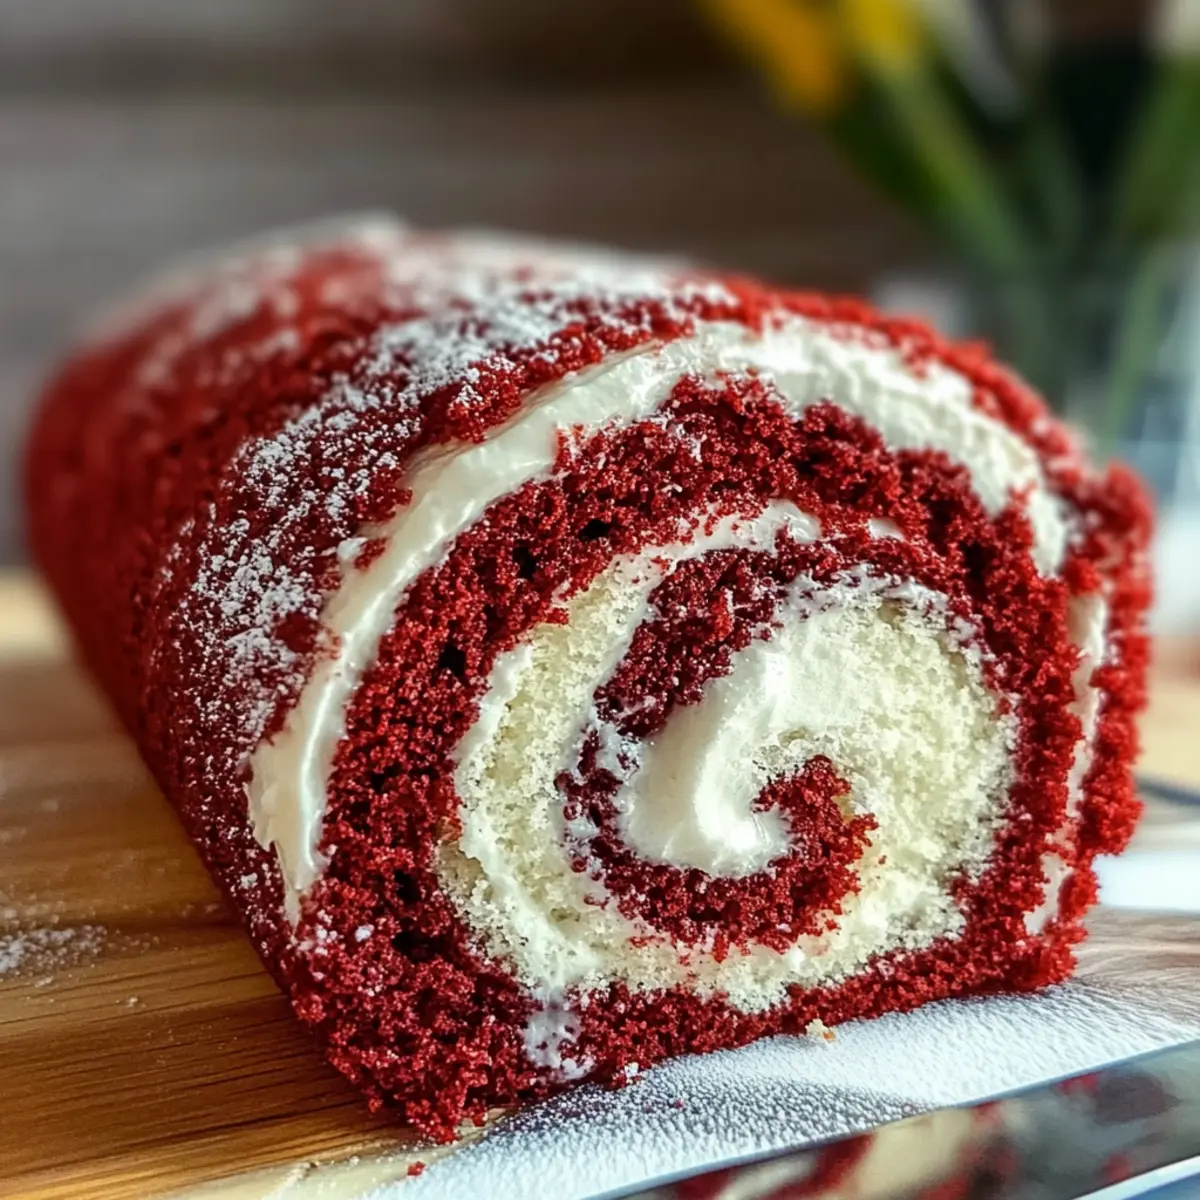
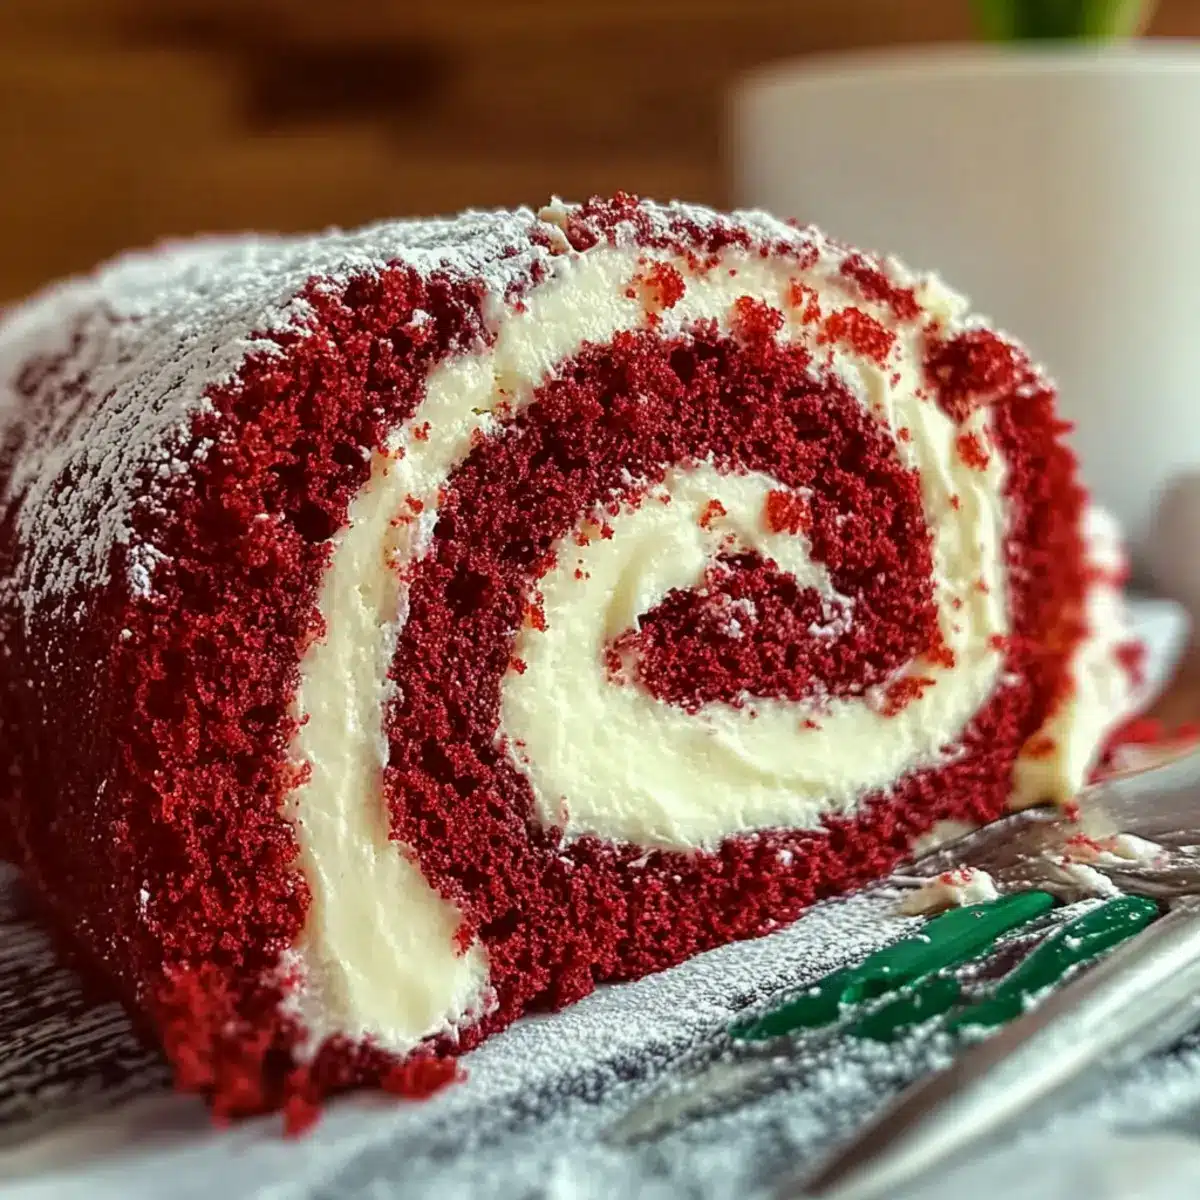
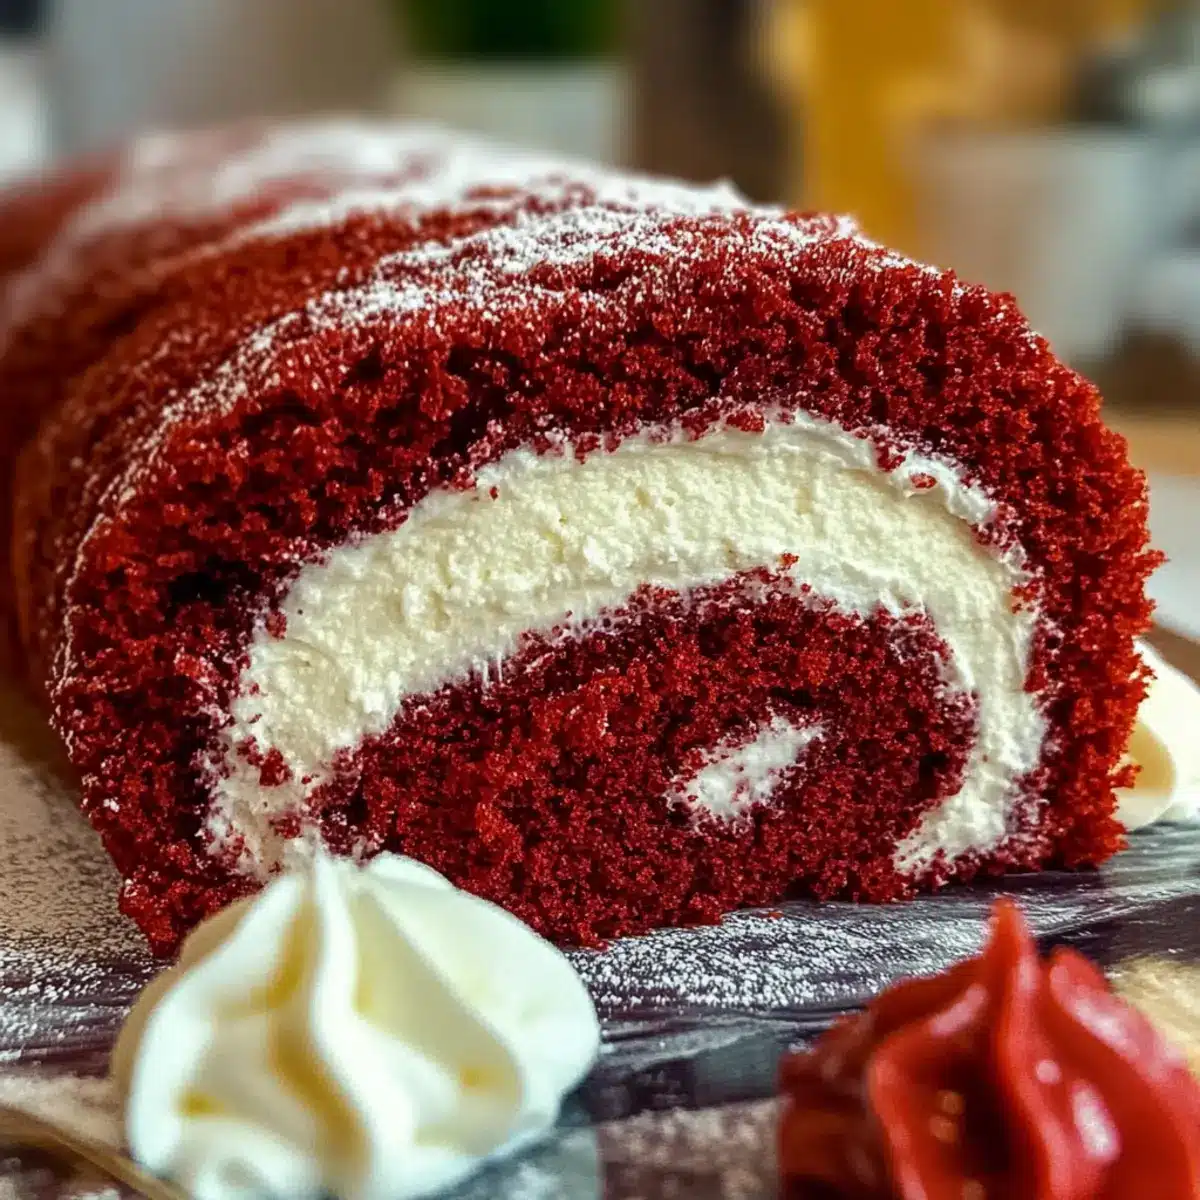
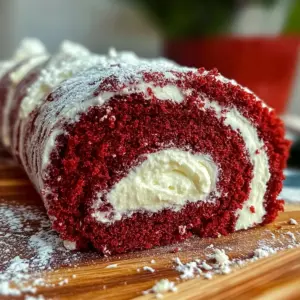
As I stood in my kitchen, the scent of cocoa and sweet vanilla wafted through the air, transporting me to joyous celebrations and beloved family gatherings. The star of this enchanting moment? A Red Velvet Cake Roll — a delightful fusion of classic red velvet flavor wrapped around a luscious cream cheese filling. This dessert isn’t just a treat for the eyes; it’s the perfect show-stopper for every occasion, whether you’re celebrating a birthday or simply want to impress your weekend guests. Best of all, it’s surprisingly easy to make, making it ideal even for a busy home chef like you. Ready to indulge in this elegant dessert that combines beauty and taste effortlessly? Let’s dive into the world of baking magic together!
Why is this Red Velvet Cake Roll irresistible?
Simplicity at Its Finest: This cake roll comes together quickly, perfect for those short on time but big on flavor.
Elegant Presentation: The vibrant red hue and creamy swirls make it a stunning centerpiece for any gathering.
Rich, Decadent Taste: With its chocolatey flavor and tangy cream cheese filling, each bite is a heavenly experience.
Versatile Delight: Serve it as a dessert after a festive meal or as a sweet treat alongside coffee.
Crowd-Pleasing Appeal: It’s an instant hit with guests, reminiscent of classic desserts like our Christmas Spice Cake and perfectly complementing a scoop of ice cream.
Get ready to be the star of your next get-together with this delightful creation!
Red Velvet Cake Roll Ingredients
For the Cake
- Large Eggs – Provide structure and moisture; use room temperature eggs for better incorporation.
- Granulated Sugar – Adds sweetness and helps with cake texture.
- Vegetable Oil – Keeps the cake moist and tender; melted butter can be used for a richer flavor.
- Baking Powder – Provides leavening, ensuring the cake rises; check for freshness.
- Salt – Enhances overall flavor.
- Vanilla Extract – Adds depth of flavor; opt for pure vanilla for the best taste.
- Cocoa Powder – Contributes to the cake’s chocolate flavor and color; unsweetened is preferable.
- All-Purpose Flour – Forms the cake’s structure; measure accurately for the best outcomes.
For the Cream Cheese Filling
- Powdered Sugar – Dusts the cake and is used in the filling; helps achieve a smooth frosting.
- Unsalted Butter – Adds richness to the filling; ensure it’s softened for easy mixing.
- Cream Cheese – Provides a creamy, tangy filling; make sure it’s at room temperature for easy blending.
Embrace the magic of a Red Velvet Cake Roll with these simple ingredients, and create a dish that will charm everyone at your table!
Step‑by‑Step Instructions for Red Velvet Cake Roll
Step 1: Preheat Your Oven
Start by preheating your oven to 350°F (175°C). While it heats, prepare a 10×15-inch cake pan by lining it with foil, making sure to leave some overhang for easy removal later. Lightly spray the foil with floured nonstick spray to prevent sticking.
Step 2: Beat Eggs and Sugar
In a large mixing bowl, use an electric mixer to beat 3 large eggs at medium speed for 3-5 minutes until the mixture is foamy and has doubled in volume. Gradually add the granulated sugar and continue beating for another 2 minutes until the mixture thickens and turns pale.
Step 3: Mix Wet Ingredients
Add the vegetable oil, baking powder, salt, vanilla extract, and cocoa powder to the egg mixture. Use your mixer on low speed until everything is combined. This step ensures the red velvet cake roll has a rich flavor, so take your time to incorporate each ingredient well.
Step 4: Combine with Flour
Gradually sift in the all-purpose flour, mixing gently until just combined. Be cautious not to overmix, as this can lead to a denser cake. You want a fluffy and light texture, which is key for a perfect Red Velvet Cake Roll.
Step 5: Bake the Cake
Pour the cake batter into the prepared pan, smoothing the top with a spatula. Bake in your preheated oven for 10-15 minutes, or until the top springs back when lightly tapped. Keep an eye on it to avoid overbaking, which can dry out the cake.
Step 6: Roll the Cake
Once baked, carefully transfer the cake onto a clean kitchen towel that’s dusted with powdered sugar. Flip the cake over, peel back the foil, and gently roll the cake up with the towel starting from one end. This helps maintain its shape while cooling completely.
Step 7: Prepare the Cream Cheese Filling
In a medium bowl, beat together the softened cream cheese and unsalted butter until smooth and creamy. Gradually add the powdered sugar and mix in the vanilla extract until the filling is fluffy and well-blended, creating a delicious contrast for your Red Velvet Cake Roll.
Step 8: Fill and Roll Again
Unroll the cooled cake very carefully, and spread the cream cheese filling evenly over the surface. Once spread, gently roll the cake back up, this time without the towel. Wrap it tightly in plastic wrap and chill in the refrigerator for one hour to set the filling properly.
Step 9: Serve the Cake Roll
Before serving, dust the top of the chilled Red Velvet Cake Roll with additional powdered sugar to add a touch of sweetness and elegance. Slice into pieces and enjoy the beautiful swirls of cake and cream cheese filling—perfect for impressing guests!
What to Serve with Red Velvet Cake Roll
Indulging in a splendid Red Velvet Cake Roll? Elevate your dessert experience and create a full meal with delightful pairings that tantalize the taste buds.
-
Fresh Berries: Juicy strawberries or raspberries add a refreshing burst, cutting through the richness of the cake.
-
Vanilla Ice Cream: Creamy and cool, it provides a dreamy contrast to the warm flavors of the cake roll. Scoop it generously on the side!
-
Chocolate Ganache: Drizzling this luscious chocolate sauce over the cake adds a decadent layer of luxury, enhancing every bite.
-
Whipped Cream: Light and airy, a dollop of freshly whipped cream balances the dense filling perfectly, creating an elegant presentation.
-
Coffee or Espresso: A warm cup of coffee brings out the chocolate notes in the cake while offering a cozy touch to your dessert experience.
-
Mint Leaves: Garnishing with fresh mint not only enhances the visual appeal but also adds a burst of freshness that complements the rich flavors beautifully.
-
Lemon Sorbet: This refreshing, zesty treat cleanses the palate, an invigorating contrast to the sweet, creamy indulgence of the Red Velvet Cake Roll.
-
Spiced Chai Latte: The aromatic spices in chai harmonize splendidly with the cake’s flavors, creating a comforting beverage pairing.
With these delightful choices, you’ll craft a meal that leaves a lasting impression on your guests while satisfying every sweet craving!
How to Store and Freeze Red Velvet Cake Roll
Fridge: Wrap leftover slices in plastic wrap or aluminum foil, storing them in the fridge for up to 3 days. This keeps the cake moist and flavorful.
Freezer: For longer storage, tightly wrap the cake roll in plastic wrap and then in aluminum foil. It can be frozen for up to 2 months. Thaw in the refrigerator overnight before enjoying.
Room Temperature: If serving the cake roll on the same day, it can be kept at room temperature for up to 4 hours. Just make sure it’s covered to prevent drying out.
Reheating: To enjoy warm, reheat individual slices in the microwave for about 10-15 seconds. This will give you that delightful melty filling without compromising the texture of the Red Velvet Cake Roll.
Expert Tips for Red Velvet Cake Roll
-
Room Temperature Eggs: Make sure your eggs are at room temperature to ensure they incorporate smoothly, creating a light texture in your Red Velvet Cake Roll.
-
Don’t Overmix: When adding flour, mix just until combined to keep your cake fluffy and airy. Overmixing can lead to a dense result.
-
Cooling with Care: Allow the cake to cool completely while rolled in the towel. This maintains its shape and prevents cracks during filling.
-
Chill the Filling: Ensure your cream cheese and butter are soft but not melted. Chill the finished roll to set the filling before serving for the best texture.
-
Slice with Precision: Use a sharp knife to cut the cake roll into slices. This will help retain those beautiful swirls and prevent squishing.
Make Ahead Options
These Red Velvet Cake Rolls are perfect for busy home cooks looking to save time during the week! You can prepare the cake itself up to 24 hours in advance; just bake as directed, roll it while it’s warm with a towel, and let it cool completely before wrapping it tightly in plastic wrap. The cream cheese filling can also be made and stored in the refrigerator for up to three days—just keep it covered to maintain freshness. When you’re ready to serve, unroll the cake, spread the chilled filling, and roll it back up before dusting with powdered sugar. With these make-ahead tips, your Red Velvet Cake Roll will taste just as delicious, allowing you more time to enjoy the moments that matter!
Red Velvet Cake Roll Variations
Feel free to let your creativity shine by customizing your Red Velvet Cake Roll to suit your tastes and dietary needs!
- Natural Coloring: Replace red food coloring with beet juice for a natural alternative. This twist adds a subtle earthy flavor and vibrant hue to your cake.
- Flavor Variations: Add a hint of almond extract to the filling for a lovely alternative flavor profile. Just a teaspoon can elevate your cake with a sweet, nutty essence.
- Gluten-Free: Substitute all-purpose flour with a gluten-free blend to cater to gluten sensitivities without sacrificing taste or texture.
- Nutty Crunch: Fold in finely chopped pecans or walnuts into the cream cheese filling for added texture and a delightful crunch.
- Chocolate Twist: Mix a tablespoon of cocoa powder into the cream cheese filling for an intensified chocolate experience that compliments your cake beautifully.
- Coconut Infusion: Stir in shredded coconut to the filling for a tropical flavor burst. It’s a wonderful way to elevate the traditional recipe into something new.
- Heat it Up: Add a dash of cayenne pepper to the filling for a quirky spicy kick that contrasts beautifully against the sweet, creamy flavors.
- Mini Cake Rolls: Create bite-sized versions by baking the batter in mini cupcake liners. Perfect for parties and easy to share!
The beauty of this Red Velvet Cake Roll is its versatility! You might also explore pairing it with fresh berries or even a scoop of ice cream alongside it, similar to how we enhance the indulgence of our Christmas Carrot Cake Cookies. Enjoy messing around with these variations and making it your own!
Red Velvet Cake Roll Recipe FAQs
How do I choose ripe ingredients for this recipe?
Absolutely! When selecting your eggs, look for ones that are free from cracks and have a clean shell. Room temperature eggs are ideal, as they will blend smoothly into your batter, enhancing the cake’s texture. For the vegetable oil, ensure it’s fresh and of good quality, as this impacts both moisture and flavor. Additionally, check that your baking powder is not expired by adding a teaspoon to hot water; it should fizz if it’s still active!
How can I store leftover Red Velvet Cake Roll?
Very simply! Wrap any leftover slices tightly in plastic wrap or aluminum foil and store them in the refrigerator. This method keeps the cake moist and flavorful for up to 3 days. Just remember to keep it covered so it doesn’t dry out. Alternatively, you can place the slices in an airtight container for longer freshness.
Can I freeze my Red Velvet Cake Roll?
Yes, you can! To freeze your cake roll, first, let it cool completely, then wrap it tightly in plastic wrap, ensuring no air is trapped inside to prevent freezer burn. Afterward, wrap it in aluminum foil or place it in an airtight container. The cake roll will stay fresh for up to 2 months. When you’re ready to enjoy, simply thaw it in the refrigerator overnight before serving.
What should I do if my cake cracks while rolling?
If your cake cracks during the rolling process, don’t worry—it happens to the best of us! I recommend using some of your cream cheese filling to gently smooth over the cracks; this not only fixes the appearance but also adds more flavor. Alternatively, cut the cake into slices, which will allow you to present it beautifully while still delighting your guests with the delicious taste!
Are there any dietary considerations for this recipe?
Absolutely! This Red Velvet Cake Roll is vegetarian, but if you’re serving it at a gathering, be mindful of potential allergies. The recipe contains eggs and dairy from the cream cheese filling. If anyone has specific dietary restrictions, consider using egg replacers and plant-based cream cheese alternatives. Always read labels to ensure they meet your guests’ needs!
How can I ensure my cake rolls properly without breaking?
Great question! To prevent breaking, allow the cake to cool in the towel it was rolled in—this helps the cake maintain its shape. When you unroll it to add the filling, do so gently, and don’t roll it too tightly during the cooling process. Make sure the filling is spread evenly for balanced weight during re-rolling. This technique will give you a stunning swirl and an impressive finish!

Irresistible Red Velvet Cake Roll for Your Sweet Cravings
Ingredients
Equipment
Method
- Preheat your oven to 350°F (175°C) and prepare a 10x15-inch cake pan lined with foil.
- Beat 3 large eggs at medium speed for 3-5 minutes. Gradually add 1 cup granulated sugar, beating for another 2 minutes.
- Add 1/3 cup vegetable oil, 1 teaspoon baking powder, 1/2 teaspoon salt, 1 teaspoon vanilla extract, and 2 tablespoons cocoa powder. Mix on low until combined.
- Gradually sift in 1 cup all-purpose flour, mixing gently until just combined.
- Pour the batter into the prepared pan and bake for 10-15 minutes, until the top springs back.
- Transfer the cake onto a powdered sugar-dusted kitchen towel, peel back the foil, and roll it up with the towel.
- Beat together 8 oz cream cheese and 8 oz unsalted butter until smooth. Gradually mix in 1 cup powdered sugar and a teaspoon of vanilla extract.
- Unroll the cooled cake, spread the cream cheese filling, roll back up without the towel, wrap tightly, and chill for 1 hour.
- Dust the top with powdered sugar before serving, slice, and enjoy!
Leave a Reply