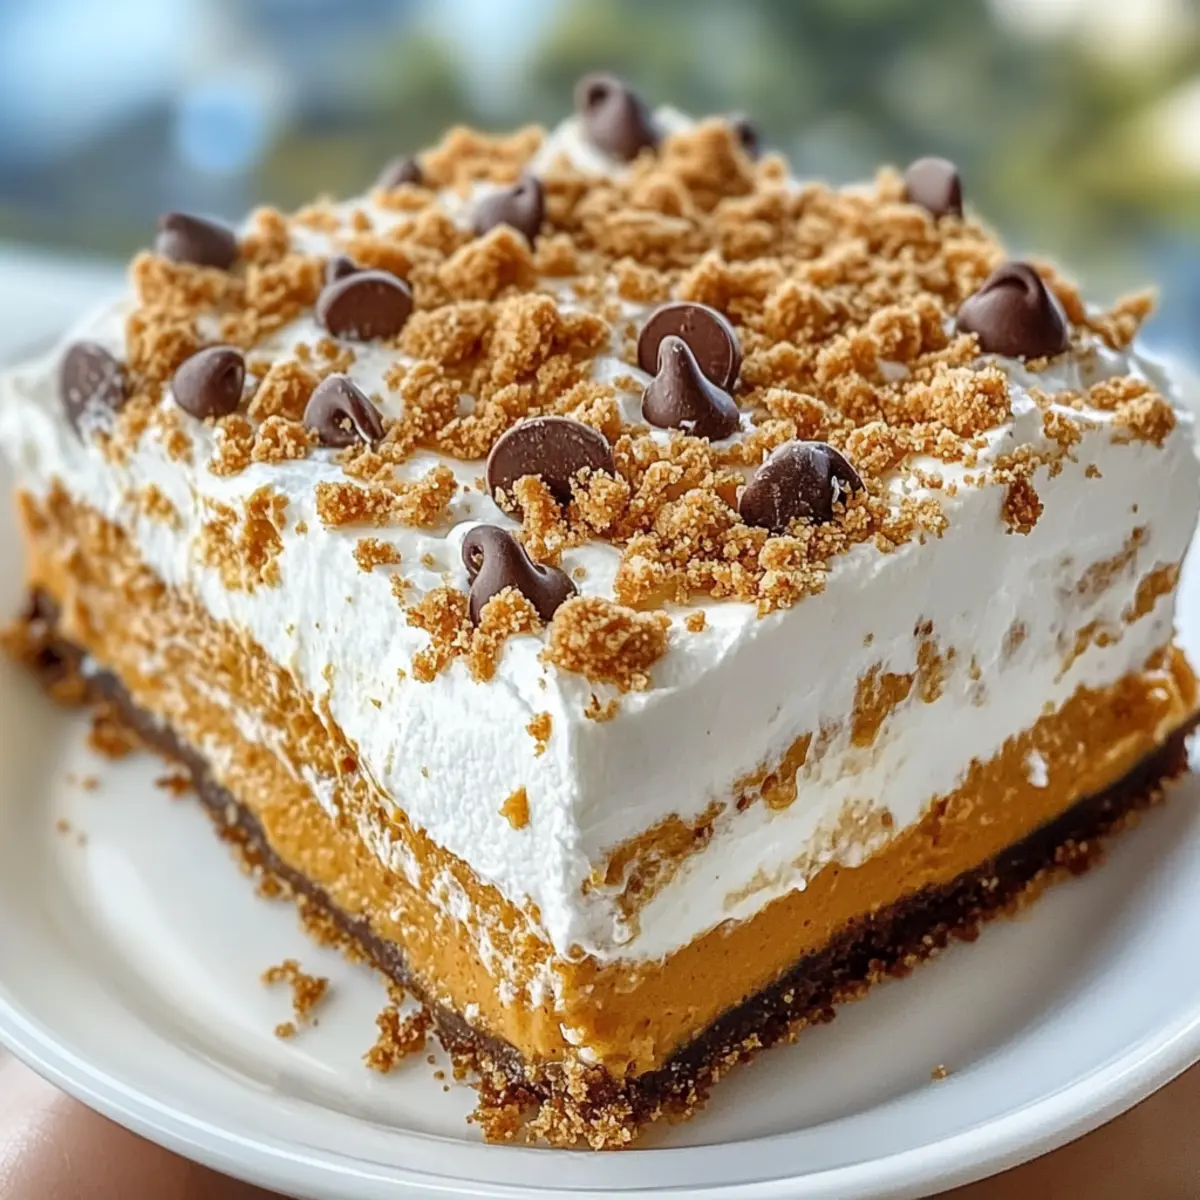
As the leaves begin to turn and the air carries hints of cinnamon and nutmeg, there’s nothing quite like treating yourself to a cozy slice of No-Bake Pumpkin Lush. This creamy fall dessert delight brings together a buttery graham cracker crust, velvety pumpkin filling, and fluffy whipped topping, creating a layered experience that’s sure to impress at any gathering. Best of all, it’s an easy no-bake recipe that saves you time—perfect for those busy Thanksgiving preparations! With the warmth of pumpkin and a playful sprinkle of chocolate chips and pecans on top, this vegetarian treat is a crowd-pleaser that provides a sweet escape from the chaos of fast food. Curious how to bring this autumn wonder to your dessert table? Let’s dive into the details!
Why is Pumpkin Lush a Must-Try?
Irresistible layers make this dessert a showstopper at your holiday gatherings. No-bake joy means you can whip it up quickly, leaving more time to enjoy the festivities! Perfectly balanced flavors meld together creamy pumpkin filling and crunchy toppings, creating each delectable bite. Versatile and vegetarian-friendly, it’s suitable for everyone at the table. If you’re looking for other delightful pumpkin treats, check out our Pumpkin Cheesecake Gingersnap or Pumpkin Pie Cheesecake for more seasonal inspiration!
Pumpkin Lush Ingredients
• Unleash the magic of fall with these delightful ingredients!
For the Crust
- Graham Cracker Crumbs – Provides a lightly sweet and toasty base. Substitution: Digestive biscuits work well for a similar crust.
- Unsalted Butter – Binds the crust together for shape retention. Note: Do not substitute with salted butter to avoid altering taste.
For the Cream Cheese Layer
- Cream Cheese – Adds richness and a tangy flavor, preventing excessive sweetness. Ensure it’s well-softened before mixing to avoid lumps.
- Powdered Sugar – Sweetens the cream cheese layer smoothly. No substitutes recommended for texture purposes.
For the Pumpkin Layer
- Pumpkin Puree – The core ingredient providing fall flavor and moisture. Canned or homemade works; however, ensure it’s pure pumpkin puree, not pie filling.
- Vanilla Pudding Mix – Helps the pumpkin layer set while enhancing creaminess. Instant mix is crucial; do not use cooked variety.
- Cold Milk – Activates the pudding mix and adjusts the consistency of the pumpkin layer. Use whole milk for best results.
- Pumpkin Pie Spice – A blend of warm spices (cinnamon, ginger, nutmeg, clove) adding seasonal flavor. You can create your own blend if unavailable.
For the Topping
- Whipped Topping – Lightens the dessert and provides a fluffy finish. For homemade, ensure it’s stabilized if needed for layering.
- Mini Chocolate Chips – Adds texture and a chocolate contrast. Substitutions: Could use dark chocolate chips for a richer taste.
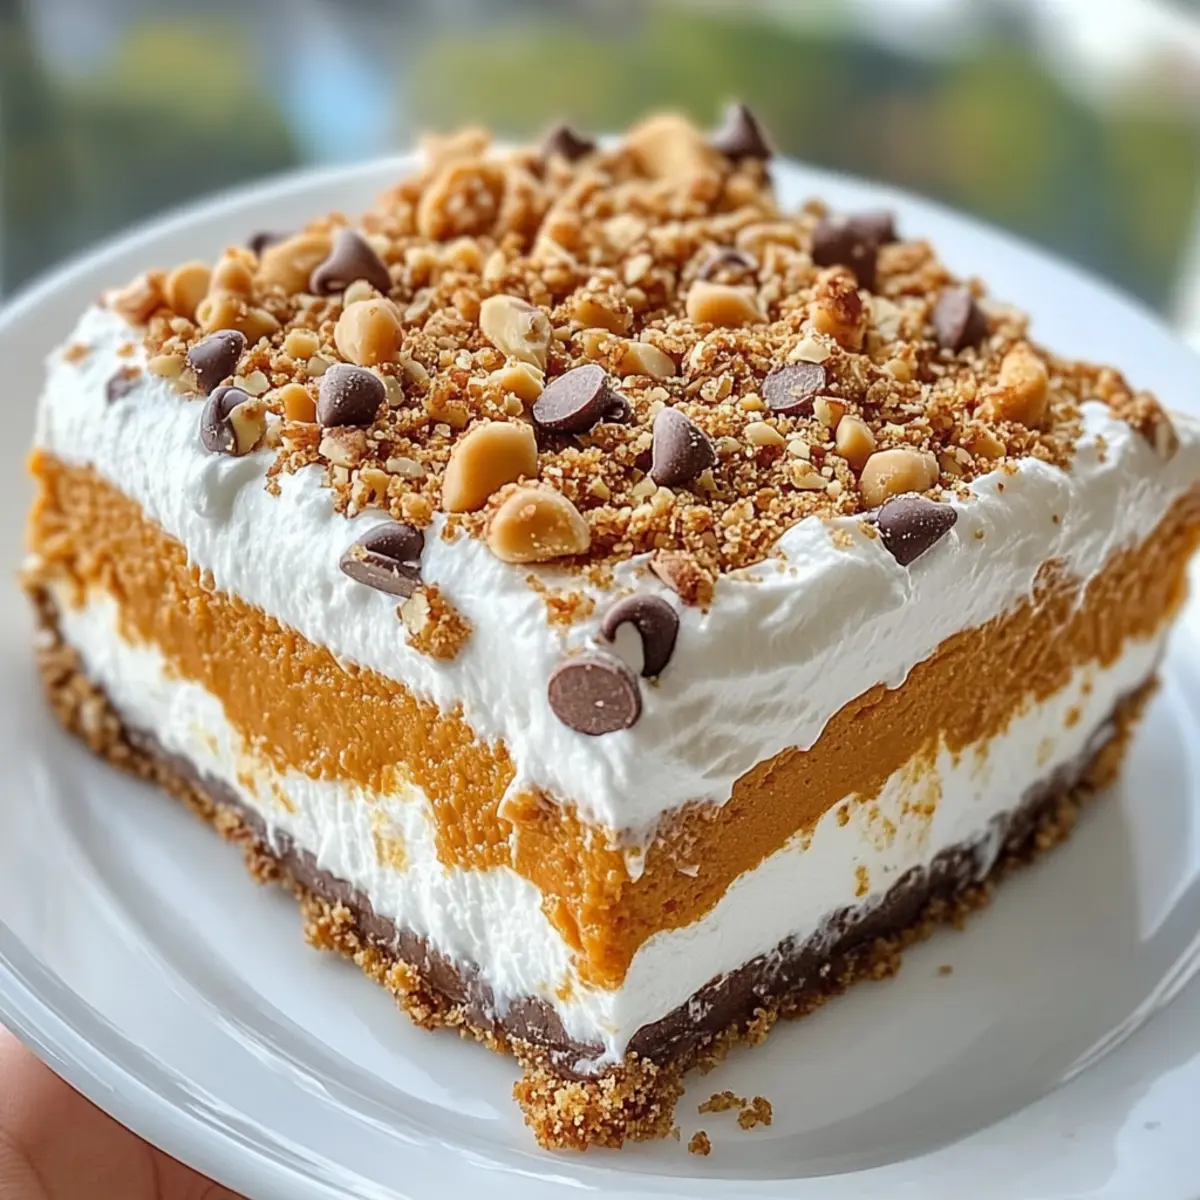
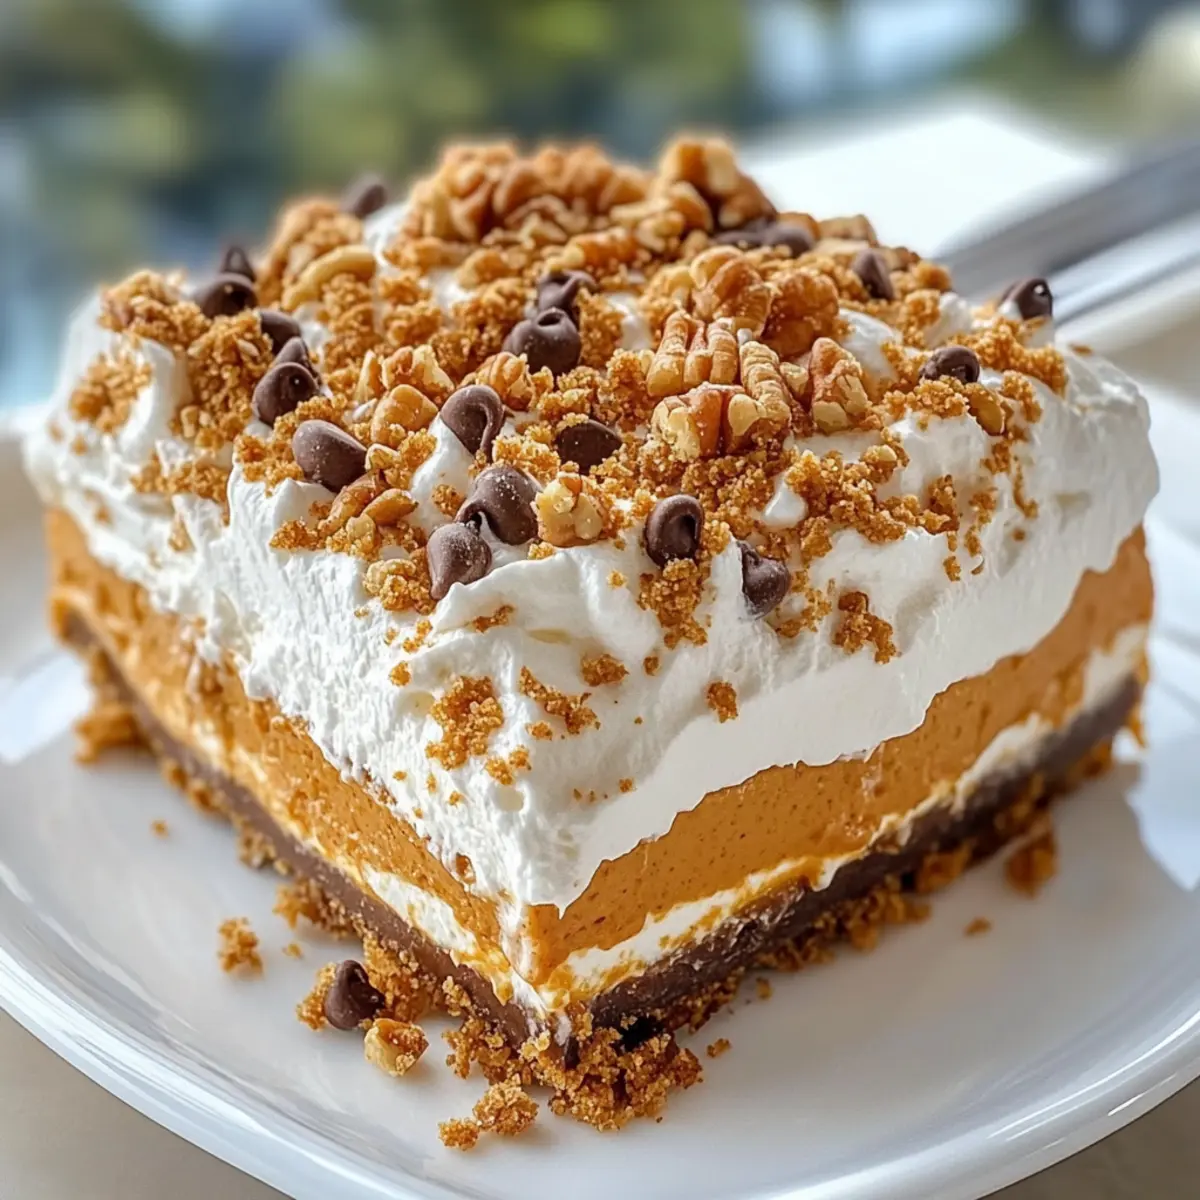
- Chopped Pecans – Provides crunch and nutty flavor, completing the dessert. Omit if nut-free; extra chocolate chips can replace them.
Step‑by‑Step Instructions for Pumpkin Lush
Step 1: Make the Crust
In a medium bowl, combine the graham cracker crumbs and melted unsalted butter, mixing until the mixture resembles wet sand. Press this mixture firmly into the bottom of a greased 9×13-inch pan to form a solid crust. Ensure it’s even and well-packed, then place it in the refrigerator for about 30 minutes to chill and set.
Step 2: Prepare the Cream Cheese Layer
While the crust sets, beat the softened cream cheese in a large mixing bowl with an electric mixer until creamy and smooth. Gradually blend in the powdered sugar until thoroughly combined. Gently fold in 1 cup of whipped topping until fluffy and no lumps remain. Carefully spread this mixture evenly over the chilled crust, smoothing it out to the edges with a spatula.
Step 3: Create the Pumpkin Layer
In a separate bowl, whisk together the pumpkin puree, vanilla pudding mix, cold milk, and pumpkin pie spice until the mixture thickens and is well blended, about 2 minutes. This pumpkin layer will provide that quintessential fall flavor. Carefully spread the pumpkin mixture over the cream cheese layer, ensuring it covers the surface evenly for a beautiful layer.
Step 4: Add the Topping
Top the pumpkin layer with the remaining whipped topping, using a spatula to spread it smoothly across the entire surface. Make sure to reach the edges to create a nice finish for your Pumpkin Lush. This fluffy layer balances the rich pumpkin filling delightfully and sets the stage for the toppings to come.
Step 5: Finish with Toppings
Sprinkle mini chocolate chips and chopped pecans over the whipped topping layer, distributing them evenly for a charming presentation. The chocolate and nutty crunch will add delightful texture to your Pumpkin Lush, enhancing the flavor experience with every bite.
Step 6: Chill and Serve
Refrigerate the completed Pumpkin Lush for at least 4 hours or ideally overnight, allowing the flavors to meld together and ensuring the dessert is well-chilled. This time will help the layers set beautifully. When ready to serve, cut into squares for a stunning display and enjoy this no-bake fall delight!
How to Store and Freeze Pumpkin Lush
Fridge: Keep Pumpkin Lush tightly covered in the refrigerator for up to 4 days. This will help maintain its creamy texture and delicious flavor.
Freezer: For longer storage, you can freeze Pumpkin Lush. Wrap it tightly in plastic wrap and then aluminum foil. It can be frozen for up to 2 months.
Thawing: To enjoy, transfer the frozen Pumpkin Lush to the fridge and let it thaw overnight before serving. This will ensure it retains its delightful layers and taste.
Reheating: There’s no need to reheat Pumpkin Lush—serve it chilled directly from the fridge for the best experience!
Expert Tips for No-Bake Pumpkin Lush
- Softened Cream Cheese: Ensure your cream cheese is fully softened for a smooth, luscious cream cheese layer. Cold cream cheese can lead to lumps in your Pumpkin Lush.
- Even Crust: Press the graham cracker mixture firmly and evenly into the pan to create a sturdy base. A well-packed crust will prevent crumbling when you cut into the dessert.
- Chill Time: Allow the Pumpkin Lush to chill for at least 4 hours, or overnight for the best results. This helps the flavors meld and the layers set perfectly.
- Sharp Knife: Use a sharp knife wiped clean between each cut for neat layers. This simple technique will help showcase those beautiful, distinct layers when serving.
- Personalize the Toppings: Feel free to get creative with toppings! Swap pecans for walnuts or drizzle caramel for an extra sweet touch that complements the pumpkin flavor.
What to Serve with No-Bake Pumpkin Lush
As you gather around the table this fall, complement your creamy dessert with sides that enhance its rich flavors and textures.
- Creamy Mashed Potatoes: Smooth, buttery potatoes create a comforting contrast to the Pumpkin Lush’s sweetness, making each bite feel cozy and indulgent.
- Roasted Brussels Sprouts: Seasoned and caramelized, these vegetables add a delightful crunch and a hint of earthiness that pairs beautifully with the dessert.
- Apple Cider Sangria: A fruity, refreshing beverage to balance the richness of your dessert, this sweet and tangy drink is perfect for festive gatherings.
- Spiced Pecan Pie: For those who can’t get enough of fall flavors, a slice of pecan pie brings the sweetness of pumpkin and nuts together in one delightful spread.
- Gingerbread Cookies: Soft, spiced cookies create a charming holiday atmosphere while echoing the warmth found in your Pumpkin Lush.
- Caramel Drizzle: A simple yet indulgent topping for your Pumpkin Lush that adds a sweet touch and enhances its fall appeal.
Each pairing enhances the festive spirit, allowing your dessert table to shine with autumnal cheer!
Make Ahead Options
These delightful Pumpkin Lush layers are perfect for meal prep and can be made ahead, saving time for your busy holiday schedule! You can prepare the crust and cream cheese layer up to 24 hours in advance; simply cover tightly with plastic wrap and refrigerate. For the pumpkin layer, mix it in advance and refrigerate it separately for up to 3 days (keeping it covered to prevent drying). When you’re ready to assemble, spread the pumpkin layer over the chilled cream cheese, top with whipped topping, and finish with mini chocolate chips and pecans. This way, you’ll have a luscious dessert that’s just as delicious when it’s time to serve!
Pumpkin Lush Variations & Substitutions
Feel free to explore these variations and make this delightful dessert your own!
- Nut-Free: Omit the chopped pecans and opt for extra mini chocolate chips to maintain the flavor and texture.
- Dairy-Free: Substitute cream cheese with a dairy-free cream cheese alternative and use coconut whipped topping for a vegan-friendly version.
- Spice It Up: Increase the pumpkin pie spice for a bolder flavor; a touch more cinnamon or nutmeg can elevate the autumn warmth.
- Chocolate Lovers’ Twist: Substitute mini chocolate chips with crushed Oreos for an added crunch and a playful chocolate surprise.
- Caramel Drizzle: Instead of chocolate chips, top with a drizzle of caramel for a luscious and richer flavor profile.
- Cinnamon Sugar Crust: Mix a tablespoon of cinnamon into the graham cracker crumb mixture for a spiced crust that complements the filling beautifully.
- Pumpkin Cheesecake Layer: Blend an additional layer of cheesecake filling made from cream cheese, sugar, and vanilla for a decadent touch that heightens indulgence.
- Fruit Topping: Add sliced bananas or diced apples on top for a fruity layer—this adds freshness that contrasts beautifully with the creamy layers.
Feel inspired to try something new! If you’re still in the mood for more pumpkin flavor, check out our Pumpkin Cheesecake Gingersnap or indulge in Pumpkin Pie Cheesecake for more seasonal delights.

Pumpkin Lush Recipe FAQs
How do I select the best pumpkin puree for my Pumpkin Lush?
Choose pure pumpkin puree, either canned or homemade. If using canned, ensure it’s not labeled as “pumpkin pie filling,” as that contains added sugars and spices. When making your own, roast a sugar pumpkin until soft, scoop it out, and blend until smooth for the freshest flavor.
What’s the best way to store Pumpkin Lush in the fridge?
Store your Pumpkin Lush tightly covered with plastic wrap or in an airtight container in the refrigerator for up to 4 days. This keeps it chilled and preserves the creamy texture, ensuring each slice remains delicious until you’re ready to enjoy it again!
Can I freeze Pumpkin Lush, and if so, how?
Absolutely! To freeze Pumpkin Lush, first cut it into individual squares for easier thawing. Wrap each piece tightly in plastic wrap and then in aluminum foil to prevent freezer burn. It can be frozen for up to 2 months. When ready to serve, simply transfer to the fridge and let thaw overnight—your dessert will taste as delightful as freshly made!
What should I do if my cream cheese layer has lumps?
If you end up with lumps in your cream cheese layer, don’t worry! This often happens if the cream cheese is too cold. To remedy this, you can pass the mixture through a fine-mesh sieve or beat it more vigorously for a few moments. If you notice the lumps while preparing, simply add a splash of milk and blend more until it’s creamy and smooth.
Is Pumpkin Lush safe for those with nut allergies?
Yes, Pumpkin Lush can be made nut-free! Simply omit the chopped pecans from the topping. You can add extra mini chocolate chips or even a sprinkle of toasted coconut to replace the texture without compromising on flavor. Always double-check labels for cross-contamination if you’re serving someone with severe nut allergies.
Can I make Pumpkin Lush a day in advance?
Very much so! In fact, making it a day ahead is a fantastic idea, as it allows the flavors to meld beautifully. Just be sure to cover it tightly to maintain freshness, and refrigerate until you’re ready to serve. Keeping it chilled will ensure that the layers set nicely, making for a delightful dessert presentation!
Indulge in No-Bake Pumpkin Lush: The Ultimate Fall Dessert
Ingredients
Equipment
Method
- In a medium bowl, combine the graham cracker crumbs and melted unsalted butter, mixing until the mixture resembles wet sand. Press this mixture firmly into the bottom of a greased 9x13-inch pan to form a solid crust. Ensure it's even and well-packed, then place it in the refrigerator for about 30 minutes to chill and set.
- While the crust sets, beat the softened cream cheese in a large mixing bowl with an electric mixer until creamy and smooth. Gradually blend in the powdered sugar until thoroughly combined. Gently fold in 1 cup of whipped topping until fluffy and no lumps remain. Carefully spread this mixture evenly over the chilled crust, smoothing it out to the edges with a spatula.
- In a separate bowl, whisk together the pumpkin puree, vanilla pudding mix, cold milk, and pumpkin pie spice until the mixture thickens and is well blended, about 2 minutes. Carefully spread the pumpkin mixture over the cream cheese layer, ensuring it covers the surface evenly.
- Top the pumpkin layer with the remaining whipped topping, using a spatula to spread it smoothly across the entire surface. Make sure to reach the edges for a nice finish.
- Sprinkle mini chocolate chips and chopped pecans over the whipped topping layer, distributing them evenly for a charming presentation.
- Refrigerate the completed Pumpkin Lush for at least 4 hours or ideally overnight, allowing the flavors to meld together and ensuring the dessert is well-chilled.
Leave a Reply