Amidst the bustling kitchen, a little excitement bubbled up as I concocted my latest culinary creation: Pea Bruschetta. While I favored classic appetizers, there was something irresistibly delightful about this modern twist on a favorite. Combining a creamy pea pesto with crispy ciabatta, this easy recipe is perfect for a light lunch or a charming date night, all while bringing spring’s freshness to your table. Plus, it’s a breeze to whip up, allowing you to enjoy more time with your loved ones and less time in the kitchen. Who wouldn’t want to indulge in a vibrant dish that’s sure to impress, all without breaking a sweat? Ready to bring a taste of modern Australian cuisine to your next gathering? Let’s dive into this delightful recipe together!
Why is Pea Bruschetta a Must-Try?
Vibrant Ingredients: This dish bursts with flavorful ingredients, showcasing the creamy richness of peas, balanced by zesty lemon and fragrant garlic.
Quick & Simple: Perfect for any home cook, the easy-to-follow steps mean you can prepare this dish in no time, making it ideal for unexpected guests.
Versatile Serving: Whether as an appetizer or light meal, Enjoy it on larger bruschetta or smaller crostini, adapting to any occasion effortlessly.
Healthy Delight: Packed with nutritional benefits like protein and fiber, it’s a guilt-free choice that doesn’t sacrifice taste.
Elevate Your Gatherings: Impress your friends with this modern twist on a classic that’s sure to please any crowd. This refreshing recipe is also a wonderful starter to pair with crisp white wine for a truly elevated experience! If you’re looking for more ideas, check out our Serving Suggestions.
Pea Bruschetta Ingredients
For the Pea Topping
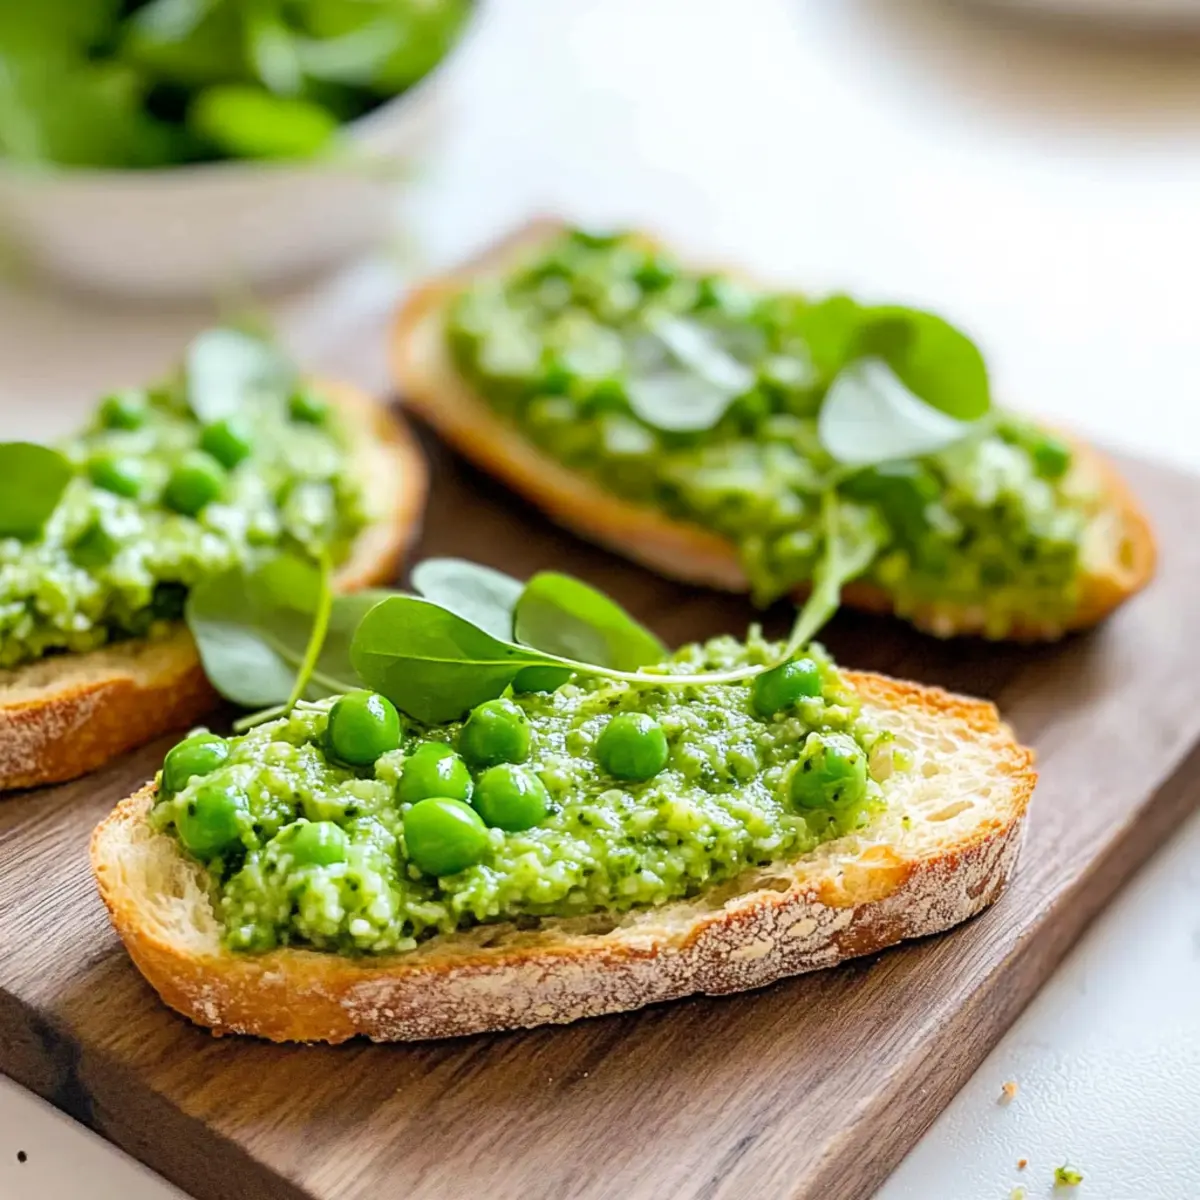
- Frozen Peas – Creamy texture and vibrant color; note: no cooking needed—just defrost!
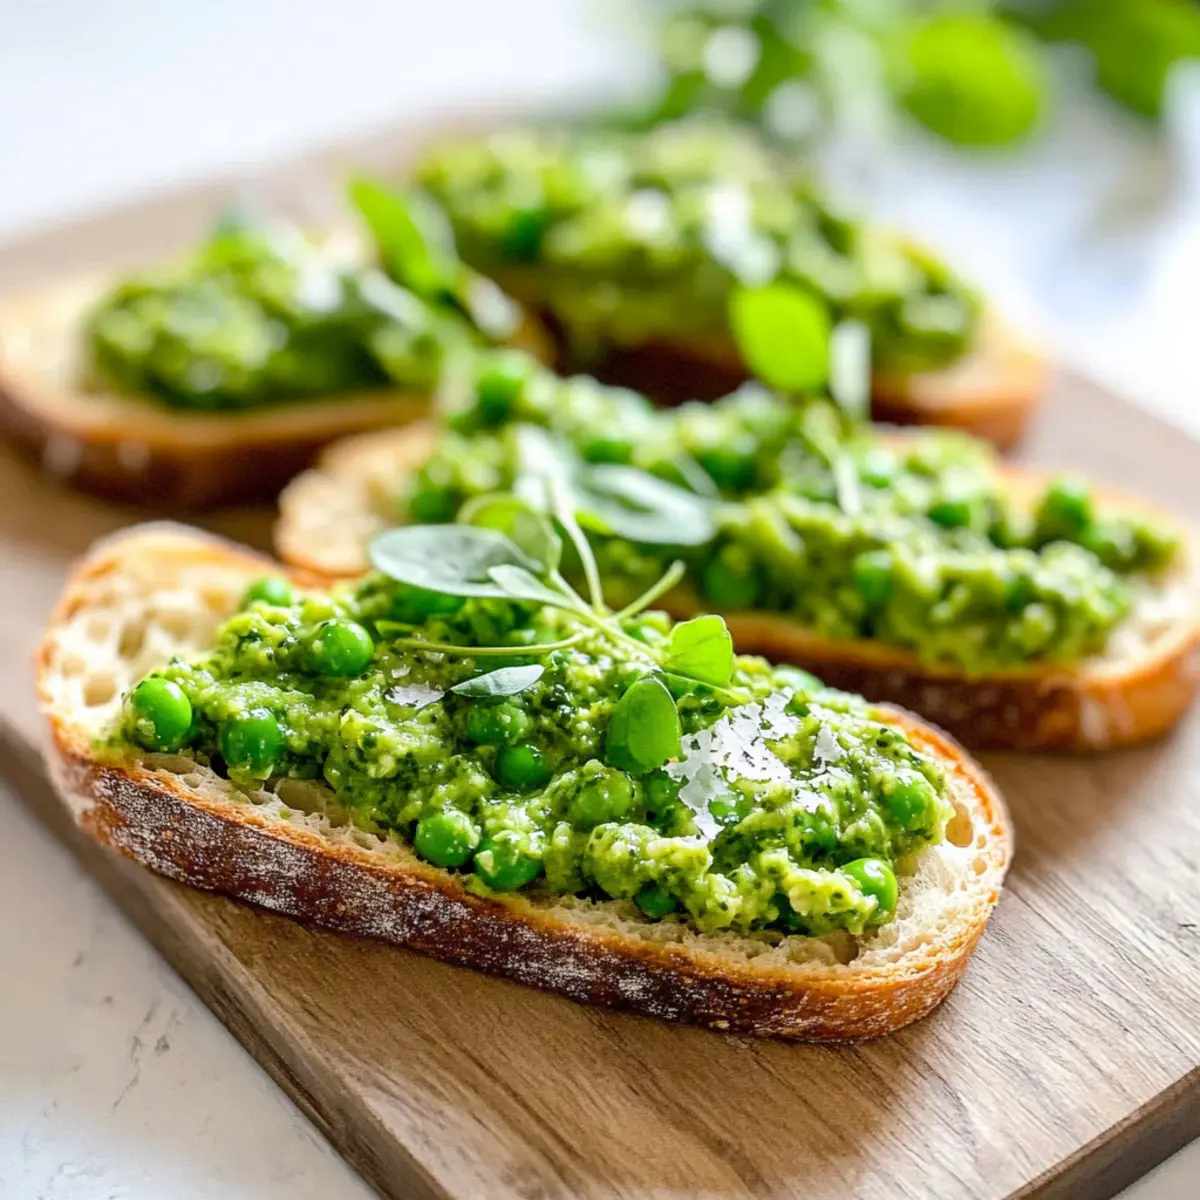
- Pea Shoots – Optional for added flavor and nutrition; can be omitted if unavailable.
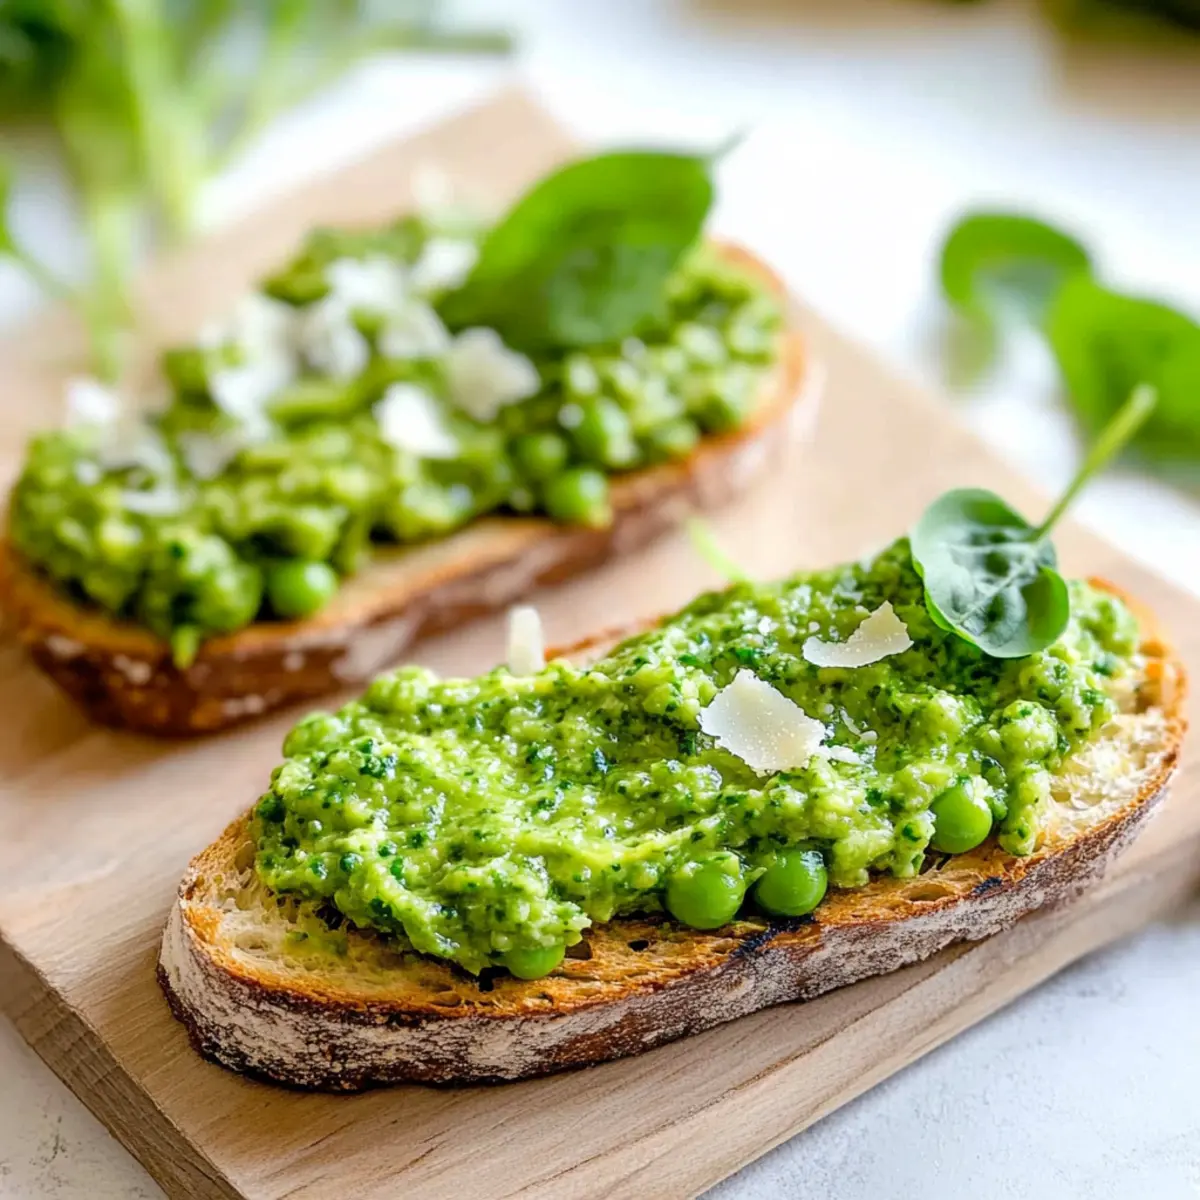
- Grated Parmesan Cheese – Adds richness and umami flavor; substitute with vegan cheese for a dairy-free version.
- Olive Oil – Essential for blending and flavor; opt for extra virgin for the best results.
- Lemon Juice – Provides acidity to balance richness; fresh lemon juice enhances flavor beautifully.
- Garlic – Enhances the overall flavor profile; rub on warm toast for a subtle garlic essence.
For the Bread
- Ciabatta Bread – Perfect base for bruschetta; feel free to substitute with any crusty bread like baguette.
- Black Pepper – For seasoning; adjust to taste, and avoid salt since Parmesan adds saltiness.
For Drizzling
- Extra Virgin Olive Oil – Drizzle over assembled bruschetta for added flavor and a beautiful finish.
Elevate your culinary adventures with this easy and delicious Pea Bruschetta!
Step‑by‑Step Instructions for Easy Pea Bruschetta with Homemade Pesto
Step 1: Make the Pea Topping
In a food processor, combine the thawed frozen peas, optional pea shoots, grated Parmesan cheese, extra virgin olive oil, fresh lemon juice, and a clove of garlic. Blend until smooth, scraping down the sides as needed. You want a creamy mixture with a vibrant green color. Once blended, set the pea topping aside to allow the flavors to meld while you prepare the bread.
Step 2: Prepare the Bruschetta
Preheat your broiler to high, ensuring it’s ready when you need it. While the broiler heats, slice the ciabatta bread into ½-inch thick slices. Drizzle each slice lightly with extra virgin olive oil. Place the slices on a baking sheet and broil for 2-3 minutes on each side, keeping a close eye to ensure they turn golden brown and crispy.
Step 3: Flavor the Toast
Once the ciabatta slices are nicely toasted, remove them from the oven and while they are still warm, gently rub one side of each slice with the cut garlic clove. This imparts a delightful garlic essence that enhances the overall flavor of the Easy Pea Bruschetta. Prepare for assembly by ensuring your bread is still warm and fragrant.
Step 4: Assemble the Bruschetta
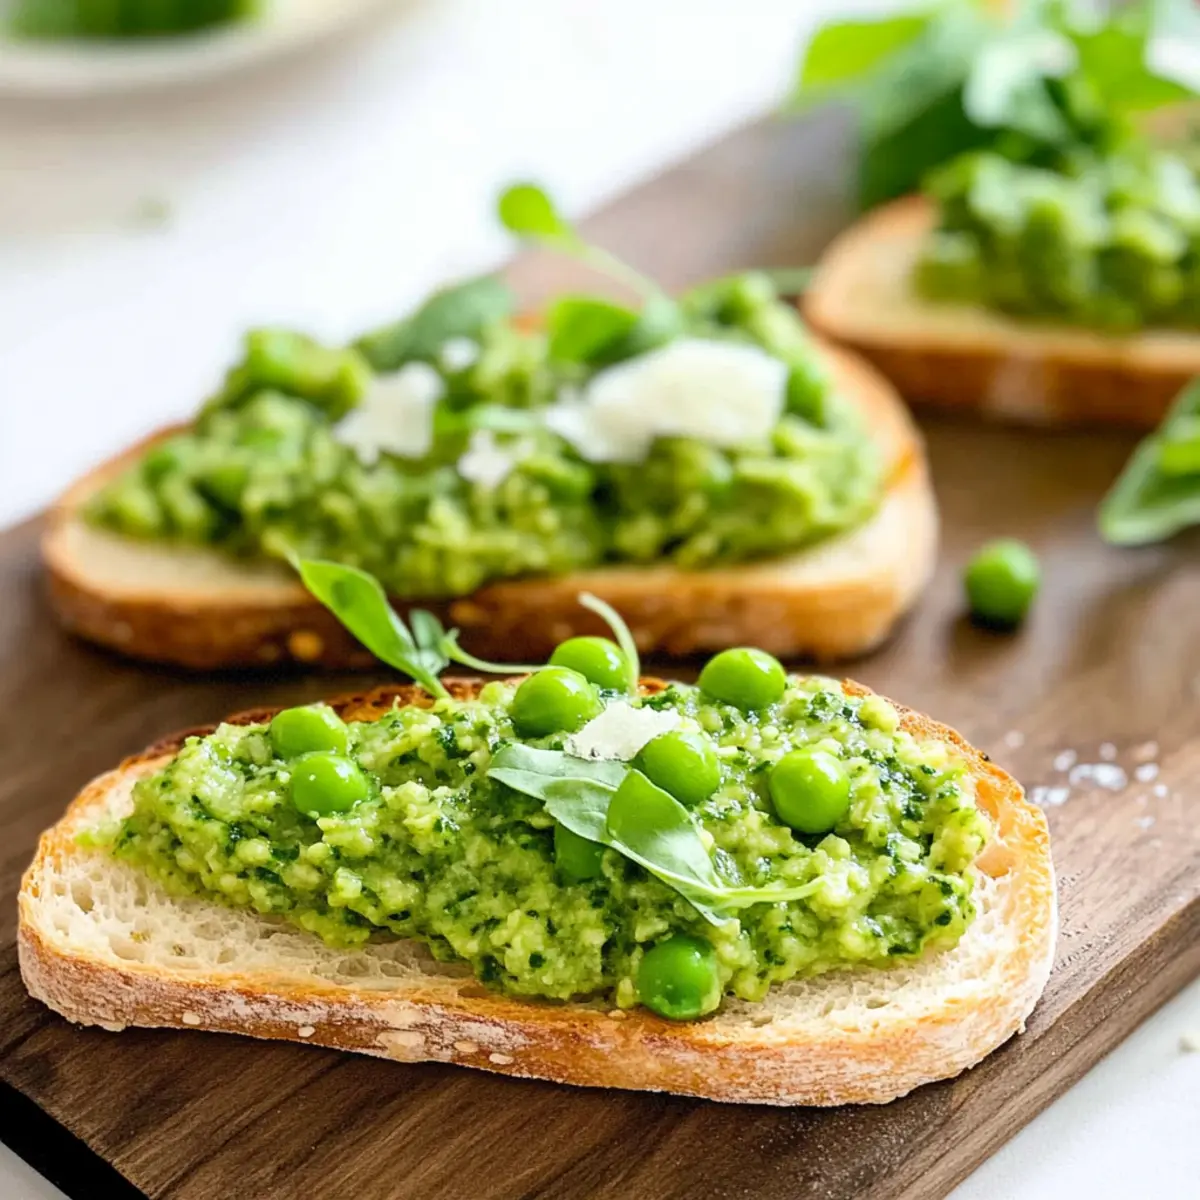
Spread a generous layer of the creamy pea topping on each warm slice of toasted ciabatta. Don’t be shy; you want each bite to be packed with flavor! After you’ve added the pea topping, garnish each piece with additional grated Parmesan, a sprinkle of lemon zest, and pea shoots if desired. Drizzle a little extra virgin olive oil over the top and finish with a crack of black pepper to elevate the presentation and taste.
How to Store and Freeze Pea Bruschetta
Fridge: Store assembled Pea Bruschetta in an airtight container for up to 2 hours to maintain toast crispiness before serving.
Pea Topping: The pea topping can be refrigerated in an airtight container for up to 3 days, allowing you to make it in advance for easy assembly later.
Freezer: If you need to store the pea topping longer, freeze it for up to 2 months. When ready to use, thaw in the fridge overnight before serving.
Reheating: For leftover toasted ciabatta, reheat briefly in the oven until crisp, as microwave reheating may make it soggy. Enjoy fresh flavors every time!
Expert Tips for Perfect Pea Bruschetta
-
Defrost Peas Thoroughly: Ensure frozen peas are fully thawed; this promotes a smooth and creamy pea paste for your bruschetta topping.
-
Toast with Care: Keep a close eye when broiling the ciabatta; cooking times may vary, and you want a perfect golden color without burning.
-
Enhance Garlic Flavor: For a milder garlic touch, consider rubbing the toasted bread lightly with the garlic clove instead of using minced garlic in the blend.
-
Assemble Just Before Serving: To maintain the crunchiness of the toasted ciabatta, assemble the Pea Bruschetta right before serving for the best texture.
-
Try Different Garnishes: Experiment with fresh herbs, like mint or basil, for a refreshing twist that elevates your Pea Bruschetta to new heights of flavor.
Make Ahead Options
These Pea Bruschetta are perfect for meal prep enthusiasts! You can make the creamy pea topping up to 3 days in advance by blending thawed peas, pea shoots, Parmesan, olive oil, lemon juice, and garlic, then refrigerating it in an airtight container. Additionally, you can toast the ciabatta slices a day ahead and store them in an airtight container at room temperature; just re-crisp them in the oven before assembly. When ready to serve, simply spread the pea topping on the toasted ciabatta and finish with garnishes like extra Parmesan, lemon zest, and a drizzle of olive oil. This ensures you’ll have delightful, fresh-tasting Pea Bruschetta ready in a snap, perfect for busy weeknights!
What to Serve with Easy Pea Bruschetta?
Elevate your gathering with delightful pairings that enhance the vibrant flavors of this refreshing appetizer.
-
Creamy Mashed Potatoes: These buttery potatoes create a mellow backdrop, balancing the zingy pea topping with their comforting texture.
-
Garlic Roasted Asparagus: Bright and tender spears complement this dish, echoing the garlic notes and adding an earthy touch to your meal.
-
Light Greek Salad: Crisp cucumbers and juicy tomatoes tossed in a tangy vinaigrette create a refreshing contrast, elevating the overall dining experience.
-
Chilled White Wine: A bottle of Sauvignon Blanc or a light Pinot Grigio complements the vibrant pesto, enhancing your celebration with crisp, fruity notes.
-
Zesty Lemon Sorbet: This palate-cleansing dessert rounds off the meal with a burst of citrus sweetness, harmonizing beautifully with the pea bruschetta.
-
Crusty Baguette: Offer another bread option for your guests to enjoy, allowing them to indulge in the creamy topping with a classic texture.
Imagine your family and friends delighting in these pairings, each offering a unique taste that enhances your pea bruschetta experience!
Pea Bruschetta Variations & Substitutions
Feel free to let your creativity shine as you personalize this delightful recipe to suit your tastes and dietary needs!
- Gluten-Free: Substitute ciabatta with gluten-free bread or rice crackers for a crispy base that’s safe for everyone.
- Dairy-Free: Use a plant-based cheese alternative, like cashew cheese, to keep the creamy richness without the dairy.
- Herb Infusion: Add fresh mint or basil to the pea topping for an aromatic boost that brightens the flavor profile.
- Crispy Topping: Consider adding a sprinkle of toasted pine nuts or chopped walnuts for a delightful crunch that complements the creamy peas perfectly.
- Zesty Kick: Incorporate a pinch of red pepper flakes into the pea topping for an easy heat adjustment that elevates each bite.
- Flavor Twist: Swap lemon juice for lime juice to introduce a lively twist while maintaining the refreshing zest that balances the dish.
- Cheesy Variation: Experiment with crumbled feta or soft goat cheese mixed into the pea topping for a tangy flavor explosion.
- Artful Assembly: Create a visually stunning platter with multi-colored heirloom tomatoes and microgreens, placing them alongside your Pea Bruschetta for an elegant touch that celebrates seasonal ingredients.
These variations not only help cater to different dietary preferences but also add a personal touch, ensuring every bite of your Pea Bruschetta is even more enjoyable. If you’re curious about perfect pairings and serving ideas, check out our Serving Suggestions.
Pea Bruschetta Recipe FAQs
What kind of peas should I use for the pea topping?
Absolutely! I recommend using frozen peas as they provide a creamy texture and vibrant color. Just ensure they are fully thawed before blending to get the smoothest consistency in your pea pesto.
How long can I store the pea topping?
You can keep the pea topping in the refrigerator for up to 3 days in an airtight container. It’s great for meal prep; just mix everything together and have it ready for bruschetta assembly whenever you like!
Can I freeze the pea topping for later use?
Yes, of course! To freeze the pea topping, place it in an airtight container or freezer bag, ensuring to remove as much air as possible. You can store it for up to 2 months. When you’re ready to use it, simply thaw it in the fridge overnight before serving.
How do I keep the ciabatta toast crispy before serving?
To maintain crispness, store the toasted ciabatta slices in a cool place, but I recommend assembling the bruschetta just before serving. This way, the bread stays crispy, and you avoid any sogginess from the pea topping.
Are there any dietary considerations for Pea Bruschetta?
Definitely! If you’re catering to dietary restrictions, you can substitute parmesan cheese with a vegan cheese for a dairy-free version. Also, always check the ingredients for any allergens like gluten in the bread. It’s also important to avoid salt since the parmesan adds enough saltiness already.
Can I serve Pea Bruschetta to pets?
While the ingredients used for Pea Bruschetta pose no direct harm to pets, I advise caution. For instance, garlic can be toxic to dogs in large amounts, so it’s best to keep your pet away from the finished dish. Always consult your veterinarian if you’re unsure about introducing new foods to your pet!
Fresh and Flavorful Pea Bruschetta for Your Next Gathering
Ingredients
Equipment
Method
- In a food processor, combine the thawed frozen peas, optional pea shoots, grated Parmesan cheese, extra virgin olive oil, fresh lemon juice, and a clove of garlic. Blend until smooth, scraping down the sides as needed.
- Preheat your broiler to high. While it heats, slice the ciabatta bread into ½-inch thick slices and drizzle each slice lightly with extra virgin olive oil.
- Broil the ciabatta slices for 2-3 minutes on each side until golden brown and crispy, keeping a close eye.
- Remove the toasted ciabatta from the oven and gently rub one side of each slice with the cut garlic clove.
- Spread a generous layer of the creamy pea topping on each warm slice of toasted ciabatta and garnish with additional grated Parmesan, sprinkle of lemon zest, and pea shoots if desired. Drizzle with extra virgin olive oil and finish with black pepper.
Leave a Reply