
As I stood in my kitchen, the summer heat swirling outside, I couldn’t shake the craving for something cool and satisfying. That’s when the idea struck me—homemade Cookies and Cream Ice Cream, and the best part? No machine needed! This delightful recipe brings together the classic flavors of chocolate sandwich cookies and creamy sweet goodness, all whipped up in just 10 minutes. The beauty of this easy dessert lies in its simplicity: it’s perfect for those hot days when you want a sweet treat without the hassle. Plus, it’s an absolute crowd-pleaser that will have everyone coming back for more. Are you ready to dive into the world of frozen indulgence right from your home? Let’s get started!

Why is This Ice Cream So Special?
Homemade Delight: This Cookies and Cream Ice Cream brings the joy of ice cream parlor treats right to your kitchen—without any gadgets needed!
Ultimate Crowd-Pleaser: It’s a universally loved flavor that’s sure to impress family and friends during summer gatherings or cozy nights in.
Quick and Easy: Ready in just 10 minutes, this recipe is perfect for those last-minute dessert cravings when you want something delicious without much fuss.
Versatile Options: Feel free to customize with your favorite cookies or even try adding in some crushed nuts for a unique twist!
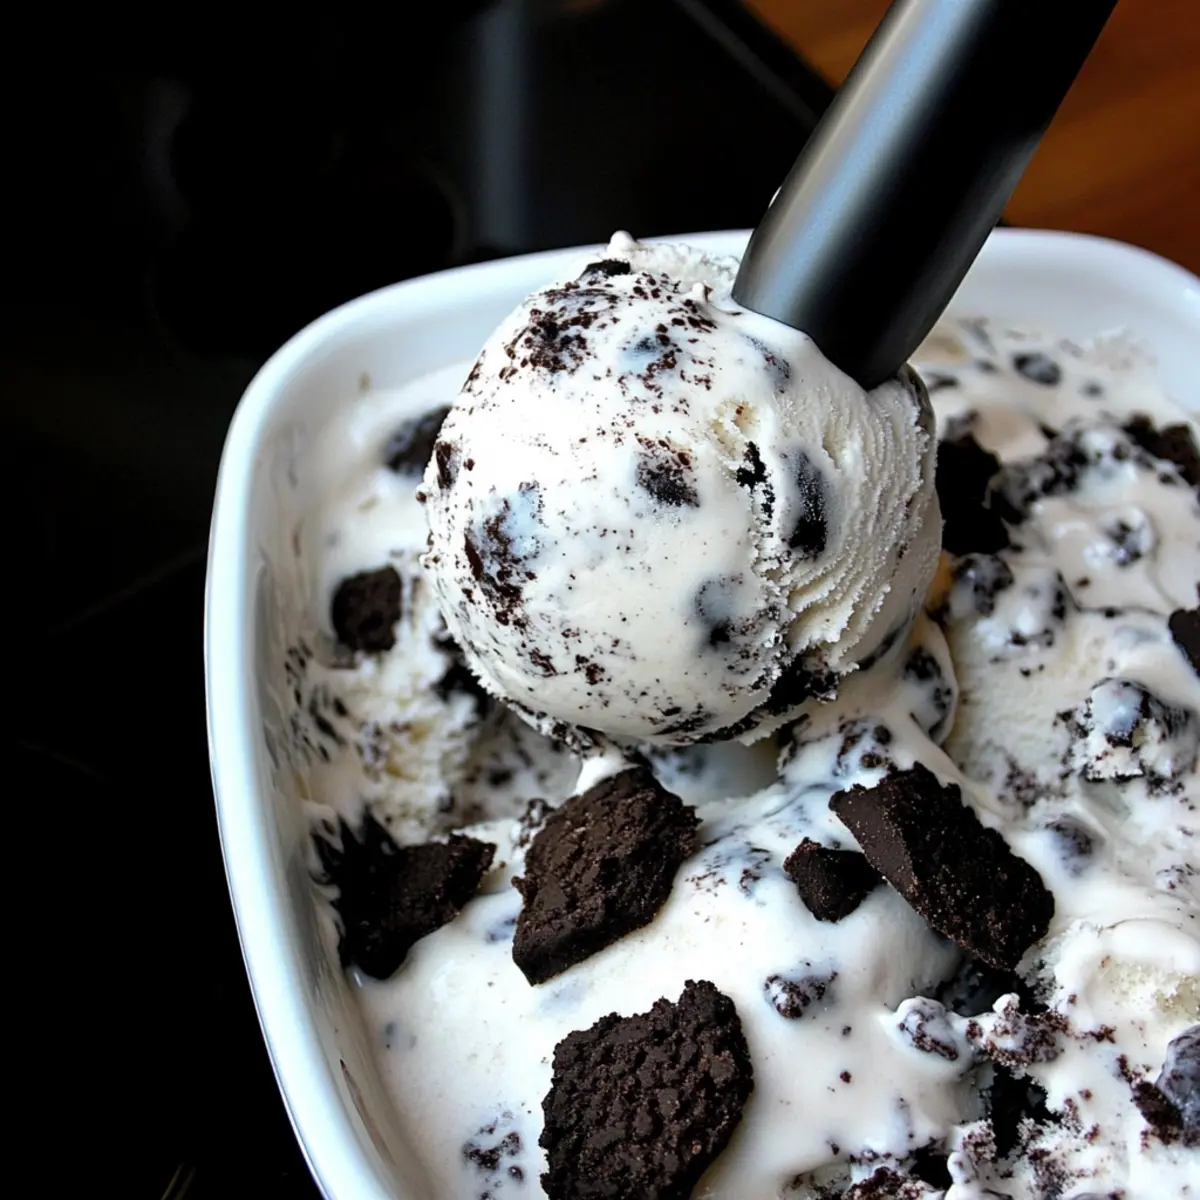
Creamy Texture: Each scoop features a rich, velvety consistency, punctuated by delightful cookie chunks that make every bite exciting.
Unleash your creativity in the kitchen by serving this ice cream with a drizzle of chocolate sauce, or, if you’re in the mood for an additional sweet treat, pair it with Butter Thumbprint Cookies for the ultimate dessert experience!
Cookies and Cream Ice Cream Ingredients
For the Ice Cream Base
- Heavy Cream – This provides a rich and creamy base; for a dairy-free version, substitute with coconut cream.
- Vanilla Extract – Adds warmth and depth to the flavor; almond extract can be used for an interesting twist.
- Sweetened Condensed Milk – Sweetens and thickens the mixture; coconut milk mixed with a sweetener works as a vegan alternative.
For the Cookie Mix-ins
- Chocolate Sandwich Cookies – The star flavor of this Cookies and Cream Ice Cream; coarsely chopped for texture.
- Chocolate Sandwich Cookies (Chopped for Topping) – These add a delightful crunch and visual appeal; feel free to use extra Oreos or similar cookies.
Step‑by‑Step Instructions for Cookies and Cream Ice Cream
Step 1: Mix Base
In a large mixing bowl, combine 2 cups of heavy cream with 1 tablespoon of vanilla extract. Using an electric mixer, whip the mixture on medium speed for about 3-5 minutes until soft peaks begin to form. You want the cream to look fluffy and light, signifying a good foundation for your homemade Cookies and Cream Ice Cream.
Step 2: Add Sweetened Condensed Milk
Gently fold in 14 ounces of sweetened condensed milk into the whipped cream mixture. Use a spatula and take care to incorporate the milk without deflating the whipped cream too much. This step adds sweetness and a luxurious creaminess, creating a smooth base for your cookies.
Step 3: Incorporate Cookies
Now, it’s time to add the fun! Fold in 30 coarsely chopped chocolate sandwich cookies into the creamy mixture. Use a gentle hand to ensure that the cookie pieces are evenly distributed throughout the ice cream, adding delightful texture and flavor to each scoop of your Cookies and Cream Ice Cream.
Step 4: Prepare to Freeze
Transfer the ice cream mixture into a loaf pan. Use a spatula to smooth the top, creating an even surface. This will ensure a beautiful presentation when you serve your ice cream later on! Make sure there are no air pockets to promote even freezing throughout the mixture.
Step 5: Add Toppings
Sprinkle 10-15 extra chopped chocolate sandwich cookies on top of the ice cream for a beautiful, crunchy finish. This final touch not only enhances the visual appeal but adds texture, making every bite of your Cookies and Cream Ice Cream even more delightful.
Step 6: Freeze
Cover your prepared loaf pan with plastic wrap or a lid and place it in the freezer. Let it chill for at least 6 hours or until firmly set. When it’s ready, the ice cream should be solid but scoopable, perfect for serving on a hot summer day.
Storage Tips for Cookies and Cream Ice Cream
Fridge: If you have leftovers, you can store the ice cream in the refrigerator for up to 30 minutes before it starts to lose its texture. However, it’s best enjoyed fresh from the freezer.
Freezer: For optimal freshness, keep the Cookies and Cream Ice Cream tightly covered in the freezer for up to 2 weeks. Wrapping the loaf pan in plastic wrap or foil helps prevent freezer burn.
Serving: To serve, allow the ice cream to sit at room temperature for 5-10 minutes for easier scooping. This makes every scoop a creamy delight!
Reheating: If you find the ice cream too hard, simply let it sit out for a few minutes before serving rather than microwaving it, which can affect the texture.
Expert Tips for Cookies and Cream Ice Cream
-
Chill Your Ingredients: Ensure your heavy cream is cold before whipping for maximum volume and a fluffy texture in your homemade Cookies and Cream Ice Cream.
-
Gentle Mixing: Avoid overmixing when folding in the cookies. This keeps the air in your ice cream, preventing it from becoming dense and ensuring a light consistency.
-
Room Temperature Scoop: Allow the ice cream to sit at room temperature for 5-10 minutes before scooping. This helps it soften slightly, making serving easier and more enjoyable.
-
Flavor Experimentation: Don’t hesitate to try different extracts or cookie flavors! Almond or peppermint extracts can create exciting variations of the classic Cookies and Cream Ice Cream.
-
Storage Tips: To maintain freshness, wrap the loaf pan tightly with plastic wrap or foil. Properly stored, it can remain tasty for up to 2 weeks in the freezer.
Cookies and Cream Ice Cream Variations
Get ready to elevate your homemade cookies and cream ice cream with these fun and delicious twists!
-
Dairy-Free: Substitute heavy cream with coconut cream for a delightful, creamy texture without dairy.
-
Minty Fresh: Swap vanilla extract for peppermint extract to create a refreshing mint cookies and cream version. Imagine each scoop transporting you to a cool winter night, even in summer!
-
Nutty Crunch: Add coarsely chopped nuts like almonds or walnuts for an exciting texture. This boost will create an added layer of flavor and crunch that complements the cookies perfectly!
-
Gluten-Free: Use gluten-free chocolate sandwich cookies to make this dessert accessible for everyone at your table, while maintaining that classic taste we all love.
-
Choco-Lovers Delight: For an extra chocolatey treat, mix in chocolate chips along with the cookies. Every bite becomes a rich chocolate paradise you won’t be able to resist!
-
Reese’s Twist: Add crushed peanut butter cups for a decadent twist that intertwines the flavors of cookies and cream with a nutty sweetness. It’s an indulgent delight waiting to be discovered!
-
Zesty Lemon: Introduce a touch of zesty lemon juice for an unexpected citrus zing. The brightness of the lemon complements the sweetness beautifully, making for a unique summer treat.
-
Caramel Swirl: Drizzle in some caramel sauce before freezing for a sweet, gooey delight that guests will rave about. Picture that luscious caramel mingling with the ice cream, creating sweet ribbons throughout!
As you can see, the possibilities are endless! For more inspiration, you might also enjoy pairing this ice cream with Holiday Antipasto Cream for the perfect snack platter or serve alongside Harvest Cookies for a delightful dessert duo!
Make Ahead Options
These delightful Cookies and Cream Ice Cream treats are perfect for meal prep enthusiasts! You can make the ice cream base up to 24 hours in advance, which saves you time on the day you want to serve it. Simply follow the initial steps of mixing the heavy cream, vanilla extract, and sweetened condensed milk, then fold in the chocolate sandwich cookies before transferring it into a loaf pan to freeze. To maintain its creamy texture, cover securely with plastic wrap or a lid and ensure it’s chilled well. When you’re ready to serve, just pull it from the freezer, add the topping cookies for that delightful crunch, and scoop! Your homemade ice cream will taste just as delicious as if it were made fresh that day!
What to Serve with No Machine Cookies and Cream Ice Cream?
Delight in a sweet symphony of flavors and textures that perfectly complement your creamy, dreamy treat.
- Warm Brownies: The fudgy, gooey texture of warm brownies pairs wonderfully with the cold, creamy ice cream, creating a decadent contrast.
- Chocolate Sauce: Drizzling rich, velvety chocolate sauce over your ice cream elevates each scoop, adding an extra layer of indulgence.
- Fresh Berries: Juicy strawberries or raspberries provide a burst of freshness, cutting through the richness with a delightful tartness.
- Peanut Butter Cookies: The nutty flavor and chewy texture of peanut butter cookies enhance your ice cream experience, offering a tasty twist of flavor.
- Whipped Cream: Light and airy, whipped cream adds a classic touch and enhances the creaminess of your Cookies and Cream Ice Cream.
- Homemade Waffle Cones: Crisp, warm waffle cones serve as a delightful vessel, enhancing the texture and experience of your frozen treat.
- Mint Chocolate Chip Cookies: The cool mint flavor and chewy cookie contrast beautifully with the creamy ice cream, making for a wonderful flavor pairing.
- Milk Shakes: A rich, chocolate milkshake complements the flavors of your ice cream while providing a fun, nostalgic drink option.

Cookies and Cream Ice Cream Recipe FAQs
What type of heavy cream should I use for this recipe?
Absolutely use heavy cream with at least 36% fat content for the best results. This will provide you with a rich and creamy texture. If you’re looking for a dairy-free option, coconut cream is a fantastic substitute that still gives you that delightful creaminess!
How should I store Cookies and Cream Ice Cream?
To keep your Cookies and Cream Ice Cream fresh, store it tightly covered in the freezer for up to 2 weeks. Wrapping the loaf pan in plastic wrap or aluminum foil will help prevent freezer burn while maintaining that delightful texture.
Can I freeze leftover Cookies and Cream Ice Cream?
Yes, you can freeze your leftover ice cream! Just ensure it is kept covered to avoid freezer burn. It should easily remain delicious for about 2 weeks. Before serving, let it sit out for about 5-10 minutes to soften slightly, making scooping easier.
What if I run into issues with the texture?
If your ice cream is too soft after freezing, it may not have set long enough—try freezing it for an additional hour or two. On the other hand, if it’s too hard, simply let it sit at room temperature for 5-10 minutes before scooping to bring back that creamy consistency.
What are some alternative ingredients I can use?
You can always swap out ingredients based on your preferences or needs! For example, using unsweetened coconut milk and a sweetener will create a vegan version. Additionally, feel free to use gluten-free chocolate sandwich cookies if you’re catering to dietary restrictions.
Is this ice cream safe for pets or those with allergies?
Caution is key! While the ingredients are safe for most humans, the mixture contains dairy and sugars that can be harmful to pets, especially dogs. If you’re making this for someone with allergies, always confirm their dietary restrictions regarding heavy cream and sweetened condensed milk.

Easy No Machine Cookies and Cream Ice Cream You’ll Love
Ingredients
Equipment
Method
- In a large mixing bowl, combine 2 cups of heavy cream with 1 tablespoon of vanilla extract. Whip on medium speed for 3-5 minutes until soft peaks form.
- Gently fold in 14 ounces of sweetened condensed milk into the whipped cream mixture.
- Fold in 30 coarsely chopped chocolate sandwich cookies into the mixture.
- Transfer the ice cream mixture into a loaf pan and smooth the top.
- Sprinkle 10-15 extra chopped chocolate sandwich cookies on top of the ice cream.
- Cover and freeze for at least 6 hours or until firm.
Leave a Reply