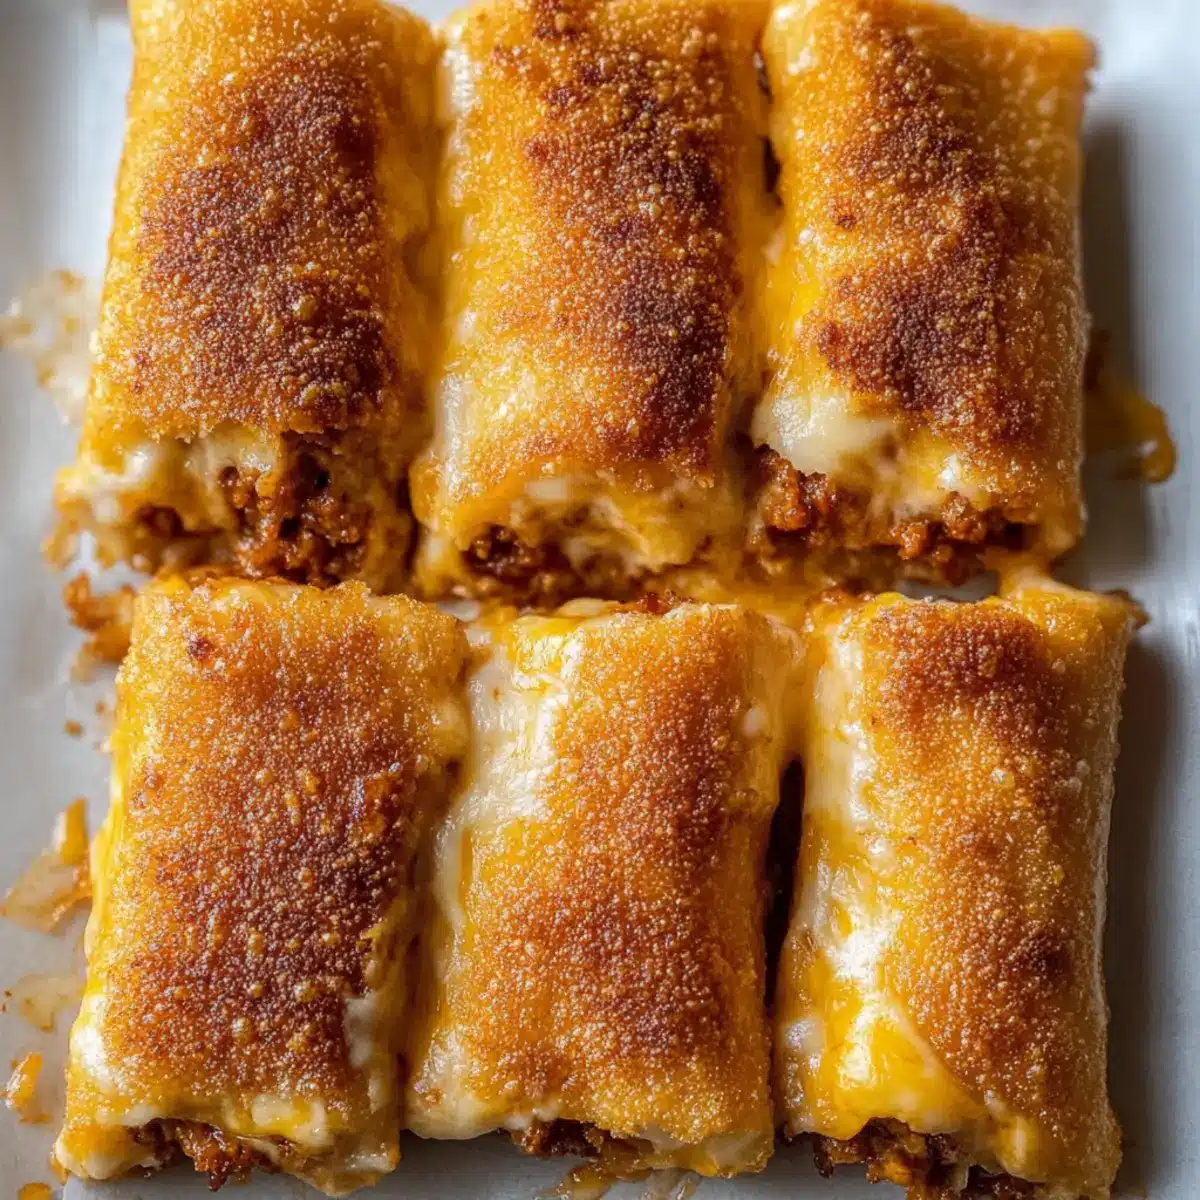
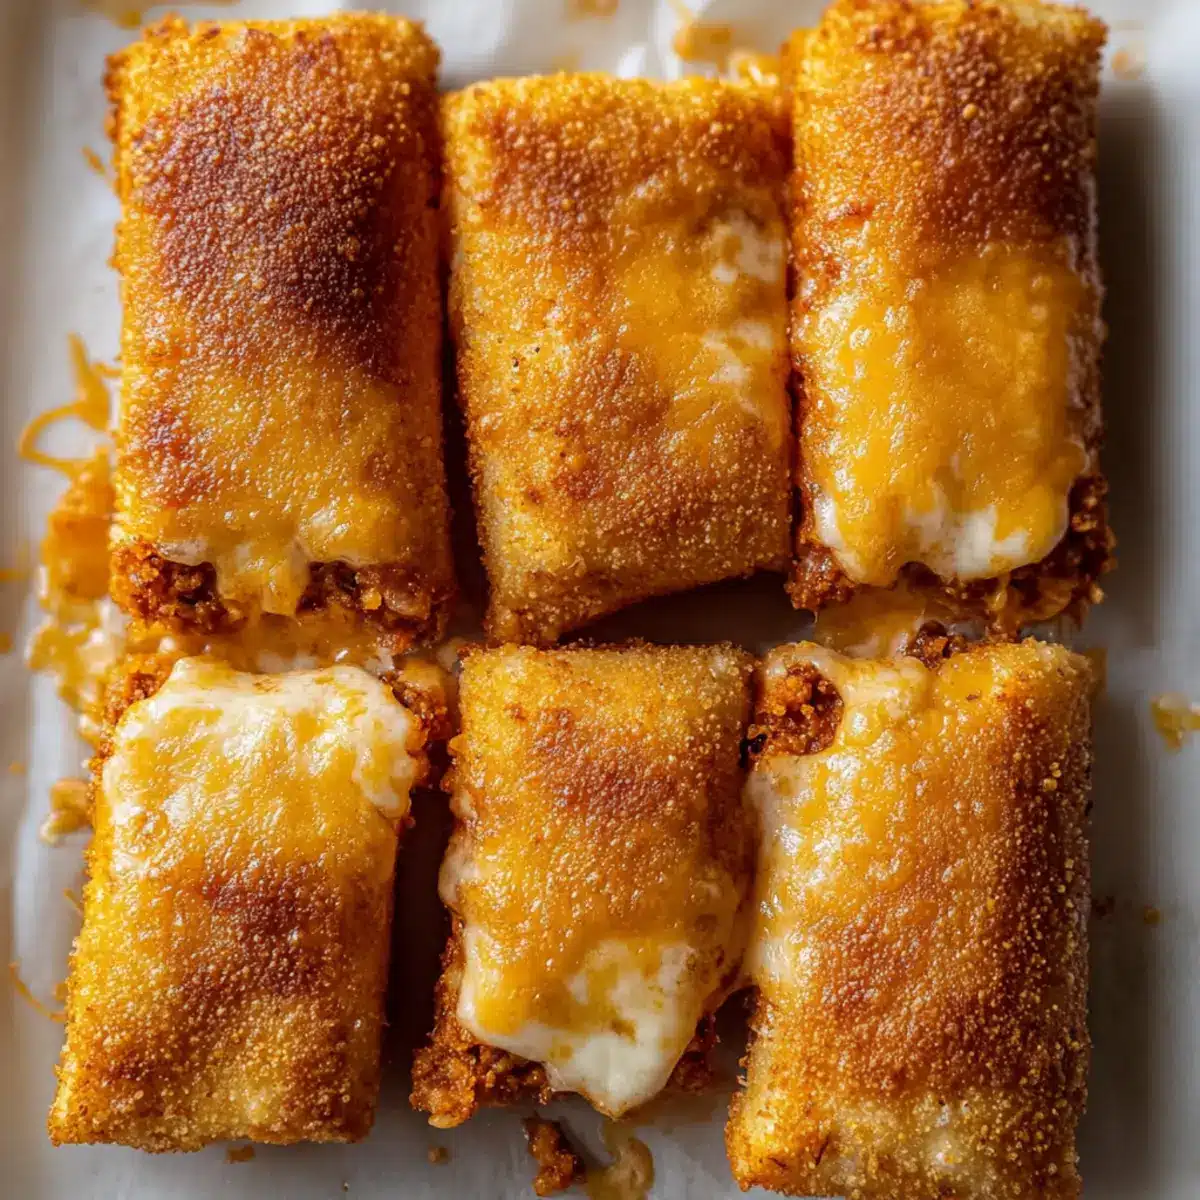
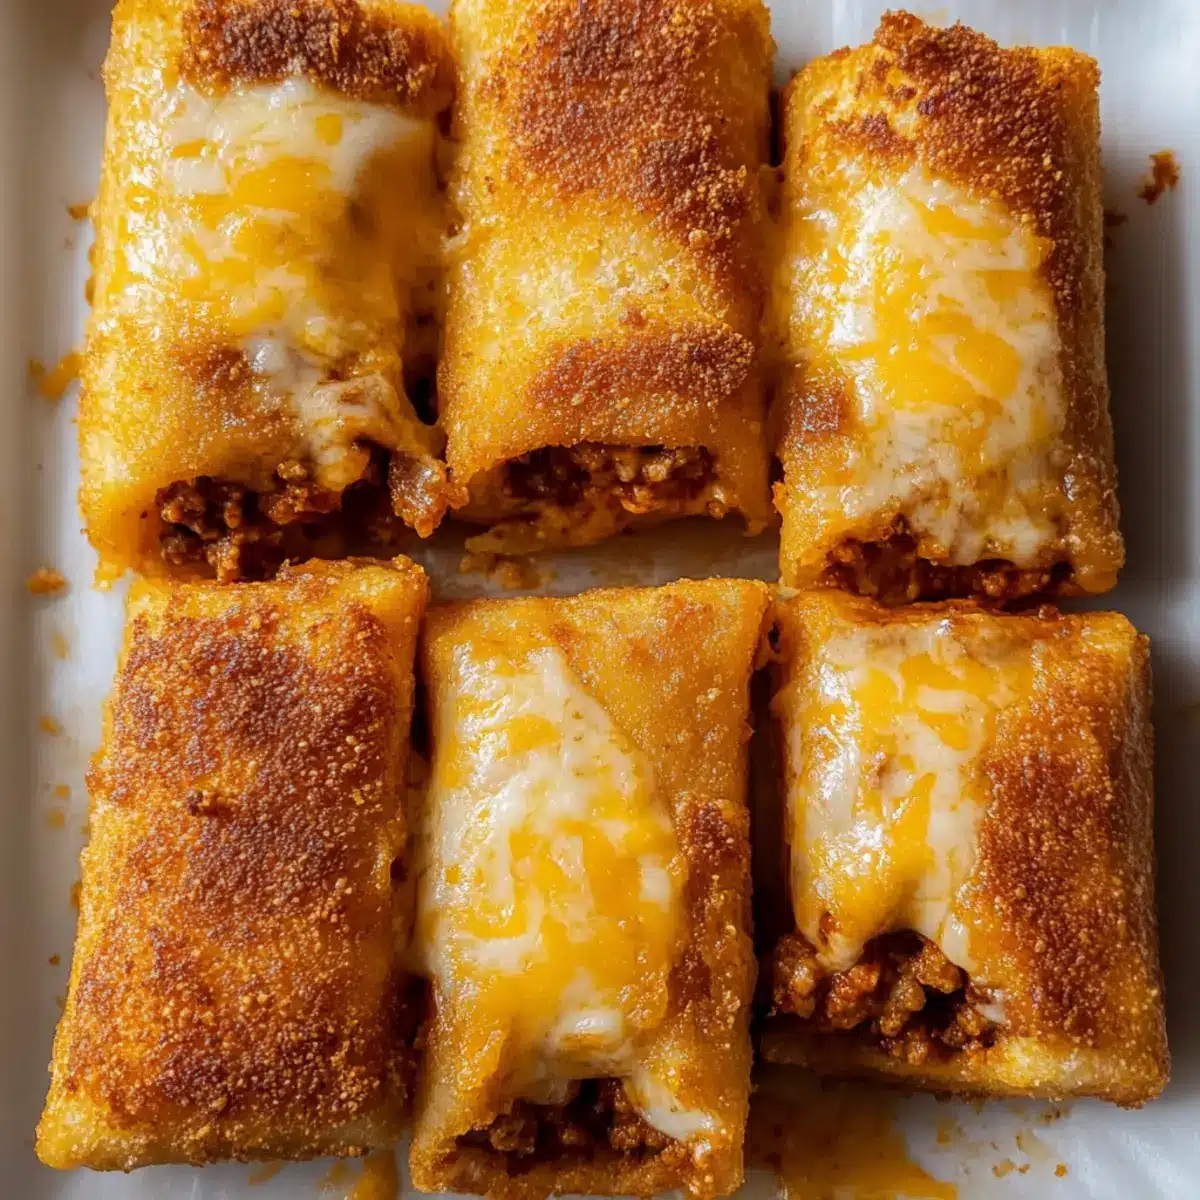
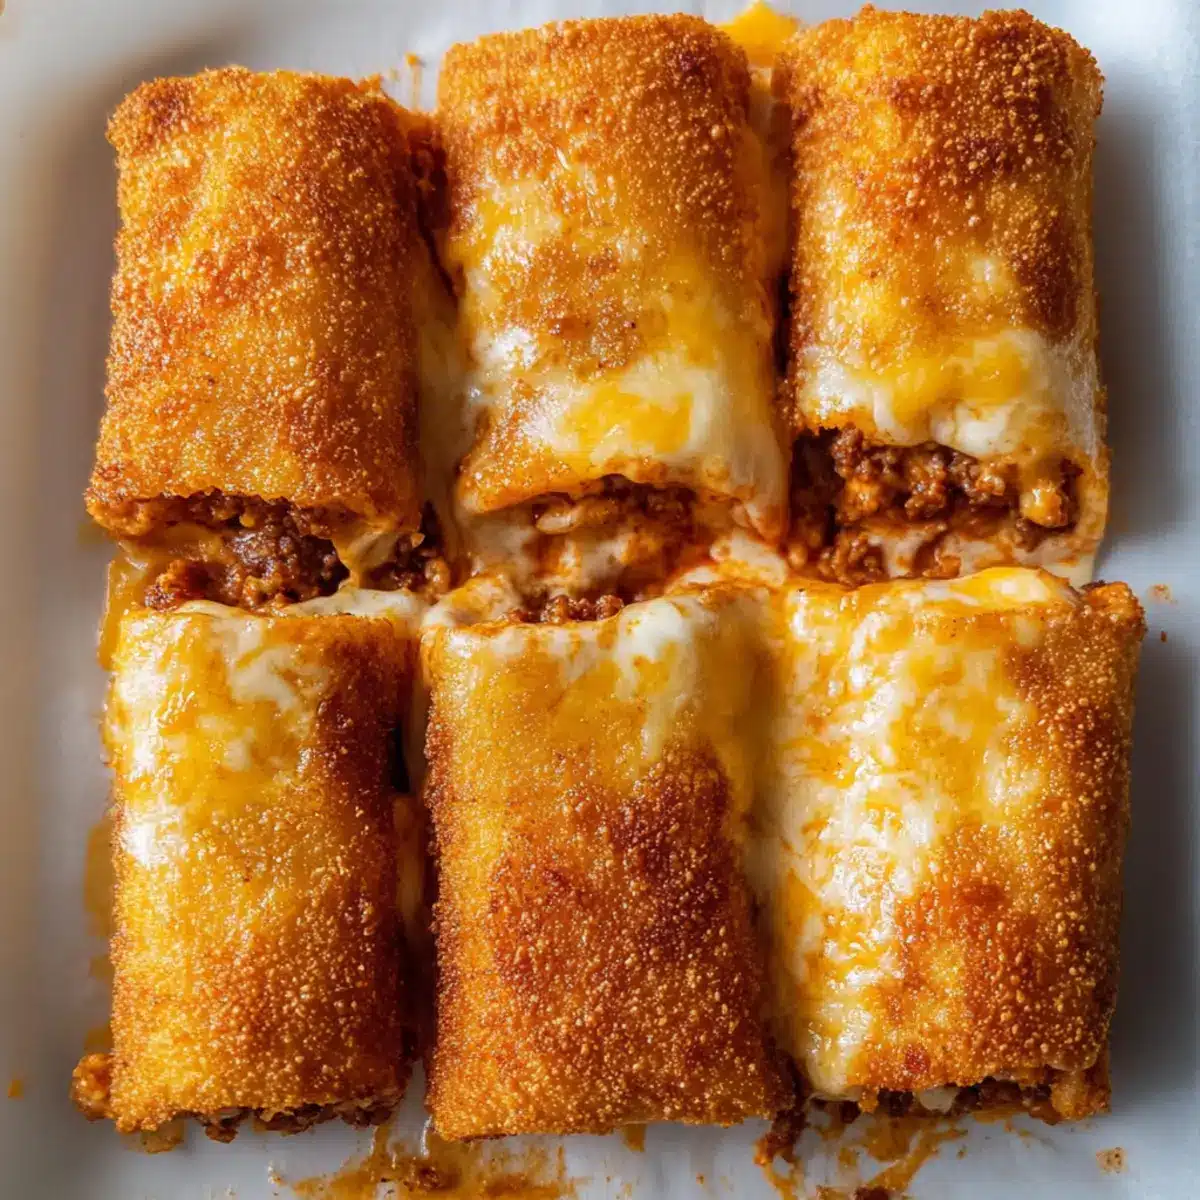
“Dinner’s on the table!” my friend exclaimed, waving her phone with a photo of homemade Cheesy Taco Sticks. Instantly, I felt that familiar pang of inspiration; it was taco night reimagined. Who wouldn’t love these delightful handheld treats packed with seasoned beef, gooey cheese, and warm dough? Not only do they reintroduce a comforting twist to your weekly meals, but they also make for a fun, customizable dish that’s perfect for family gatherings or busy weeknights. And the best part? They’re baked, not fried, offering a healthier alternative without sacrificing flavor. With endless variations—think spicy, vegetarian, or even breakfast-centric versions—everyone can find their ideal taco stick. Are you ready to elevate your taco game? Let’s dive into the recipe!
Why Are Cheesy Taco Sticks Amazing?
Irresistible Flavor: These Cheesy Taco Sticks pack a punch with seasoned beef and melty cheese, creating a delicious bite every time. Customizable Options: Whether you’re craving a spicy kick or need a vegetarian alternative, there’s a variation for everyone, including a delightful breakfast version! Easy Preparation: This recipe is quick to make, perfect for busy weeknights or last-minute gatherings, ensuring you spend less time in the kitchen and more time enjoying. Kid-Friendly Fun: Watch as these delightful sticks win over even the pickiest eaters. Serve them with dips like salsa or guacamole for an extra touch! Check out our Smashburger Quesadillas Cheesy for another crowd-pleasing option!
Cheesy Taco Sticks Ingredients
• Elevate your taco night with these delightful Cheesy Taco Sticks!
For the Filling
• Ground Beef – The main protein source; use lean ground beef for less greasiness. Substitution: Ground turkey or chicken can lighten the dish.
• Taco Seasoning – Adds a burst of flavor; homemade seasoning allows you to control the spice levels.
• Cream Cheese (optional) – This rich addition helps bind the filling together, making it extra creamy.
For the Dough
• Refrigerated Pizza Dough or Crescent Dough – Forms the outer layer; pizza dough offers a firmer texture, while crescent dough gives it a softer bite.
For the Cheese
• Shredded Cheese – The star component that delivers that ooey-gooey texture; opt for Cheddar, Mexican blend, or Monterey Jack for great flavor. Mozzarella can be added for extra stretch.
For the Egg Wash
• Egg – A simple beaten egg creates a golden, glossy finish when brushed on the dough before baking.
For Toppings
• Optional Toppings – Add some flair with sesame seeds, everything bagel seasoning, or a sprinkle of extra taco seasoning to elevate the flavor even more.
Step‑by‑Step Instructions for Cheesy Taco Sticks
Step 1: Preheat and Prepare
Preheat your oven to 375°F (190°C) and line a baking sheet with parchment paper. This initial preparation helps ensure even baking for your Cheesy Taco Sticks. While the oven heats, gather all your ingredients and equipment, including a large skillet for cooking the filling.
Step 2: Cook the Filling
In a large skillet over medium heat, add a drizzle of olive oil and heat until shimmering. Sauté a diced onion until softened, about 3-4 minutes, then add minced garlic for an additional minute until fragrant. Next, add the lean ground beef, breaking it apart as it browns; cook until there is no pink remaining, making a flavorful filling.
Step 3: Season and Combine
Once the beef is cooked through, drain any excess fat from the skillet. Stir in your taco seasoning along with a splash of water, simmering for 2-3 minutes until thickened. Remove the skillet from heat, then mix in the shredded cheese until melted and creamy. This cheesy filling is the heart of your Cheesy Taco Sticks!
Step 4: Prepare Dough
Roll out your refrigerated pizza dough on a lightly floured surface into a rectangle about 1/4-inch thick. Use a sharp knife or pizza cutter to slice the dough into strips, approximately 2 inches wide. This will serve as the delicious outer layer that encases the flavorful filling of your Cheesy Taco Sticks.
Step 5: Assemble
Take a strip of dough and place a generous spoonful of the taco mixture at one end. Fold the dough over the filling, pinching the seams tightly to seal. Repeat this process with each strip of dough until all of the filling is enclosed. Ensure each Cheesy Taco Stick is well sealed to prevent any cheesy goodness from leaking.
Step 6: Bake
Transfer the assembled taco sticks to your prepared baking sheet, leaving space between each stick. Brush the tops with a mixture of melted butter, garlic powder, and parsley for added flavor and a beautiful sheen. Bake in your preheated oven for 12-15 minutes or until the dough is golden brown and flaky, filling your kitchen with mouthwatering aromas.
Step 7: Cool and Serve
Remove the Cheesy Taco Sticks from the oven and allow them to cool slightly on the baking sheet for about 5 minutes. This cooling time makes them easier to handle. Serve warm with your choice of dips like salsa or sour cream for a delightful snack or meal that will please everyone.
How to Store and Freeze Cheesy Taco Sticks
Fridge: Store baked Cheesy Taco Sticks in an airtight container for up to 3 days. Reheat in the oven to restore that crispy exterior.
Freezer: For longer storage, freeze unbaked Cheesy Taco Sticks on a parchment-lined baking sheet until firm, then transfer to a freezer bag. They’ll keep well for up to 3 months.
Reheating: Reheat cooked Taco Sticks in the oven or air fryer at 350°F (175°C) for 8-10 minutes until warmed through and crispy.
Make-Ahead: Assembled sticks can be refrigerated before baking for a quick, fresh meal. Simply bake when you’re ready to enjoy!
Make Ahead Options
These Cheesy Taco Sticks are a fantastic option for meal prep, saving you time on busy weeknights! You can prepare the filling by cooking the ground beef and mixing it with the cheese and taco seasoning up to 3 days in advance. Simply refrigerate the filling in an airtight container. You can also assemble the sticks and refrigerate them for up to 24 hours before baking; this keeps the stuffed dough fresh and ready to cook. When you’re ready to enjoy them, bake directly from the fridge—just add a few extra minutes to the baking time for best results. By prepping ahead, you’ll have a delicious meal with minimal effort on your busy evening!
Cheesy Taco Sticks Variations & Substitutions
Feel free to explore these delightful variations to make your Cheesy Taco Sticks even more exciting and suited to your preferences!
-
Spicy Kick: Add diced jalapeños or a splash of your favorite hot sauce to the filling for a fiery twist. Your tastebuds will thank you for that extra heat!
-
Chicken Delight: Swap ground beef for shredded or ground chicken, offering a lighter yet equally flavorful option. This change keeps the heartiness while making it a bit healthier.
-
Vegetarian Version: Substitute seasoned black beans or lentils for the meat to create a veggie-packed delight. Even meat-lovers won’t miss the beef with this delicious swap!
-
Breakfast Taco Sticks: Fill your sticks with scrambled eggs and breakfast sausage or crispy bacon for a fun morning treat. Breakfast has never been so convenient or delicious!
-
Mini Taco Bites: Cut the dough into smaller pieces for cute, bite-sized snacks perfect for parties or kids. These can be fully customizable for a variety of tasty fillings.
-
Cheesy Blend: Mix in cream cheese with your shredded cheese for an extra creamy filling. The combination gives a rich texture that will melt in your mouth.
-
Low-Carb Twist: Use low-carb or keto-friendly dough alternatives like cauliflower dough to cater to specific dietary needs while enjoying the same great flavors.
Feeling inspired? If you’re looking for more delicious ideas, don’t miss our Pot Cheesy Taco and another fun take with Smashburger Quesadillas Cheesy for your next family meal!
Expert Tips for Cheesy Taco Sticks
-
Lean Meat Choice: Use lean ground beef to keep your filling from becoming greasy. Ground turkey or chicken are great alternatives for a lighter option.
-
Prevent Cheese Leaks: Make sure your cheese mixture isn’t too runny to avoid any leaks during baking. Allow it to cool slightly before using it.
-
Customize Fillings: Feel free to experiment with different fillings like black beans for a vegetarian option or diced jalapeños for a spicy punch in your Cheesy Taco Sticks.
-
Seal Well: Pinch the seams of your dough tightly during assembly to ensure that no cheesy goodness escapes while baking, resulting in perfectly filled taco sticks.
-
Prep Ahead: Consider preparing the assembled sticks in advance and refrigerating them. Bake fresh when you’re ready to serve for optimum flavor and texture.
What to Serve with Cheesy Taco Sticks
Dive into a delicious meal experience with perfectly paired sides that complement each scrumptious bite.
-
Creamy Guacamole: A rich and creamy dip that adds a refreshing kick, enhancing the flavors of the cheesy filling.
-
Zesty Salsa: Fresh, tangy salsa brightens the taste with vibrant tomatoes and spices, offering a delightful contrast to the cheesy sticks.
-
Crisp Garden Salad: A mixed green salad with a light vinaigrette provides freshness and crunch, balancing the comforting warmth of taco sticks beautifully.
-
Spicy Mexican Rice: Fluffy rice with a hint of heat melds flavors together, creating a satisfying fusion that enriches your taco night.
-
Roasted Veggies: A medley of roasted bell peppers and zucchini brings vibrant colors and earthy flavors, making for a wholesome complement.
-
Cold Beverages: Serve with chilled hibiscus iced tea or a classic margarita for refreshing pairings that tie the meal together with a festive touch.
-
Chocolate Chip Cookies: For dessert, these warm, gooey cookies offer a sweet finish that everyone will love after the savoriness of the taco sticks.
Each of these pairings elevates your meal, creating an unforgettable dining experience where flavor and fun come together!
Cheesy Taco Sticks Recipe FAQs
How do I choose the right ingredients for Cheesy Taco Sticks?
Absolutely! For the best results, opt for lean ground beef to prevent greasiness. If you’re looking for alternatives, ground turkey or chicken works wonderfully as lighter options. When selecting cheese, consider a blend of Cheddar, Monterey Jack, and mozzarella for that gooey texture. For the dough, both refrigerated pizza dough and crescent dough are great choices—pizza dough provides a chewier bite, while crescent dough gives a softer finish.
How should I store leftover Cheesy Taco Sticks?
Very good question! Baked Cheesy Taco Sticks can be stored in an airtight container in the fridge for up to 3 days. To reheat, I recommend placing them in the oven at 350°F (175°C) for about 8-10 minutes, allowing that crispy exterior to come back to life. If they have gotten a bit soft, using an air fryer helps to restore their texture beautifully.
Can I freeze Cheesy Taco Sticks?
Absolutely! Freezing is simple. Before baking, arrange the assembled Cheesy Taco Sticks on a parchment-lined baking sheet and place them in the freezer until firm. Once firm, transfer them to a freezer-safe bag and store them for up to 3 months. When you’re ready to cook them, bake from frozen, adding an extra few minutes to the cooking time for that perfect golden brown finish.
What if my filling is too runny when making Cheesy Taco Sticks?
If you notice your filling is too runny, don’t worry! You can thicken it up by simmering it on low heat for a few more minutes until excess moisture evaporates. Additionally, allowing the filling to cool slightly before assembling your taco sticks can help prevent any runniness during baking. Ensuring the cheese is well combined and melted with the beef will also contribute to a thicker consistency.
Are Cheesy Taco Sticks a healthy option?
Definitely! You can make Cheesy Taco Sticks healthier by choosing lean meats and incorporating more veggies. For a low-carb or keto version, swap out the dough with alternatives like cauliflower crust or keto-friendly wraps. You can also incorporate black beans or lentils for a nutritious vegetarian option, making them not just kid-friendly, but suitable for various dietary needs.
Can Cheesy Taco Sticks be made ahead of time?
Yes, they can! You can prepare the assembled Cheesy Taco Sticks ahead of time and refrigerate them for up to 24 hours before baking. Just be sure to cover them tightly with plastic wrap to prevent drying out. When you’re ready to bake, simply place them in the oven as directed, and enjoy freshly baked deliciousness straight from the oven!
Cheesy Taco Sticks: The Ultimate Comfort Food You'll Love
Ingredients
Equipment
Method
- Preheat your oven to 375°F (190°C) and line a baking sheet with parchment paper.
- Gather all your ingredients and equipment, including a large skillet for cooking the filling.
- In a large skillet over medium heat, add olive oil and sauté a diced onion until softened, about 3-4 minutes.
- Add minced garlic for an additional minute until fragrant. Then add the lean ground beef and cook until browned.
- Drain any excess fat and stir in taco seasoning with a splash of water.
- Simmer for 2-3 minutes until thickened, then mix in the shredded cheese until melted.
- Roll out the pizza dough on a floured surface into a rectangle about 1/4-inch thick.
- Slice the dough into strips, approximately 2 inches wide.
- Take a strip of dough, place a spoonful of the taco mixture at one end, fold over and pinch seams tightly.
- Transfer assembled taco sticks to the baking sheet, brush with melted butter, garlic powder, and parsley.
- Bake for 12-15 minutes until golden brown.
- Allow to cool slightly for about 5 minutes before serving with dips like salsa or sour cream.
Leave a Reply