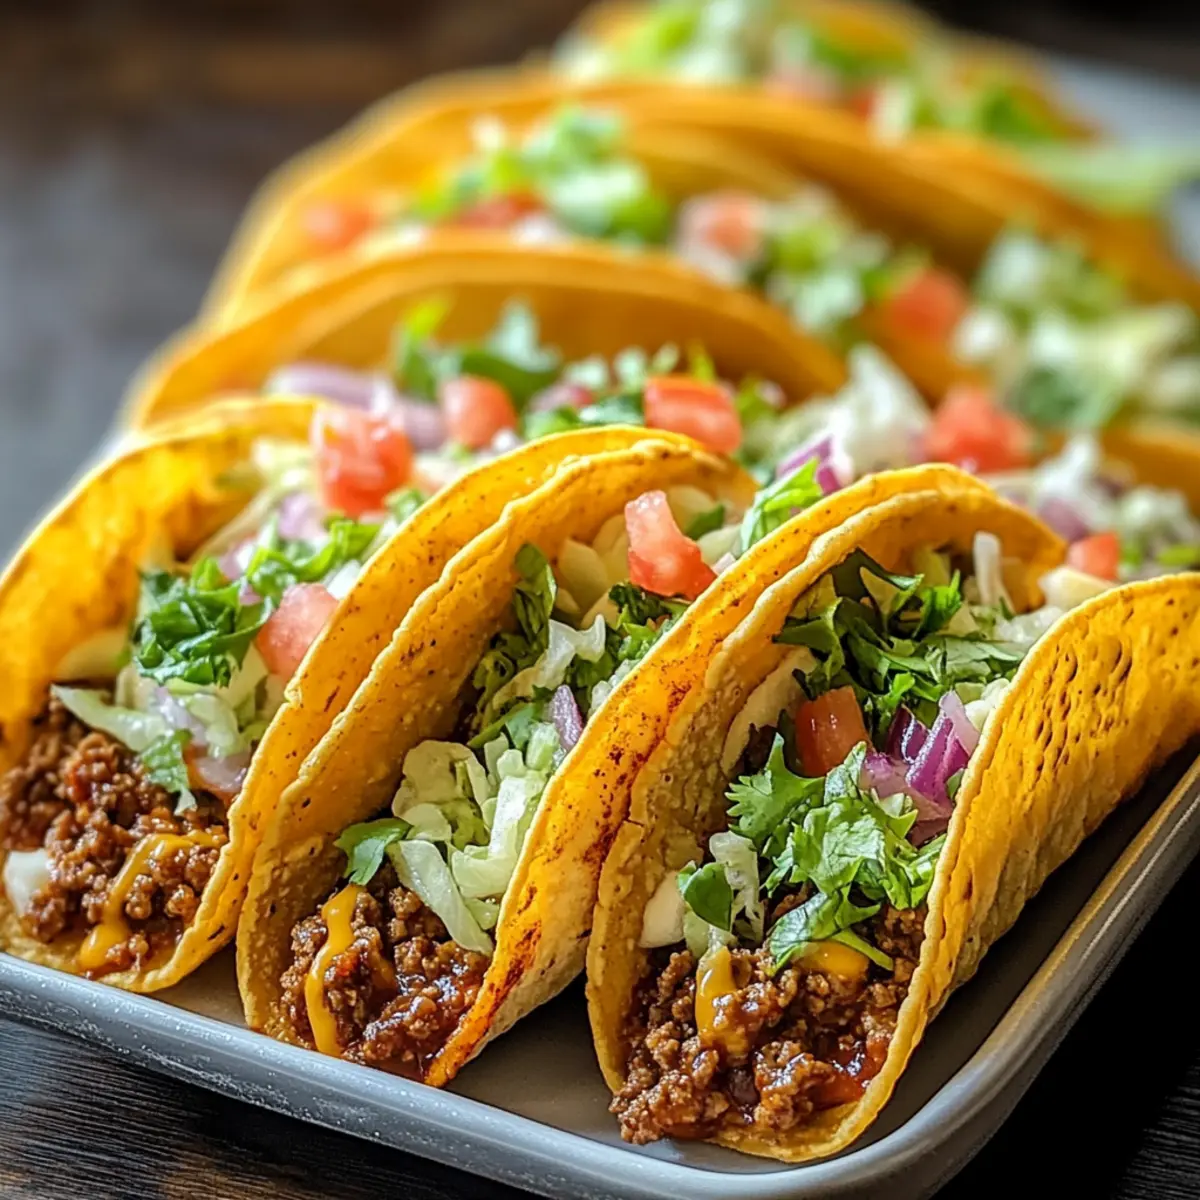
You know that moment when the day has been a whirlwind, and the thought of cooking feels like a mini crisis? That’s where my Oven-Baked Cheesy Tacos (Crispy & Loaded) come in—your go-to solution for a fast, delightful dinner that the whole family will absolutely love! These tacos strike the perfect balance between crispy and gooey, transforming humble taco shells into a melty masterpiece. Best of all, they’re completely customizable; you can swap in your favorite proteins—from juicy ground beef to plant-based options like black beans. Ready in just 35 minutes, they make a perfect weeknight dinner, satisfying cravings without the fuss. Who’s ready to step up their taco game and fill their home with mouthwatering aromas? Let’s dive in!
Why You’ll Adore This Recipe
Quick, Delicious Meal: In just 35 minutes, you can whip up oven-baked cheesy tacos that will make your taste buds sing.
Customizable for Everyone: Whether it’s ground beef, chicken, or a veggie mix, the filling can cater to any preference, making it a family favorite.
Crispy and Gooey Perfection: The contrasting textures—with crispy shells and gooey cheese—will have everyone coming back for seconds!
User-Friendly Cooking: No culinary skills? No problem! These tacos are straightforward, making them a perfect weeknight dinner choice.
Serve with Sides: Feel free to pair these tacos with refreshing toppings or sides like guacamole or fresh salsa for an added flavor punch!
Oven-Baked Cheesy Tacos Ingredients
• The perfect harmony of flavors and textures awaits with these oven-baked cheesy tacos!
For the Filling
- Ground Beef – Use as the main protein; ground turkey or black beans work great too!
- Olive Oil – Essential for sautéing and adding depth; feel free to replace with vegetable oil if needed.
- Onion – Adds sweet flavor; shallots or leeks can be a lovely twist.
- Garlic – Amplifies the taste; fresh garlic is best, but powdered garlic can save time.
- Taco Seasoning – This blend brings the spice; you can use store-bought or whip up a homemade version.
- Tomato Sauce – Provides moisture and zesty flavor; salsa is a zesty alternative that adds a nice kick.
For the Assembly
- Taco Shells – The crispy base for our masterpiece; ensure they’re gluten-free if necessary.
- Shredded Cheese – Melts beautifully to top off the tacos; Monterey Jack or Pepper Jack are excellent choices.
For Fresh Toppings
- Lettuce – Adds a refreshing crunch; swap for spinach for a different flavor!
- Tomatoes – Bright and juicy, making a perfect salsa base too!
- Red Onion – Adds sharpness; green onions or chives can be a milder substitute.
- Cilantro – Enhances flavor and freshness; parsley can be an alternative for those with a cilantro aversion.
Step‑by‑Step Instructions for Oven-Baked Cheesy Tacos (Crispy & Loaded) You’ll Love
Step 1: Preheat the Oven
Begin by preheating your oven to 375°F (190°C). This ensures that your oven-baked cheesy tacos will achieve that desired golden crispiness and gooey melt. While your oven heats up, you can gather the rest of your ingredients to keep everything organized and ready for action.
Step 2: Sauté the Aromatics
In a large skillet, heat a tablespoon of olive oil over medium heat. Once shimmering, add finely chopped onion and minced garlic, sautéing them for about 3–4 minutes until they are fragrant and slightly translucent. This step lays the flavor foundation for your taco filling and infuses the kitchen with delicious aromas.
Step 3: Cook the Ground Beef
Add the ground beef to the skillet, breaking it apart with a spatula. Cook for around 5–7 minutes, stirring occasionally, until the meat is fully browned. You’ll know it’s done when there’s no pink remaining, and the beef is beautifully caramelized. This savory filling forms the heart of your oven-baked cheesy tacos.
Step 4: Mix in Seasoning and Sauce
Sprinkle in your taco seasoning and pour in the tomato sauce, stirring well to combine. Let this mixture simmer for 5 minutes on low heat, which melds the flavors together and creates a hearty filling. Keep an eye on it—once it thickens slightly, you’re all set to move on to the next step!
Step 5: Fill the Taco Shells
As your filling simmers, prepare your taco shells. Warm them briefly in the oven or microwave to make them pliable. Once ready, take each taco shell and generously fill them with the delicious meat mixture. Don’t forget to layer a generous amount of shredded cheese on top to achieve melty perfection.
Step 6: Bake the Tacos to Crispy Perfection
Place your filled taco shells in a greased baking dish, ensuring they are snug but not too tightly packed. Bake in the preheated oven for 10–15 minutes, or until the cheese is bubbly and the edges of the shells are beginning to crisp. You’ll want to keep an eye on them; the aroma will be irresistible!
Step 7: Add Fresh Toppings Before Serving
After removing the tacos from the oven, let them cool for a couple of minutes. Then, top them with fresh ingredients like shredded lettuce, diced tomatoes, chopped red onion, and cilantro. This brightens up your oven-baked cheesy tacos and adds vibrant flavors that contrast beautifully with the warm filling.
Step 8: Serve and Enjoy Your Tacos
Now it’s time to dish up your crispy and loaded tacos! Serve them with a side of guacamole, sour cream, or your favorite salsa to take your meal to the next level. These tasty creations are sure to bring joy to your family table, making dinner a delicious, shared experience.
Make Ahead Options
These Oven-Baked Cheesy Tacos (Crispy & Loaded) are ideal for meal prep, allowing you to save time during your busy weeknights! You can prepare the filling up to 3 days in advance; simply cook the ground beef and mix in the taco seasoning and tomato sauce, then store it in an airtight container in the fridge. To maintain quality, let the filling cool completely before refrigerating. On the day you plan to serve, just reheat the filling in a skillet and assemble your tacos with the warmed shells and cheese, then bake as instructed. Enjoy restaurant-quality tacos with minimal effort and all the flavors you love!
How to Store and Freeze Oven-Baked Cheesy Tacos
-
Fridge: Store leftover oven-baked cheesy tacos in an airtight container for up to 3-4 days. Reheat in the oven for the best texture, about 10-15 minutes at 350°F (175°C).
-
Freezer: For long-term storage, wrap assembled tacos tightly in foil and freeze for up to 2 months. Bake directly from frozen, adding extra cooking time to ensure they’re heated through.
-
Reheating: To revive the crispy texture, reheat tacos in the oven rather than the microwave. This method helps maintain their delightful crunch while warming.
-
Make-Ahead Tip: Prepare the filling ahead of time and store it in the fridge for up to 3 days, so you can quickly assemble and bake when craving those cheesy goodness!
Expert Tips for Oven-Baked Cheesy Tacos
-
Preheat the Oven: Always preheat your oven to avoid undercooked shells. A well-heated oven ensures superior crispiness for your oven-baked cheesy tacos.
-
Don’t Overstuff: Leave some space in the taco shells for the cheese to melt properly. Overfilling can lead to messy tacos that fall apart.
-
Use Fresh Ingredients: Fresh toppings not only enhance flavor but also add a delightful crunch. Consider using fresh herbs for an extra layer of taste.
-
Experiment with Spice: If you want some heat, try adding jalapeños or a sprinkle of cayenne pepper to the taco seasoning. It’s a great way to customize your oven-baked cheesy tacos to your liking.
-
Bake from Frozen: If you’re assembling tacos ahead of time and freezing them, bake directly from frozen. Just remember to extend the cooking time for evenly baked tacos.
Oven-Baked Cheesy Tacos Variations You’ll Love
Feel free to get creative and tailor these delicious oven-baked cheesy tacos to suit your taste buds!
-
Dairy-Free: Use plant-based cheese alternatives or just skip the cheese for a lighter option. You won’t miss the dairy with all the other flavors.
-
Gluten-Free: Opt for corn or gluten-free taco shells to accommodate dietary needs while still enjoying that satisfying crunch.
-
Veggie-Packed: Add sautéed bell peppers or zucchini to your filling for a fresh and vibrant twist. This adds beautiful colors and extra nutrients.
-
Spicy Heat: Mix in sliced jalapeños or a dash of hot sauce for those who crave a little kick in every bite. Spice lovers won’t be able to resist!
-
Mixed Protein: Combine ground beef with shredded chicken or turkey for an exciting mix of flavors and textures. Why not have the best of both worlds?
-
Mexican Twist: Try adding black beans or corn to your meat mixture for a hearty, hearty filling. This traditional touch pays homage to the roots of taco cuisine.
-
Garden Fresh: Top your tacos with fresh avocado slices or a zesty homemade salsa. Freshness elevates the flavor profile, giving you that garden quality.
-
Loaded Nacho Style: Turn your tacos into a nacho platter by layering chips with the filling and cheese, then bake until crispy and melty! A fun twist that’s perfect for sharing!
These oven-baked cheesy tacos can transform in so many wonderful ways, just like my family-favorite One Pot Cheesy dish! Or try a delightful cheesy bite with the Sushi Bake Cheesy if you’re feeling adventurous.✨
What to Serve with Oven-Baked Cheesy Tacos (Crispy & Loaded)
Elevate your taco night to a full feast with these delicious pairing ideas that tantalize the senses!
-
Guacamole: This creamy, fresh dip pairs perfectly with the crunch of tacos, adding a soothing, rich element to each bite.
-
Mexican Rice: Fluffy rice flavored with spices creates a perfect side that complements the savory flavors of cheesy tacos.
-
Fresh Salsa: Bursting with ripe tomatoes and herbs, this zesty option offers a refreshing contrast that brightens the meal.
-
Refried Beans: Creamy and packed with protein, they add a hearty touch and a delightful texture alongside crunchy tacos.
-
Corn on the Cob: Grilled or boiled, these sweet ears are a summertime favorite, their sweetness harmonizing beautifully with the spicy flavor of the tacos.
-
Margaritas: Sip on a refreshing margarita, with its tangy citrus notes enhancing the flavors of your cheesy taco delights for a festive vibe.
-
Churros: For a sweet ending, these crispy pastries dusted with cinnamon sugar will satisfy your sweet tooth, creating a perfect finish.
-
Cilantro Lime Rice: This fragrant, zesty rice dish complements the tacos, infusing your meal with fresh and vibrant flavors.
Each of these options adds its unique flair, making your meal remarkable and ensuring your taco night is truly memorable!
Oven-Baked Cheesy Tacos (Crispy & Loaded) Recipe FAQs
What type of ground meat is best for the filling?
Absolutely! Ground beef is traditionally used for these tacos, but you can also substitute it with ground turkey or chicken for a leaner option. For a vegetarian twist, black beans or cooked lentils are delicious alternatives that work wonderfully!
How should I store leftover tacos?
Leftover oven-baked cheesy tacos can be stored in an airtight container in the fridge for up to 3-4 days. When you’re ready to enjoy them again, simply reheat in the oven at 350°F (175°C) for about 10-15 minutes, which helps retain their crispy texture.
Can I freeze assembled tacos?
Definitely! To freeze your oven-baked cheesy tacos, wrap each assembled taco tightly in aluminum foil and place them in a freezer-safe bag. They can be stored in the freezer for up to 2 months. When you’re ready to bake them, you can cook them directly from frozen—just add an additional 5-10 minutes to the baking time to ensure they’re heated through.
How can I troubleshoot soggy taco shells?
If your taco shells turn out soggy, it might be due to overstuffing them with filling or not baking them long enough. To avoid this, don’t overstuff the taco shells; leave a little room for the cheese to melt and expand. Also, ensure the oven is fully preheated before baking, as this helps achieve that nice crispy exterior. If you find yourself with soggy shells, try briefly placing them back in the oven on a wire rack to crisp up!
Are there any dietary considerations for these tacos?
For gluten-sensitive individuals, make sure to use gluten-free taco shells. Additionally, always check your taco seasoning for any allergens. As for pets, avoid giving them tacos, especially those containing onions and garlic, as these can be harmful to dogs and cats.
What’s the best way to add heat to my tacos?
If you’re looking to spice things up, you can add diced jalapeños or a dash of cayenne pepper to the beef mixture while it cooks. Additionally, serving your tacos with hot salsa or a sprinkle of chili flakes can enhance the heat level to your liking!
Oven-Baked Cheesy Tacos (Crispy & Loaded) You’ll Adore
Ingredients
Equipment
Method
- Preheat your oven to 375°F (190°C).
- In a large skillet, heat a tablespoon of olive oil over medium heat. Add chopped onion and minced garlic, sautéing for 3–4 minutes.
- Add ground beef, breaking it apart. Cook for 5–7 minutes until browned.
- Sprinkle in taco seasoning and pour in tomato sauce, stirring well. Simmer for 5 minutes.
- Warm taco shells briefly, fill with meat mixture and top with shredded cheese.
- Place filled shells in a greased baking dish. Bake for 10–15 minutes until cheese is bubbly.
- Top with lettuce, tomatoes, red onion, and cilantro after cooling for a couple of minutes.
- Serve with guacamole, sour cream, or salsa.
Leave a Reply