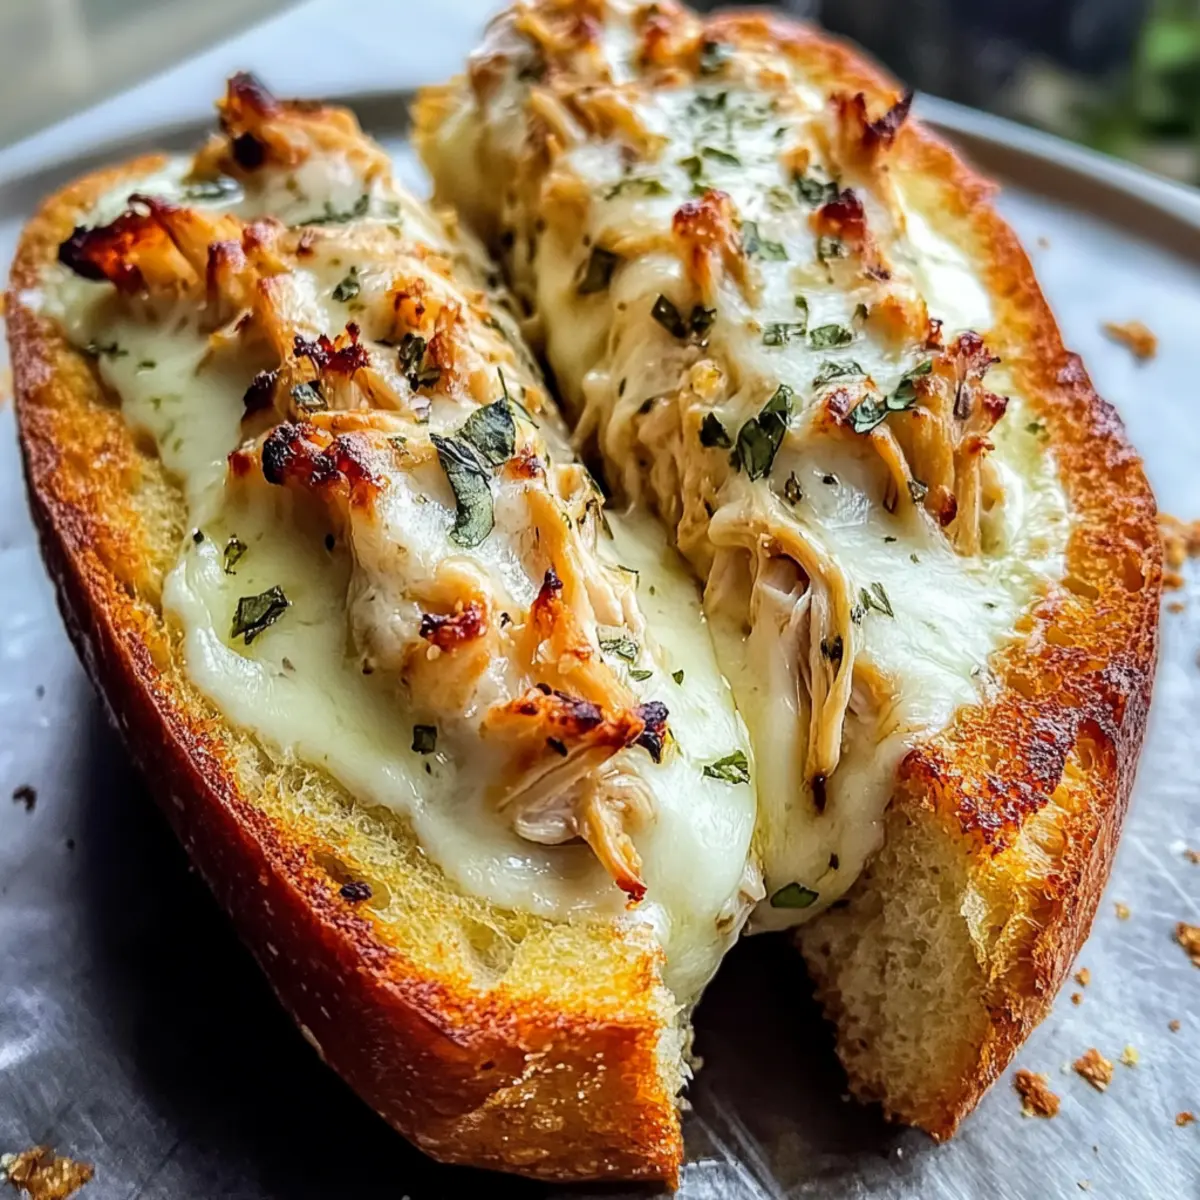
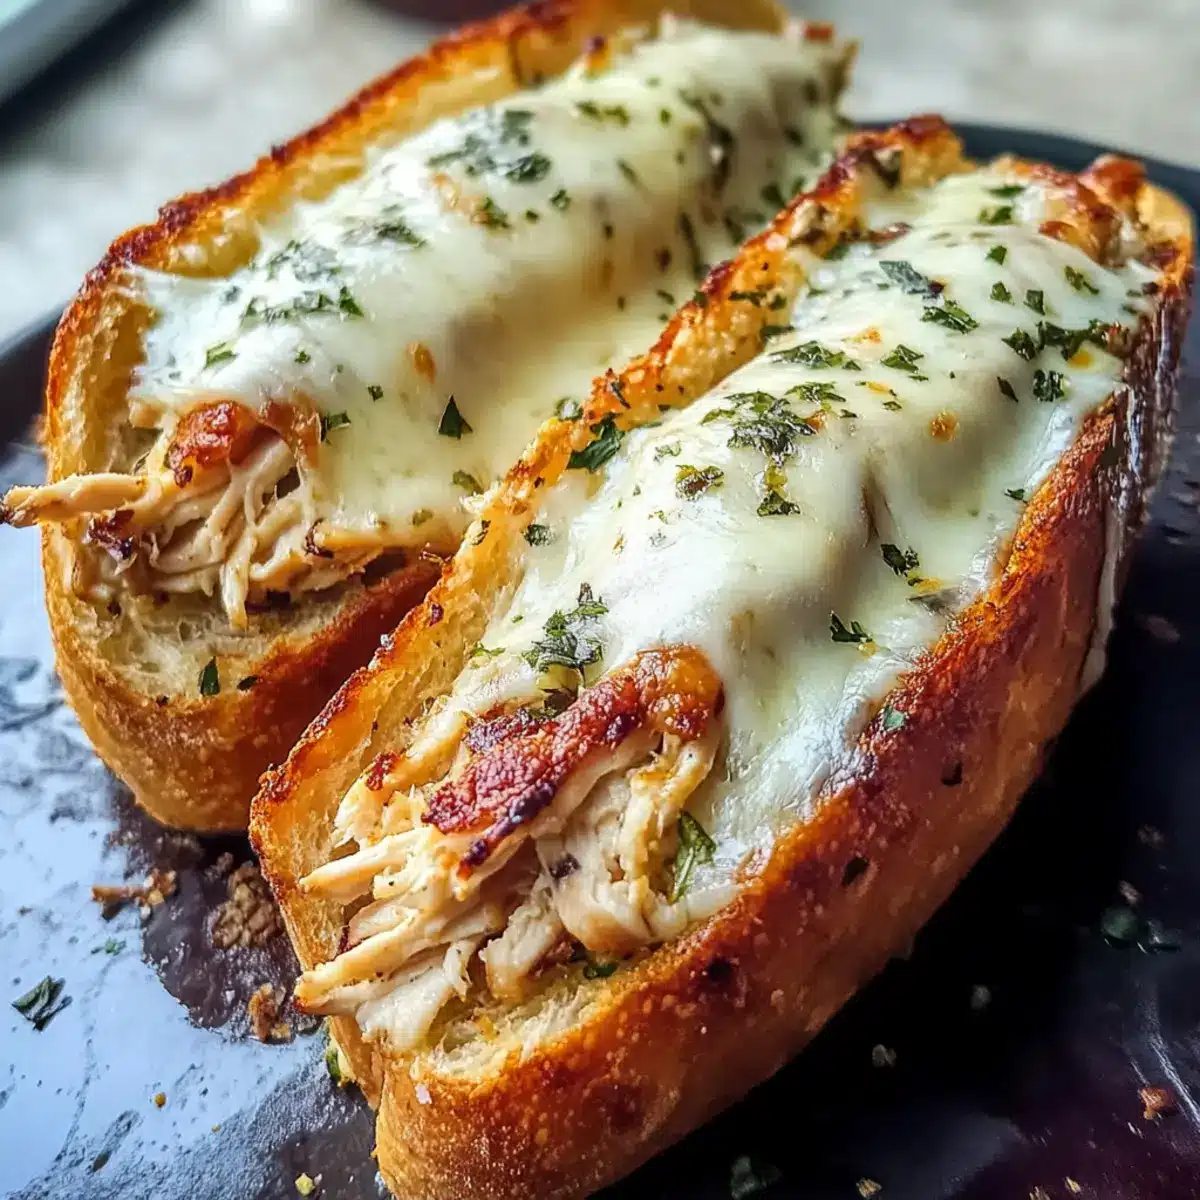
The satisfying crunch of crispy garlic bread mingling with molten cheese is just the beginning of a culinary adventure. Let’s be honest—after a long day, nothing beats the comfort of a homemade Cheesy Chicken Garlic Bread Sandwich. In just 20 minutes, you can whip up this delightful meal that’s equal parts quick and indulgent, making it perfect for a cozy lunch, a simple dinner, or that late-night craving. With tender shredded chicken mixed in creamy mayonnaise and zesty Dijon mustard, and topped off with gooey mozzarella and Parmesan, you’re about to savor a masterpiece that even the littlest taste testers will adore. Plus, this sandwich is customizable, allowing you to add whatever veggies you have on hand! Curious about how to create this mouthwatering goodness? Let’s dive into the recipe!
Why Will You Love This Sandwich?
Satisfying Crunch: The texture of crispy garlic bread perfectly complements the gooey melted cheese inside, offering a delightful bite.
Quick Preparation: Whip it up in just 20 minutes—ideal for busy weeknights or unexpected guests.
Customizable Goodness: Make it your own by adding veggies like spinach or bell peppers, or try different spreads like pesto for extra flavor.
Kid-Friendly Delight: This crowd-pleaser is sure to become a family favorite, making meal times a breeze! Plus, if you enjoy similar flavors, check out my Cottage Cheese Chicken or Chicken Fajita Pasta for more delicious options.
Hearty & Filling: Each serving provides approximately 25g of protein, making this a substantial meal that keeps you satisfied.
Cheesy Chicken Garlic Bread Sandwich Ingredients
For the Garlic Bread
• Garlic Bread – This serves as the crispy, buttery base of your sandwich; substitute with any bread if needed.
For the Chicken Mixture
• Shredded Chicken – Provides a hearty protein source; leftover roasted or rotisserie chicken works perfectly.
• Mayonnaise – Adds creaminess and binds the mixture; opt for Greek yogurt for a lighter version.
• Dijon Mustard – Infuses a tangy flavor that brightens the dish; try whole grain mustard for a different twist.
• Salt and Pepper – Essential to enhance the overall taste; adjust to your preference.
For the Cheese Toppings
• Shredded Mozzarella Cheese – Melts beautifully for that gooey texture; feel free to substitute with provolone or cheddar.
• Grated Parmesan Cheese – Gives a distinctly salty flavor that elevates the cheesiness.
Enjoy crafting your own Cheesy Chicken Garlic Bread Sandwich, a comfort food classic you’ll love!
Step‑by‑Step Instructions for Cheesy Chicken Garlic Bread Sandwich
Step 1: Prepare the Chicken Mixture
In a mixing bowl, combine tender shredded chicken with creamy mayonnaise and zesty Dijon mustard. Season the mixture with salt and pepper to enhance the flavors. Stir thoroughly until the chicken is well coated and the ingredients are evenly combined, creating a rich filling for your Cheesy Chicken Garlic Bread Sandwich.
Step 2: Assemble the Sandwich
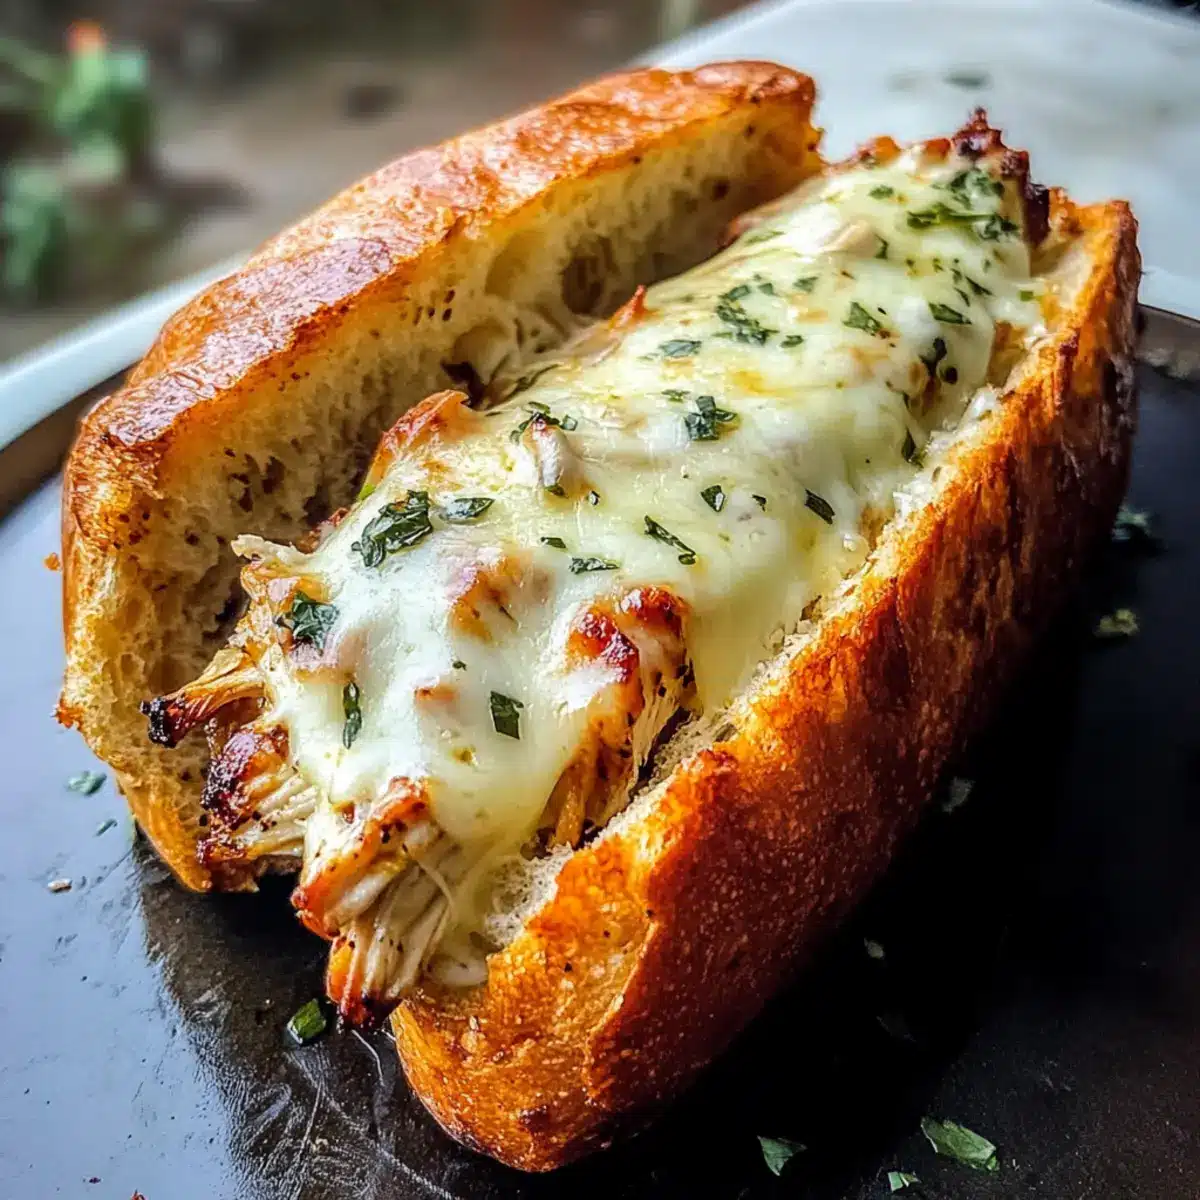
Take a slice of crispy garlic bread and spread an even layer of the chicken mixture over the top, ensuring a generous amount reaches every corner. Next, sprinkle a hearty layer of shredded mozzarella cheese followed by a sprinkle of grated Parmesan for that extra cheesy goodness. This step creates the deliciously irresistible core of the sandwich.
Step 3: Top it Off
Place the second slice of garlic bread on top of the sandwich, pressing down gently to hold everything together. Make sure the filling is securely enclosed within the crispy garlic bread. This will help maintain the structure of your Cheesy Chicken Garlic Bread Sandwich while it cooks.
Step 4: Grill the Sandwich
Heat a skillet over medium heat, allowing it to get hot for about 2 minutes. Carefully place the assembled sandwich on the skillet and let it cook undisturbed for 4-5 minutes. Keep an eye out for a beautiful golden-brown color on the bottom, signaling that it’s time to flip.
Step 5: Flip and Finish Cooking
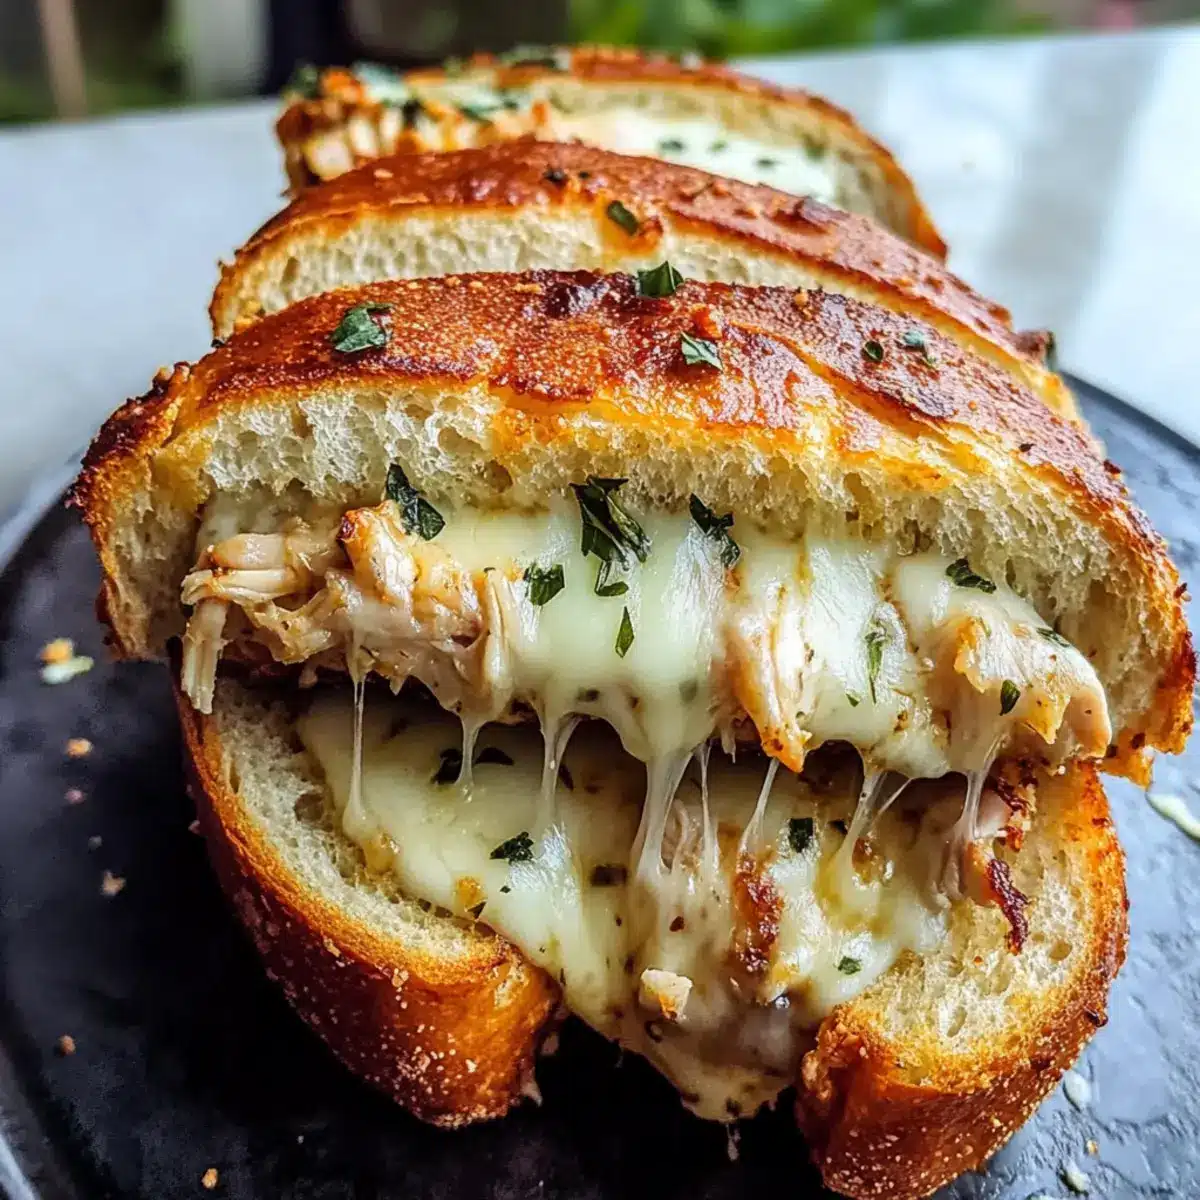
Once the first side is golden, carefully flip the sandwich using a spatula. Cook for another 4-5 minutes until the opposite side is also golden and the cheese is melted and gooey inside. The crispy garlic bread should create a satisfying crunch when you press down gently.
Step 6: Serve and Enjoy
Once cooked, remove the Cheesy Chicken Garlic Bread Sandwich from the skillet and let it cool for a minute. Cut it in half to reveal the gooey, cheesy goodness inside. Serve warm alongside your favorite sides, and enjoy this warm delight that’s perfect for lunch or a cozy dinner!
Make Ahead Options
These Cheesy Chicken Garlic Bread Sandwiches are perfect for meal prep enthusiasts! You can prepare the chicken mixture—combining shredded chicken, mayonnaise, Dijon mustard, and seasonings—up to 3 days in advance. To keep it fresh, store the mixture in an airtight container in the refrigerator. Additionally, you can assemble the sandwiches completely but should avoid grilling them until you’re ready to serve; refrigerate assembled sandwiches for up to 24 hours. When you’re ready to enjoy your deliciousness, simply grill the sandwiches in a skillet for about 4-5 minutes on each side until golden brown and the cheese is melted. You’ll savor that restaurant-quality result with minimal effort!
Expert Tips for the Best Cheesy Chicken Garlic Bread Sandwich
• Skillet Temperature: Proper heating is key: Make sure your skillet is hot enough to create a golden crust without burning the bread.
• Even Spreading: Don’t skimp on the filling: Spread the chicken mixture evenly on the garlic bread to ensure every bite is flavorful and satisfying.
• Customize Wisely: Add-ins matter: Incorporate veggies like bell peppers or spinach, but be cautious not to overload the sandwich, which can make it hard to hold together.
• Cheese Varieties: Mix it up: While mozzarella is the classic choice, consider blending it with cheddar for a different flavor experience in your Cheesy Chicken Garlic Bread Sandwich.
• Reheating Tips: Keep it crispy: To reheat leftovers, use a skillet instead of a microwave to preserve that delightful crunch.
What to Serve with Cheesy Chicken Garlic Bread Sandwich
Aromatic, wholesome sides can elevate your meal experience and perfectly complement the comforting flavors of this sandwich.
- Fresh Side Salad: A light mix of greens adds crunch and bright flavors, enhancing the richness of the sandwich.
- Crispy Potato Chips: Provide a satisfying crunch alongside the sandwich, making it a classic pairing that’s simple yet delicious.
- Warm Tomato Soup: The tangy and smooth nature of tomato soup pairs beautifully, creating a cozy and comforting combo for any time of day.
- Steamed Vegetables: Broccoli or green beans add a nutritious touch, balancing the savory elements of the sandwich without overpowering it.
- Sweet Potato Fries: Their natural sweetness and crispiness are a delightful contrast to the savory flavors in the sandwich.
- Sparkling Lemonade: A refreshing drink that cleanses the palate and adds a zesty touch, rounding out your meal nicely.
- Chocolate Chip Cookies: For a sweet finish, these classic cookies bring nostalgia and satisfaction, perfect after a comforting meal.
Storage Tips for Cheesy Chicken Garlic Bread Sandwich
Fridge: Store assembled sandwiches in an airtight container for up to 3 days. This helps maintain freshness and flavor while preventing sogginess.
Freezer: For longer storage, freeze wrapped sandwiches in plastic wrap and foil for up to 2 months. Thaw in the fridge overnight before reheating.
Reheating: To reheat, use a skillet over medium heat. This will help retain the crispy texture of the garlic bread while ensuring the cheese melts perfectly.
Preparation Ahead: You can make the chicken mixture in advance, storing it in the fridge for up to 2 days. This way, you’ll streamline your sandwich-making process on busy nights!
Cheesy Chicken Garlic Bread Sandwich Variations
Feel the joy of creating your perfect sandwich with these fun and flavorful twists!
-
Turkey Swap: Substitute shredded chicken with turkey for a lighter take. Still delicious and just as satisfying!
-
Vegetarian Delight: Use sautéed mushrooms or a medley of colorful peppers instead of chicken for a hearty, plant-based option. You can experiment with flavors and textures that excite your palate while keeping it wholesome.
-
Whole Grain Bread: If you want a healthier option, try swapping the garlic bread for whole grain or sourdough bread. It elevates the flavor and adds a nutritious touch.
-
Spicy Kick: Add sliced jalapeños or a dash of hot sauce to the chicken mixture for an excitement blast. The heat will delight spice lovers while enhancing the overall flavor!
-
Pesto Twist: Replace mayonnaise with pesto for a fresh, vibrant taste. This simple swap instantly elevates your sandwich, making every bite aromatic and packed with flavor.
-
Cheese Variation: Mix in some pepper jack or goat cheese along with mozzarella for an extra cheesy and exhilarating flavor experience. The creaminess pairs beautifully with the garlic bread!
-
Herbed Goodness: Sprinkle fresh herbs like basil or parsley into the chicken mixture for a burst of flavor. This subtle change can make your sandwich taste even fresher and more enticing.
-
Crunchy Add-ins: Consider adding crunchy veggies like shredded carrots or cucumbers inside for a delightful texture and added freshness. This small addition can transform each mouthful into a delightful experience!
Whether you opt for something spice-infused or go for a fresh herb twist, these variations will take your One Pot Cheesy creation to an exciting new level! Enjoy crafting your own Cheesy Chicken Garlic Bread Sandwich masterpiece!
Cheesy Chicken Garlic Bread Sandwich Recipe FAQs
What type of chicken should I use?
Absolutely! Tender shredded chicken is the star ingredient here. You can use leftover roasted or rotisserie chicken for convenience. If you want a healthier alternative, poach or grill chicken breasts until cooked through, then shred them for your sandwich.
How should I store leftovers?
Store assembled sandwiches in an airtight container in the fridge for up to 3 days. This helps to keep them fresh without turning soggy. If you freeze them, wrap each sandwich tightly in plastic wrap and then aluminum foil to prevent freezer burn, and they’ll last for up to 2 months!
Can I freeze the Cheesy Chicken Garlic Bread Sandwich?
Definitely! To freeze, wrap the assembled sandwich in plastic wrap followed by aluminum foil. This method protects it from freezer burn. When you’re ready to eat, thaw it in the refrigerator overnight. To reheat, place it in a skillet over medium heat for about 5-7 minutes per side until warmed through and crispy again.
What can I do if my cheese isn’t melting properly?
If your cheese isn’t melting well, it might be due to low skillet heat. Make sure your skillet is adequately heated before adding the sandwich—aim for medium heat. Give it 4-5 minutes per side, and if you’re having issues, try covering the skillet with a lid to help trap moisture and heat, which encourages the cheese to melt quickly.
Is this sandwich suitable for kids?
Very much so! The Cheesy Chicken Garlic Bread Sandwich is kid-friendly and customizable, which makes it a hit with little ones. You can add veggies like spinach or bell peppers, but keep it simple to start if your kids are picky eaters. They will surely enjoy the gooey cheese and chicken!
Can pets safely eat any part of this sandwich?
While cooked chicken can be safe for pets in moderation, it’s best to keep this sandwich away from them due to spices like garlic and seasonings that can be harmful to dogs and cats. If you want to share, offer plain cooked chicken instead as a treat without any seasonings.
Cheesy Chicken Garlic Bread Sandwich for Cozy Nights
Ingredients
Equipment
Method
- In a mixing bowl, combine tender shredded chicken with creamy mayonnaise and zesty Dijon mustard. Season with salt and pepper.
- Spread the chicken mixture over a slice of crispy garlic bread, then layer with shredded mozzarella and grated Parmesan.
- Top with another slice of garlic bread and press gently to hold everything together.
- Heat a skillet over medium heat. Cook the sandwich for 4-5 minutes until golden brown, then flip and cook the other side for another 4-5 minutes.
- Let it cool for a minute, then cut in half and serve warm.
Leave a Reply