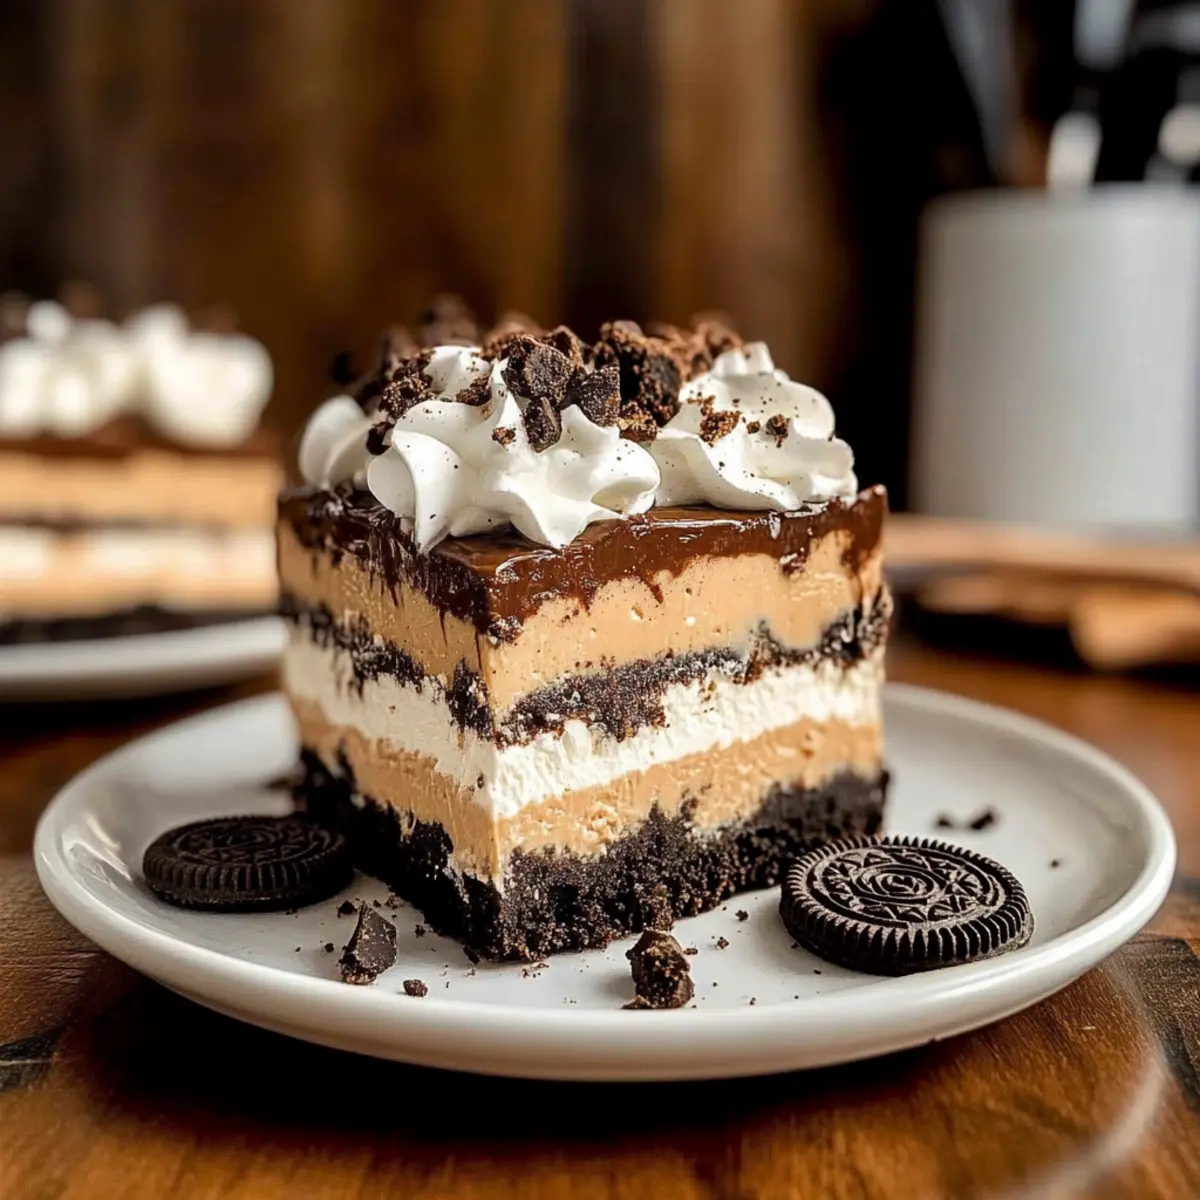
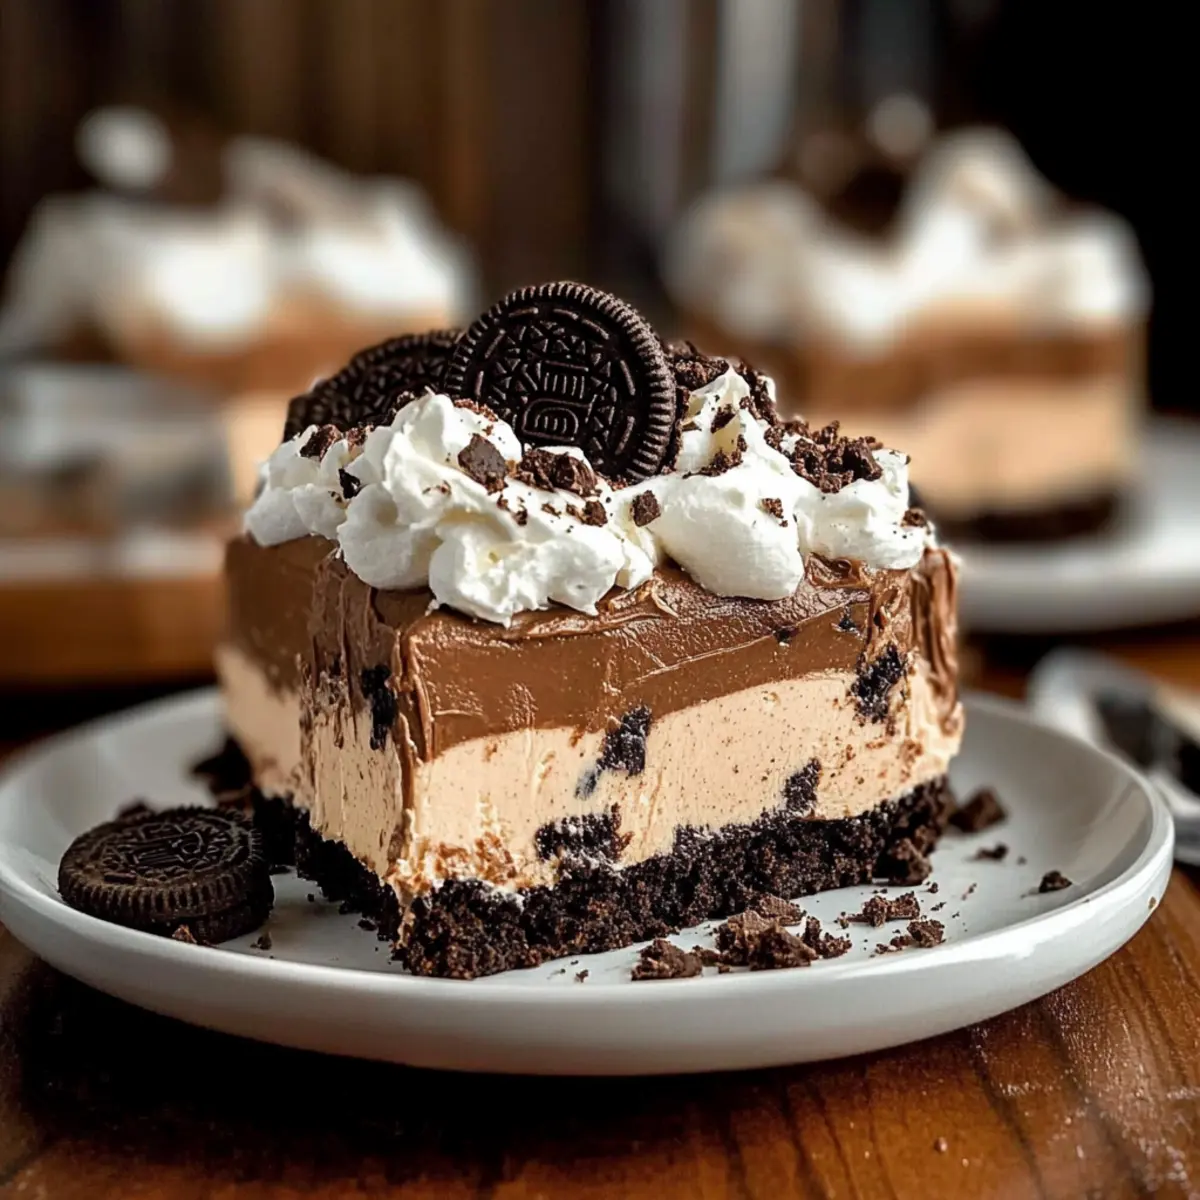
As I sifted through my pantry on a sunny afternoon, I stumbled upon a treasure trove of ingredients begging to be transformed into something delightful. Enter the No Bake Chocolate Peanut Butter Oreo Dessert, a recipe that has quickly become my go-to indulgence for any occasion. With its luxurious layers of rich chocolate, creamy peanut butter, and crunchy Oreo crumbles, it’s a simple yet decadent treat that will leave you and your guests swooning. What’s even better? This no-bake wonder can be whipped up in no time, perfect for those last-minute gatherings when you want to impress without the fuss. Plus, it’s a crowd-pleaser that satisfies those relentless chocolate-peanut butter cravings. What’s your favorite dessert to whip up when you’re short on time?
Why Make This No Bake Dessert?
Irresistible Layers: Each bite showcases a heavenly mix of creamy peanut butter, silky chocolate, and crunchy Oreo crumbles.
No Baking Required: Save time and energy! This dessert requires no oven, making it a breeze to prepare.
Quick to Assemble: In just a few simple steps, you can create a stunning dessert without feeling overwhelmed.
Crowd Favorite: It’s an absolute hit at parties and gatherings, sure to satisfy chocolate and peanut butter lovers alike! If you enjoy indulgent treats, you might also love our Chocolate Truffles Decadent or the delightful Butter Board Sweet.
Make-Ahead Convenience: Prepare it ahead of time and let it chill, freeing you up for more important matters on the big day!
No Bake Chocolate Peanut Butter Oreo Dessert Ingredients
For the Oreo Base
- Oreos (14.3 oz package) – These crunchy cookies create a delightful base for your dessert. Substitution: Gluten-free Oreos for a gluten-free option.
- Unsalted Butter (4 tbsp) – Mixing with crushed Oreos enhances richness and improves structure.
For the Peanut Butter Layer
- Cream Cheese (16 oz) – Adds creaminess and richness; make sure it’s at room temperature for easy mixing.
- Creamy Peanut Butter (1 cup) – Provides flavor and structure; try almond butter for a unique twist.
- Instant Vanilla Pudding (3.4 oz box) – Thickens the peanut butter layer; must be instant pudding, not cook & serve.
- Milk (½ cup) – Adds moisture to the mixture; whole milk gives the best creaminess.
For the Chocolate Layer
- Milk Chocolate Chips (1 cup) – Yields a rich chocolate flavor; feel free to swap with dark chocolate for a bolder taste.
- Instant Chocolate Pudding (3.4 oz box) – Essential for a creamy chocolate layer; again, it must be instant.
- Milk (½ cup) – Provides the necessary moisture for blending; using whole milk will enhance the creaminess.
For the Topping
- Whipped Topping (12 oz) – Adds a light, airy finish; homemade whipped cream can also be used for an extra treat.
These ingredients come together to create the unforgettable No Bake Chocolate Peanut Butter Oreo Dessert that will make your gatherings extraordinary!
Step‑by‑Step Instructions for No Bake Chocolate Peanut Butter Oreo Dessert
Step 1: Prepare Oreo Crumbs
Begin by crushing the Oreo cookies into fine crumbs. Use a food processor for a quick and even mix, or place the cookies in a sealed bag and crush with a rolling pin. Once finely ground, combine them with melted unsalted butter, ensuring all crumbs are coated. This rich mixture will form the base of your No Bake Chocolate Peanut Butter Oreo Dessert.
Step 2: Melt Chocolate Chips
In a microwave-safe bowl, combine half of the milk chocolate chips with a portion of milk. Microwave in 30-second intervals, stirring in between, until smooth and fully melted—about 1-2 minutes total. Once melted, set aside to cool slightly; you want it pourable but not hot to the touch, ensuring it integrates well into the layers of your dessert.
Step 3: Make Peanut Butter Layer
In a large mixing bowl, beat the room temperature cream cheese until smooth. Gradually incorporate the instant vanilla pudding mix and creamy peanut butter, blending well until silky. Slowly add the remaining milk, mixing until thoroughly combined. This luscious peanut butter layer will be spread over the Oreo base, adding creaminess to your No Bake Chocolate Peanut Butter Oreo Dessert.
Step 4: Add Oreo Layer
Once the peanut butter mixture is evenly spread over the Oreo base, sprinkle a generous layer of reserved Oreo crumbs on top. This crunchy layer will provide a delightful texture contrast in your dessert. Gently press the crumbs into the peanut butter mixture to create a stable foundation for the next chocolate layer.
Step 5: Make Chocolate Layer
In a clean bowl, mix the remaining cream cheese with the instant chocolate pudding mix and the cooled chocolate mixture. Gradually add the remaining milk, stirring until the mixture is smooth and creamy. This rich chocolate layer will be spread over the Oreo crumbs, bringing heavenly chocolate flavor to your No Bake Chocolate Peanut Butter Oreo Dessert.
Step 6: Top with Whipped Topping
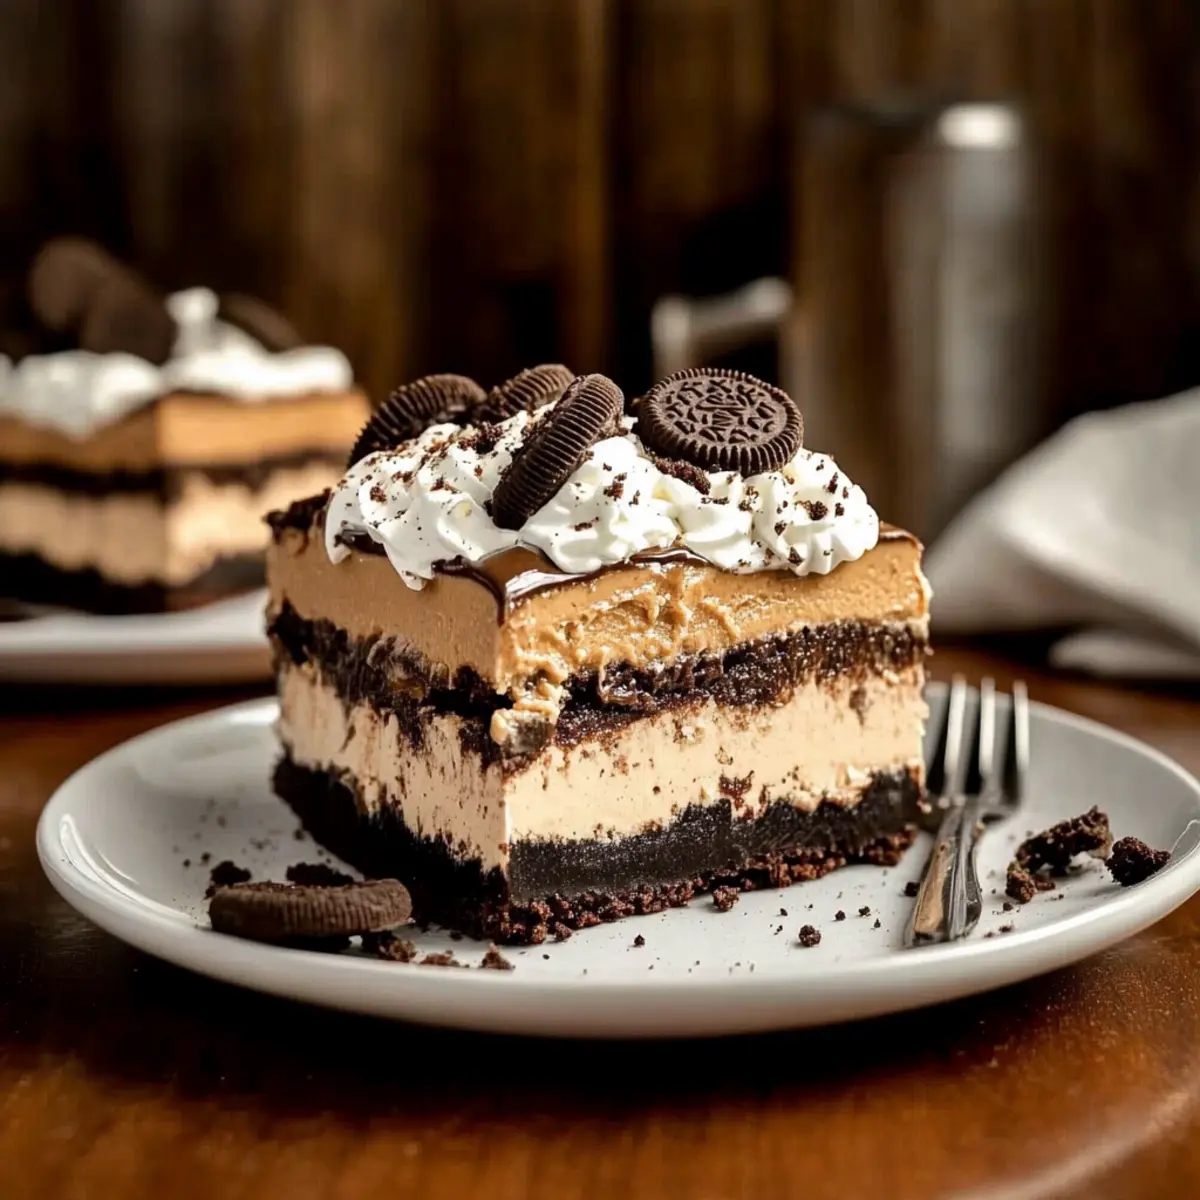
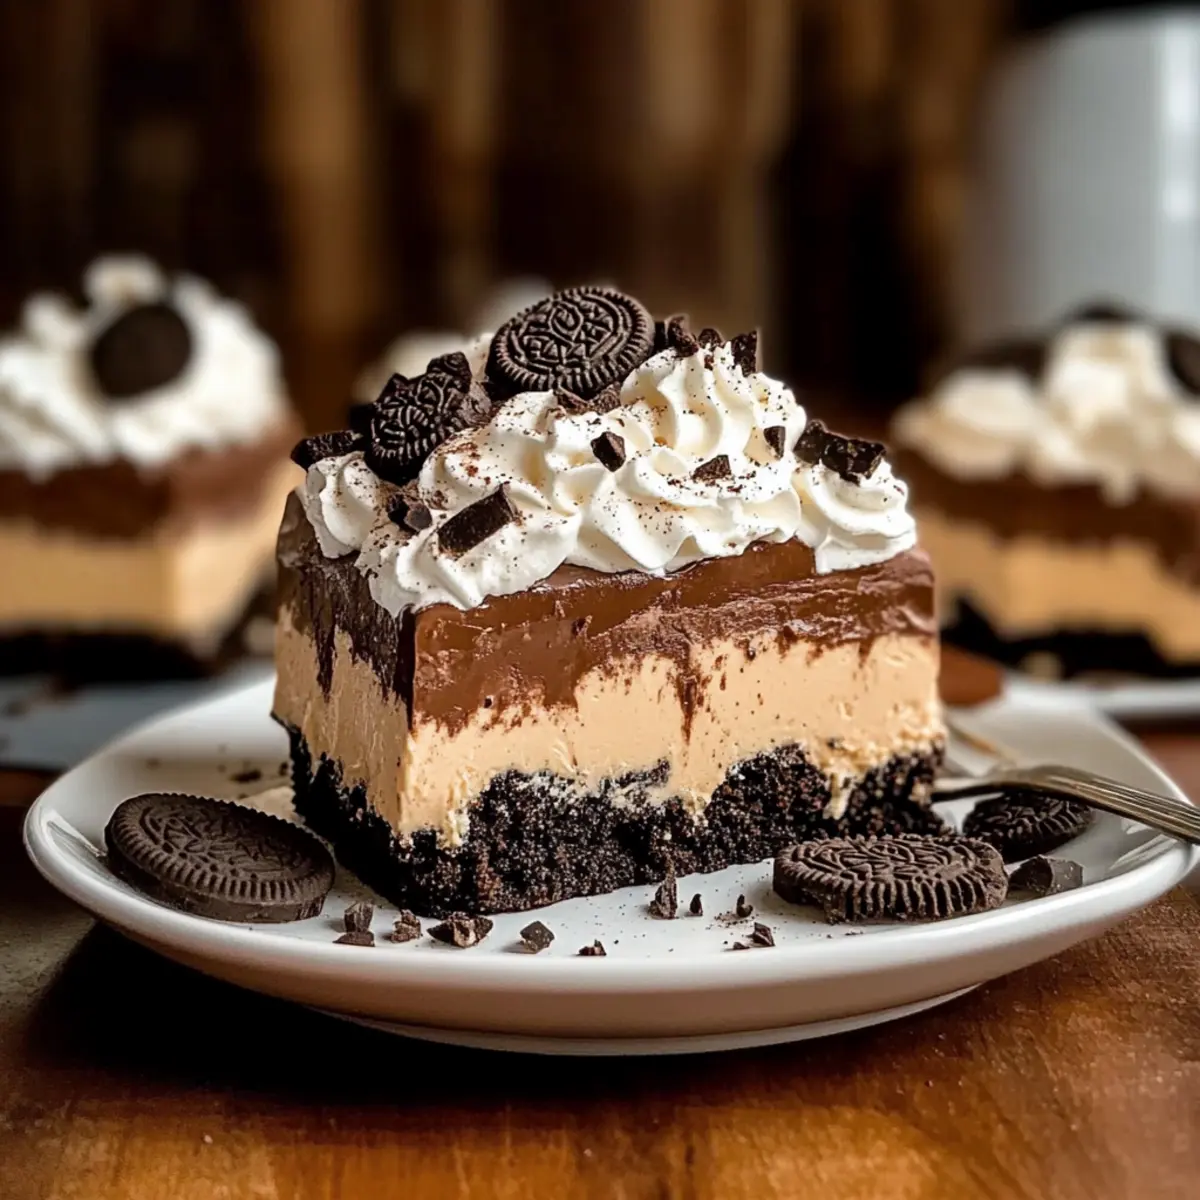
Spread the whipped topping evenly across the chocolate layer, creating a fluffy finish to your dessert. You can use a spatula or the back of a spoon for a smooth surface. For an extra touch, feel free to garnish with chocolate shavings or crushed Oreos. This light layer balances the rich fillings beneath it and makes your dessert visually tempting.
Step 7: Chill
Cover the assembled No Bake Chocolate Peanut Butter Oreo Dessert with plastic wrap and refrigerate for at least 4-6 hours, or overnight for best results. This chilling step is crucial for allowing the layers to set properly, making it easier to slice and serve later. The longer it chills, the better the flavors meld together, creating a dreamy, indulgent treat to wow your guests!
How to Store and Freeze No Bake Chocolate Peanut Butter Oreo Dessert
Fridge: Keep the dessert covered in an airtight container for up to 4 days. This ensures it stays fresh and maintains its creamy texture.
Freezer: If you need to store it longer, you can freeze the dessert for up to 2 months. Just wrap it tightly in plastic wrap and aluminum foil to prevent freezer burn.
Thawing: To enjoy after freezing, transfer the No Bake Chocolate Peanut Butter Oreo Dessert to the fridge and let it thaw overnight for the best texture.
Cutting Tips: For cleaner slices, run a knife under warm water before cutting. This helps maintain the layers without squishing them!
Expert Tips for No Bake Chocolate Peanut Butter Oreo Dessert
-
Room Temperature Cream Cheese: Make sure your cream cheese is at room temperature for easier blending, ensuring a smooth and creamy peanut butter layer in your No Bake Chocolate Peanut Butter Oreo Dessert.
-
Chill Time Matters: Allow the dessert to chill for the full recommended time of 4-6 hours. This helps it set correctly, making it easier to slice and serve for your guests.
-
Prevent Crumbliness: If your Oreo base is too crumbly, mix in melted butter to enhance its richness and provide better structure, ensuring each slice holds together beautifully.
-
Layering Technique: Spread your layers carefully and evenly for a beautiful presentation. Gently press each layer down to compact them without squishing, achieving that perfect layered look.
-
Creative Garnishes: Elevate your dessert’s appearance by adding a sprinkle of chocolate shavings or crushed Oreos on top just before serving. It adds an extra touch of indulgence that guests will adore!
No Bake Chocolate Peanut Butter Oreo Dessert Variations
Feel free to get creative with these delightful variations that will elevate your No Bake Chocolate Peanut Butter Oreo Dessert into something uniquely yours!
- Dairy-Free: Swap out cream cheese and whipped topping for dairy-free alternatives, such as cashew cheese and coconut whipped cream.
- Cookie Butter: Replace creamy peanut butter with cookie butter for a rich, spiced flavor that’s absolutely divine.
- Nutty Crunch: Add a layer of crushed nuts, like walnuts or pecans, for extra texture and a lovely nutty contrast to the creamy layers.
- Chocolate Swirl: Mix in chocolate syrup or ganache between layers to create a beautiful marbled effect that adds indulgent richness.
- Flavored Extracts: Enhance the peanut butter layer with a splash of almond or hazelnut extract for a subtle twist in flavor that surprises the taste buds.
- Guest-Ready Garnish: Top the dessert with mini chocolate chips or decorative chocolate drizzles to impress your guests, giving it that extra wow factor.
- Spicy Surprise: Add a pinch of cayenne pepper to the chocolate layer for a subtle hint of spice that complements the sweetness delightfully.
With these variations, you can personalize this dessert to match any occasion. Whether you stick to the classic or venture off the beaten path, each version promises to be a hit! If you’re in the mood for more delicious treats, be sure to check out our Harvest Marble Chocolate and Sushi Bake Cheesy recipes!
Make Ahead Options
These No Bake Chocolate Peanut Butter Oreo Dessert layers are perfect for busy cooks looking to save time! You can prepare the Oreo base and both creamy layers up to 24 hours in advance, ensuring a stress-free experience on the day of serving. To maintain their quality, store the covered dessert in the refrigerator until ready to serve. When it’s time to wow your guests, simply spread the whipped topping over the chilled layers, add any desired garnishes, and slice into squares for easy serving. This make-ahead approach allows for delicious flavors to meld while freeing up your time for other preparations!
What to Serve with No Bake Chocolate Peanut Butter Oreo Dessert
Delight your loved ones with a balanced meal that pairs perfectly with this indulgent treat, enhancing every flavor note.
-
Fresh Fruit Salad: A vibrant mix of berries and citrus provides a refreshing contrast to the rich dessert while adding a hint of tartness.
-
Vanilla Ice Cream: The creaminess of vanilla ice cream complements the chocolate and peanut butter layers, adding an extra touch of indulgence.
-
Chocolate Drizzle: A drizzle of melted chocolate on top creates an indulgent visual and adds richness to each bite of the dessert.
-
Coffee: A hot cup of freshly brewed coffee balances the sweetness of the dessert, enhancing its flavors and providing a delightful contrast.
-
Mint Tea: The cooling notes of mint tea create a refreshing palate cleanser, perfect after indulging in the creamy layers of your No Bake Chocolate Peanut Butter Oreo Dessert.
-
Milk: A classic pairing that offers a nostalgic taste; its creaminess washes down the rich flavors beautifully.
-
Cheesecake Bites: Bite-sized, creamy cheesecake brings another layer of decadence that pairs harmoniously with the crispy Oreo base.
-
Chocolate Martini: For the grown-ups, a chocolate martini provides a delightful adult twist that echoes the dessert’s flavors, creating a complete indulgent experience.
No Bake Chocolate Peanut Butter Oreo Dessert Recipe FAQs
How do I choose the right Oreos for this dessert?
Absolutely! While classic Oreos work perfectly, you can also opt for gluten-free Oreos if you need a gluten-free option. Just ensure they are fresh; if you notice any dark spots or a stale smell, it’s best to choose a new pack for the best flavor.
What is the best way to store leftovers?
Very! Store any leftovers in an airtight container in the refrigerator for up to 4 days. This keeps your No Bake Chocolate Peanut Butter Oreo Dessert fresh and maintains its creamy texture. If you think you won’t finish it within that time, consider freezing it.
Can I freeze the No Bake Chocolate Peanut Butter Oreo Dessert?
Yes, absolutely! To freeze, wrap the dessert tightly in plastic wrap and then in aluminum foil to prevent freezer burn. It can be stored in the freezer for up to 2 months. When you’re ready to enjoy it again, simply thaw it in the refrigerator overnight.
What should I do if my layers are too crumbly?
If your layers seem crumbly, don’t worry! Mix 1-2 tablespoons of melted unsalted butter into your crushed Oreos before assembling. This addition enhances richness and helps create a sturdier, more cohesive base for your No Bake Chocolate Peanut Butter Oreo Dessert.
Is this dessert safe for people with nut allergies?
Great question! This recipe contains peanut butter, which is not suitable for individuals with nut allergies. However, you can try substituting the peanut butter with sun butter or another nut-free spread to make it a safer option for those with such allergies.
Can I make this dessert ahead of time?
Absolutely! This dessert is perfect for make-ahead preparations. You can assemble it the day before your gathering and let it chill overnight, which actually enhances the flavors! Just give it at least 4-6 hours in the fridge or even overnight for the best results.
No Bake Chocolate Peanut Butter Oreo Dessert: Divine Indulgence
Ingredients
Equipment
Method
- Begin by crushing the Oreo cookies into fine crumbs.
- In a microwave-safe bowl, combine half of the milk chocolate chips with a portion of milk and microwave until smooth.
- In a large mixing bowl, beat the room temperature cream cheese until smooth, then add the vanilla pudding and peanut butter.
- Spread the peanut butter mixture over the Oreo base and sprinkle reserved Oreo crumbs on top.
- Mix the remaining cream cheese with the instant chocolate pudding and cooled chocolate mixture, then spread over the Oreo crumbs.
- Spread the whipped topping evenly across the chocolate layer for a fluffy finish.
- Cover with plastic wrap and refrigerate for at least 4-6 hours, or overnight for best results.
Leave a Reply