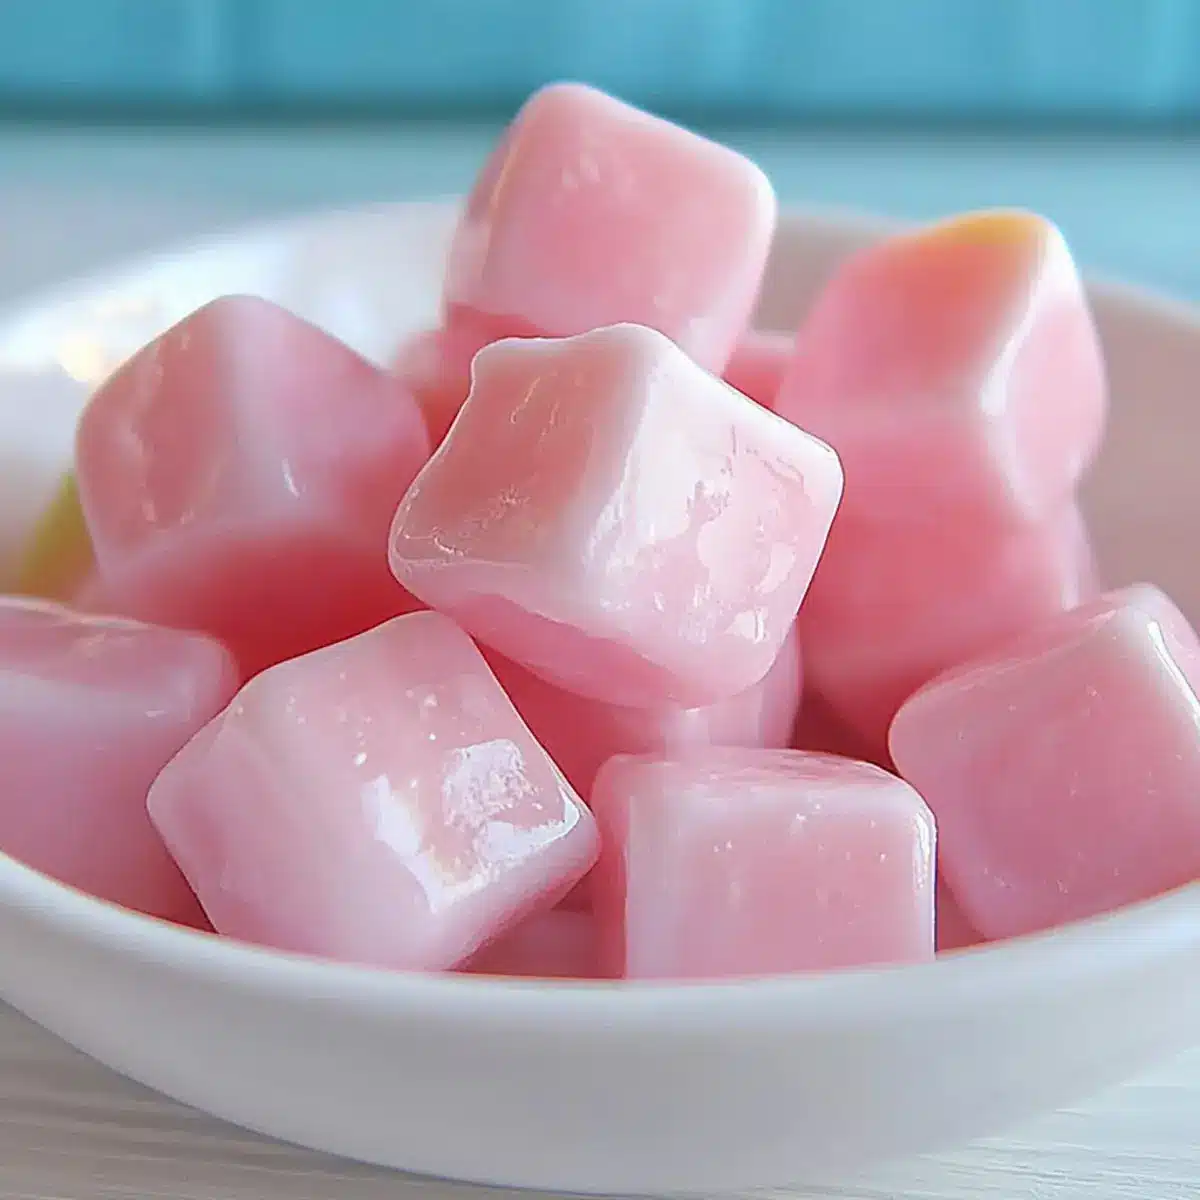
As I stood in my kitchen, the vibrant colors of the ingredients laid out before me felt like a whimsical throwback to my childhood. There’s something so incredibly satisfying about crafting your own treats, and that’s exactly what this Homemade Bubble Gum Recipe delivers. Not only is it an easy, budget-friendly adventure to take on, but it also allows you to channel the nostalgic joy of childhood bubble-blowing into a fun kitchen experiment. With just a handful of simple ingredients, you can create a chewy delight that’s customizable to your taste – from classic fruity flavors to wild twists. So, are you ready to indulge your inner kid and whip up some delightful, chewy bubbles?
Why Make Your Own Bubble Gum?
Nostalgia Awaits: This Homemade Bubble Gum Recipe lets you relive childhood memories in the most delicious way!
Budget-Friendly Fun: You’ll love that this recipe uses simple, economical ingredients—no need for pricey store-bought options.
Customizable Flavor: Choose your favorite flavors, whether it’s classic strawberry or adventurous bubblegum!
Easy and Engaging: Perfect for all skill levels, this delightful project makes for a fun experience to share with family or friends.
Perfect for Sharing: Ideal for parties, school events, or just to satisfy your sweet tooth, this gum is sure to be a crowd-pleaser!
If you enjoy hands-on projects like this, you might want to check out our Christmas Bubble Gum for a festive twist or maybe make some Chicken Tenders Dinner for the whole family!
Homemade Bubble Gum Ingredients
• Dive into the delightful world of Homemade Bubble Gum Recipe with these easy-to-find ingredients!
For the Gum Base
- Gum Base – Provides the essential chewiness; use a commercial alternative if homemade options are unavailable.
- Powdered Sugar – Sweetens and stabilizes; opt for a sugar substitute if you’re watching calories.
For the Moisture
- Corn Syrup – Vital for that perfect chewy texture; do not substitute if you want the right consistency.
For Flavor and Color
- Flavoring (e.g., vanilla, fruit extracts) – Essential for taste; use concentrated extracts for a burst of flavor.
- Food Coloring (optional) – Adds fun visual appeal; feel free to skip this for a natural look.
Get ready to enjoy the process as you gather these ingredients and embark on your bubble gum-making journey!
Step‑by‑Step Instructions for Homemade Bubble Gum Recipe
Step 1: Prepare the Gum Base
In a large mixing bowl, combine the gum base with the powdered sugar. Use your hands or a sturdy spoon to mix until you achieve a smooth, slightly sticky consistency. The mixture should resemble a play-dough texture, so be sure not to rush—this step usually takes about 5 minutes.
Step 2: Incorporate Wet Ingredients
Gradually pour in the corn syrup and your chosen flavoring, such as vanilla or fruit extract, into the gum base mixture. Use your hands to knead the mixture together until fully combined and pliable, about 3-5 minutes. It should be well blended, and you will notice a distinct sweet aroma as the flavors meld.
Step 3: Knead the Mixture
Transfer your bubble gum mixture onto a lightly powdered sugar-dusted surface. Begin kneading the gum for about 5-10 minutes until it becomes elastic and smooth. The texture should feel stretchable and slightly warm; this indicates it’s ready for shaping. Don’t forget to keep dusting with powdered sugar to prevent sticking.
Step 4: Shaping
Once kneaded, roll the bubble gum into small balls, or flatten it with a rolling pin to your desired thickness. If you prefer pieces, use a knife or pizza cutter to slice it into manageable squares. This is where creativity shines—thicker pieces will provide a more substantial chew!
Step 5: Setting
After shaping, place your bubble gum in a cool, dry area to set for approximately 30 minutes. This step helps it maintain its shape while allowing the flavors to deepen. You’ll know it’s ready when it feels firm yet retains a soft, pliable texture.
Step 6: Storage
To keep your delightful homemade bubble gum fresh, store it in an airtight container at room temperature. This will avoid moisture absorption and ensure it stays chewy. Use the gum within 1-2 weeks for the best flavor and texture. Enjoy your budget-friendly, nostalgic treat!
Make Ahead Options
These Homemade Bubble Gum treats are perfect for busy weeknights and make meal prep a breeze! You can prepare the gum base by mixing the gum base with powdered sugar up to 24 hours in advance; just store it in an airtight container to prevent it from drying out. Additionally, you can even knead the mixture and shape it into balls or slices, refrigerating them for up to 3 days. When you’re ready to indulge, simply allow the gum to come to room temperature before enjoying your delicious creation. This way, you’ll save time and still enjoy the sweet, nostalgic flavors of your homemade bubble gum!
What to Serve with Homemade Bubble Gum?
Gathering friends for a fun-filled day of sweetness? Treat yourself and your guests with delightful pairings that enhance the chewy magic of homemade bubble gum.
- Party Mix: A blend of sweet and salty snacks keeps the energy high and balances the sweetness of the gum.
- Fresh Fruit Skewers: Juicy, colorful fruit on a stick adds a refreshing and vibrant contrast, perfect for a mid-afternoon treat.
- Milkshakes: Creamy shakes in flavors like strawberry or vanilla create a nostalgia trip and make for a perfect pairing with bubble gum.
- Chocolate Dipped Pretzels: The sweet-salty crunch of these treats complements the chewiness of bubble gum, creating a delightful snacking experience.
- Popcorn: Light, fluffy popcorn sprinkled with your favorite sweet toppings brings texture variety and is a fun, shareable option.
- Soda Floats: Ice cream combined with bubbly soda makes a whimsical sweet treat that pairs wonderfully with the playful essence of bubble gum.
- Cookies: Classic chocolate chip cookies add a comforting and beloved touch to the cheerful atmosphere around your homemade gum.
- Lemonade: The tartness of fresh lemonade helps cleanse the palate and refreshes your taste buds, vibrantly contrasting the sweet gum.
- Candy Charcuterie Board: Arrange an assortment of candies and treats for a visual feast that invites everyone to indulge their sweet tooth further.
- Ice Cream Sundaes: With whipped cream, nuts, and a cherry on top, these desserts mirror the joy and fun of enjoying bubble gum.
Expert Tips for Homemade Bubble Gum
-
Measure Precisely: Accurate measurements are crucial. Too much powdered sugar can result in a dry texture, while too little may make the gum sticky.
-
Flavor Boost: Start with a few drops of flavoring and taste as you go. This Homemade Bubble Gum Recipe allows you to tailor the intensity to your liking!
-
Avoid Over-Kneading: Knead just enough to reach a smooth texture. Over-kneading may cause the gum to become tough rather than pliable.
-
Store Correctly: To keep your gum in top shape, always use an airtight container in a cool place. This helps maintain freshness and prevent drying out.
-
Experiment Wisely: When trying new flavors or color combinations, start small to ensure your gum turns out just right without overwhelming the base ingredients.
Homemade Bubble Gum Recipe Variations
Get ready to unleash your creativity with this customizable homemade bubble gum recipe! Dive into a world of delicious possibilities that’ll make each batch uniquely yours.
- Fruity Blast: Substitute extracts with fruit-flavored options like strawberry, raspberry, or blue raspberry for a vibrant taste explosion.
- Gourmet Twist: Use natural extracts like almond or coconut for an unexpected gourmet flavor that’ll surprise your taste buds. Think of the nutty richness blending delightfully with sweetness!
- Sugar-Free: Swap powdered sugar for a no-calorie sweetener suitable for cooking, allowing everyone to enjoy this treat without the sugar rush.
- Tart Surprise: Mix in a pinch of citric acid for a zesty kick that’ll make your gum pleasantly tangy, reminiscent of sour candies.
- Colorful Fun: Experiment with natural colorings like beet or turmeric to brighten up your gum while keeping it entirely natural. You can make each piece a visual treat!
- Spicy Kick: Add a pinch of cinnamon or chili powder for those who enjoy a little heat; it will surely create an intriguing flavor adventure!
- Layered Gum: For a decorative twist, layer different colored and flavored gums when shaping. This adds visual appeal and different tastes in every chew!
As you explore these delightful variations, don’t forget to keep it festive with some Christmas Bubble Gum or whip up an easy Homemade English Toffee for a cheerful treat to share during gatherings!
How to Store and Freeze Homemade Bubble Gum
Room Temperature: Store your homemade bubble gum in an airtight container at room temperature for up to 1-2 weeks to maintain optimal freshness and chewiness.
Refrigeration: If you prefer, you can refrigerate the gum; wrap it tightly to prevent absorbing flavors from other foods, which may change its delightful taste.
Freezing: For extended storage, you can freeze the gum. Wrap it in plastic wrap and store in an airtight container for up to 3 months. Thaw at room temperature before enjoying.
Reheating: If your gum becomes tough after storage, you can briefly knead it with your hands for a few minutes to restore its chewiness. Enjoy your homemade bubble gum!
Homemade Bubble Gum Recipe FAQs
What type of gum base should I use?
Absolutely! You can use a commercially available gum base for the best results, especially if you’re new to making bubble gum at home. If you’re adventurous, you can also make a homemade gum base, but commercially prepared options tend to guarantee the right texture and chewiness!
How do I store my bubble gum?
To store your delicious homemade bubble gum, keep it in an airtight container at room temperature for 1-2 weeks. If you’re in a warm climate, refrigerating it can help maintain its freshness. Just be sure to wrap it well to avoid absorbing odors from other foods.
Can I freeze my bubble gum for later?
Yes, you can freeze your bubble gum! Wrap each piece tightly in plastic wrap and place them in an airtight container or freezer bag. It can last in the freezer for up to 3 months. When you’re ready to enjoy it, simply thaw it at room temperature for a few minutes, and it should be good to go!
What should I do if my gum is too sticky?
If you find that your gum is sticky, you can dust it lightly with powdered sugar while kneading to help bring it to the right consistency. Make sure to balance the moisture by kneading just enough until it becomes pliable and smooth. Avoid adding too much sugar, as this can lead to a dry texture.
Are there any dietary considerations for this recipe?
You’ll be glad to hear this homemade bubble gum recipe is vegetarian! However, if you’re concerned about allergies, always check your flavorings and gum base for potential allergens. For a lower-calorie option, consider using sugar substitutes in place of powdered sugar (make sure they’re suitable for cooking).
Homemade Bubble Gum Recipe: Nostalgic Flavor in Every Chew
Ingredients
Equipment
Method
- In a large mixing bowl, combine the gum base with the powdered sugar. Mix until smooth and slightly sticky.
- Gradually pour in the corn syrup and chosen flavoring. Knead until fully combined and pliable.
- Transfer the mixture onto a powdered sugar-dusted surface and knead for about 5-10 minutes until elastic and smooth.
- Roll the gum into small balls or flatten it to slice into squares.
- Place the gum in a cool, dry area to set for approximately 30 minutes.
- Store in an airtight container at room temperature. Enjoy within 1-2 weeks for the best flavor.
Leave a Reply