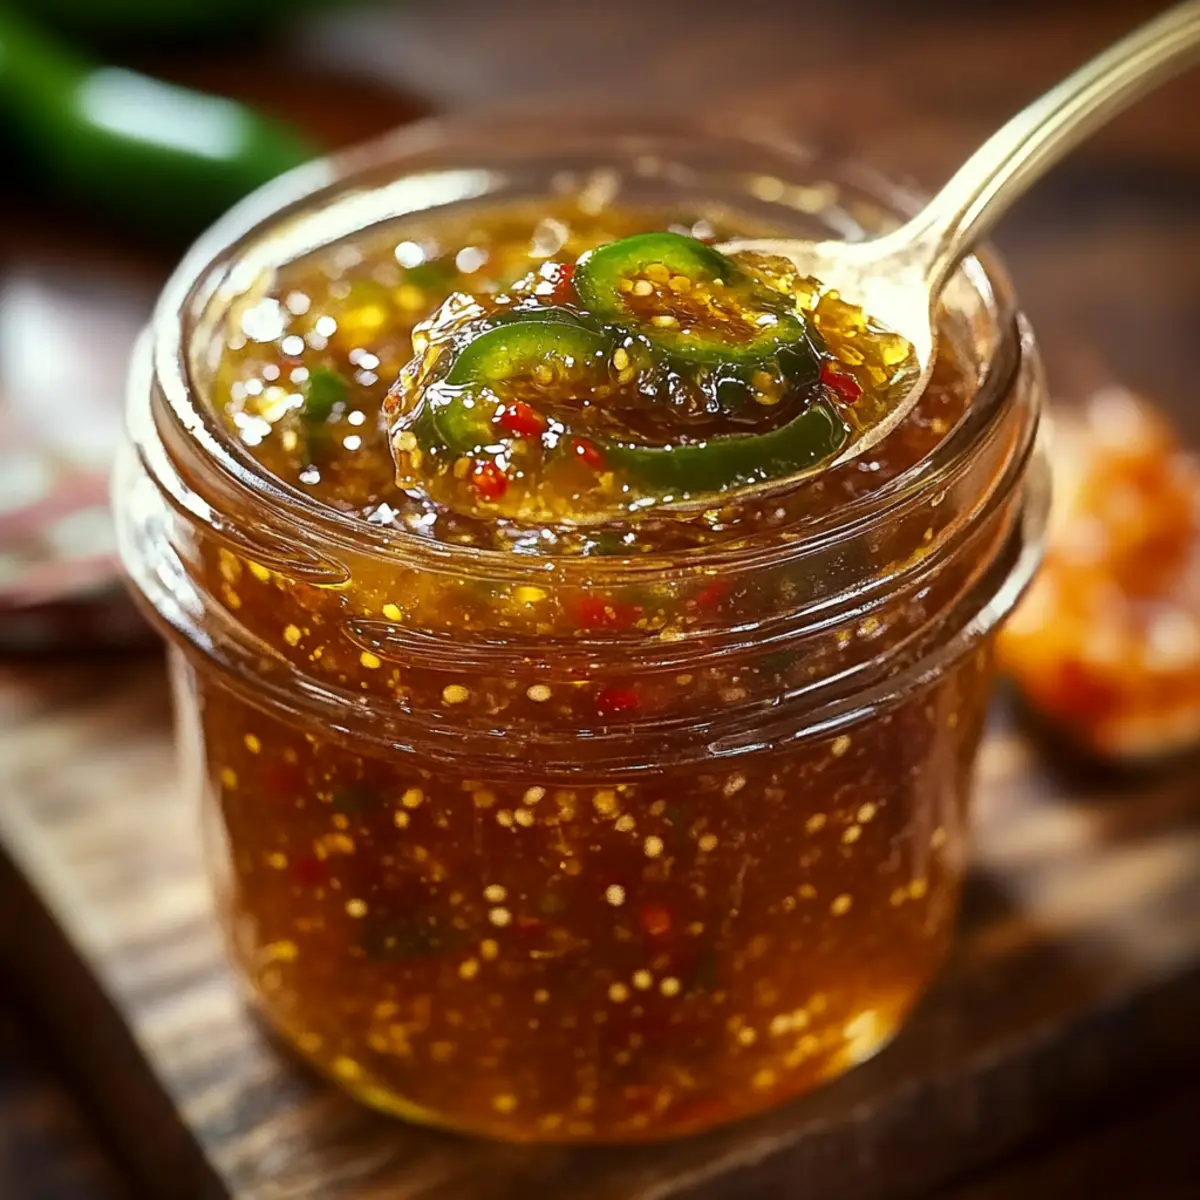
“Have you ever had a flavor experience that transforms a regular meal into something extraordinary?” That’s exactly what this homemade Jalapeño Jam delivers! Whipping up a batch takes just 30 minutes, making it an accessible and quick delight for any home chef eager to elevate their culinary creations. The harmony of sweet and spicy notes adds a refreshing twist to everything from grilled meats to cream cheese spreads on crackers. Not only is this jam a aesthetically vibrant green marvel, but it also serves as a versatile condiment that will impress both family and friends. Curious about how to make this addictive spread that’ll have everyone coming back for more? Let’s dive into this flavorful adventure!
Why is Jalapeño Jam a Must-Try?
Vibrant Flavor Combination: This jam brilliantly balances sweetness with a kick of jalapeño heat, creating an unforgettable flavor profile perfect for any palate.
Quick to Make: In just 30 minutes, you can whip up a batch of this spicy-sweet goodness without fuss.
Versatile Usage: Whether served atop grilled meats or slathered on warm biscuits, it adds a delightful twist to any dish!
Eye-Catching Color: Its emerald hue transforms simple meals into a visually stunning experience that will impress your guests.
Easy Storage: Enjoy the convenience of making a large batch that can be stored for up to a year—what’s not to love? For inspired serving suggestions, check out my Crockpot Jalapeno Stew that also complements this jam beautifully!
Jalapeño Jam Ingredients
For the Jam
- 4 cups finely chopped fresh jalapeños – Adds heat and vibrant color; for a milder taste, you can use bell peppers instead.
- 2 cups granulated sugar – Provides sweetness and helps in preservation; reducing sugar can alter consistency.
- 1 cup apple cider vinegar – Offers tanginess, balancing sweetness; try white vinegar for different acidity.
- 1/4 cup finely chopped red bell pepper – Adds sweetness and color contrast to the jam; enhances visual appeal.
- 1 teaspoon salt – Elevates the overall flavor profile; no substitutions necessary.
- 1 package (1.75 oz) fruit pectin – Essential for thickening the jam; alternatively, cook longer for a natural thickening method.
Enjoy creating this Jalapeño Jam that beautifully pairs sweet and spicy elements into one delightful condiment!
Step‑by‑Step Instructions for Jalapeño Jam
Step 1: Prepare Jalapeños
Begin by thoroughly washing and drying 4 cups of fresh jalapeños. For a milder flavor, remove the seeds and membranes before finely chopping them. This step is crucial for achieving that vibrant heat without overwhelming your taste buds. Aim for a fine chop to ensure the jalapeños blend seamlessly into your jam.
Step 2: Combine Ingredients
In a large pot, combine the finely chopped jalapeños with 2 cups of granulated sugar and 1 cup of apple cider vinegar. Stir the mixture well to ensure the ingredients are evenly distributed. Over medium heat, allow the mixture to sit for a few minutes until the sugar starts to dissolve, creating a colorful base for your delicious Jalapeño Jam.
Step 3: Cook Mixture
Increase the heat to medium-high, bringing the mixture to a rapid boil. Keep stirring regularly to prevent the sugar from burning, and watch for the color to deepen, which indicates it’s cooking properly. Maintain this boil for about 10 minutes, and enjoy the aromatic scent filling your kitchen as the flavors meld beautifully.
Step 4: Add Pectin
Once the mixture has cooked down, it’s time to thicken the jam. Stir in the packet of fruit pectin, ensuring it dissolves completely while mixing vigorously. Continue boiling for an additional 1 to 2 minutes, taking note of how the jam thickens and the color intensifies, preparing your Jalapeño Jam for a perfect consistency.
Step 5: Prep Jars
While the jam is cooking, sterilize your canning jars. Start by washing them in hot, soapy water, and then place them in a boiling water bath for 10 minutes to eliminate any bacteria. This step is essential to ensure that your finished Jalapeño Jam stays fresh and safe for a long time.
Step 6: Fill Jars
Carefully ladle the hot Jalapeño Jam into the prepared sterilized jars, filling them to about 1/4 inch from the top. Use a clean cloth to wipe down the rims of each jar to remove any residue that could interfere with sealing. This step helps guarantee a proper seal, keeping your jam fresh.
Step 7: Seal Jars
Secure the lids onto the filled jars tightly, ensuring they are leak-proof. Place the jars upside down on a clean kitchen towel for 5 minutes, allowing the heat to create a vacuum seal. After five minutes, gently turn the jars upright and allow them to cool completely at room temperature, solidifying your homemade Jalapeño Jam.
Expert Tips for Jalapeño Jam
- Wear Gloves: Handling jalapeños can cause skin irritation. Protect your hands by wearing gloves, especially when chopping.
- Refine Your Heat Level: For a milder jam, always remove the seeds and membranes from the jalapeños. This simple step makes a big difference in taste.
- Watch Your Sugar: Reducing the sugar can affect the jam’s consistency and shelf life. Stick to the recommended amount for the best results.
- Thicken Naturally: If you prefer a homemade method for thickening, cook the mixture longer to evaporate moisture instead of using pectin.
- Cool and Store Properly: Always allow jars to cool completely before storing. This helps create a proper vacuum seal, ensuring your Jalapeño Jam stays fresh.
Jalapeño Jam Variations & Substitutions
Feel free to get creative with your Jalapeño Jam, transforming it to suit your taste preferences and dietary needs!
- Spicy Twist: Add more jalapeños or mix in habaneros for an extra kick that spice lovers will adore. Mix different peppers for a flavorful blast!
- Sweet Alternative: Swap out some sugar with mashed mango or pineapple for a tropical, fruity flavor that enhances the sweetness.
- Vinegar Variations: Use lime juice instead of vinegar for a tangy twist that brightens the jam with citrus notes.
- Fruit Fusion: Incorporate berries like strawberries or raspberries for a unique berry-jalapeño jam that’s both sweet and savory. This gives a new dimension to your spread!
- Herb Infusion: Stir in fresh cilantro or basil for a burst of herbal freshness that complements the spice beautifully.
- Smoky Flavor: Add a dash of smoked paprika or chipotle powder for a delightful smoky undertone that’ll take your jam to the next level.
- Sugar-Free Option: Use sugar substitutes like agave syrup or monk fruit for a lower-calorie version that still maintains that delicious sweetness. This allows for all the flavor with less guilt!
For more inspiration on how to use this delicious jam, check out my recipe for Crockpot Jalapeno Stew! It’s another way to enjoy that zingy jalapeño flavor.
Make Ahead Options
Making Jalapeño Jam is perfect for busy home cooks who want to save time during the week! You can chop the jalapeños and bell pepper up to 24 hours in advance; simply store them in an airtight container in the refrigerator to maintain freshness and prevent browning. Additionally, you can measure out the sugar and vinegar ahead of time, keeping them sealed until you’re ready to cook. When you’re prepared to make the jam, simply combine the prepped ingredients, cook according to the recipe, and proceed with canning. This way, you’ll enjoy delectable, homemade Jalapeño Jam with minimal effort on a busy day!
What to Serve with Irresistible Jalapeño Jam
Ready to elevate your meals with a burst of flavor? This spicy-sweet condiment can truly enhance a variety of dishes and snacks!
-
Creamy Goat Cheese: The tangy richness of goat cheese pairs beautifully, mellowing the heat while complementing the jam’s sweetness.
-
Grilled Chicken: A lively glaze for your grilled chicken, its sweet-spicy notes infuse warmth and depth, transforming a simple dish into something extraordinary.
-
Savory Crackers: Spread the jam atop buttery crackers for a crunchy contrast, creating an inviting appetizer that will delight your guests.
-
Baked Brie: Top a warm wheel of Brie with jalapeño jam, allowing it to melt slightly—this decadent combination offers rich, creamy flavors with a spicy kick.
-
Pulled Pork Sandwiches: Layer jalapeño jam on pulled pork for a flavorful sandwich filling that perfectly balances sweet and savory, making every bite irresistible.
-
Crispy Tacos: Use it as a zesty topping for tacos, bringing an explosive flavor experience that’ll make your next taco night unforgettable.
-
Sparkling Wine: The effervescence of a chilled sparkling wine cleanses the palate, making it an excellent companion to the bold flavors of your jalapeño jam.
-
Chocolate Desserts: Pair with rich chocolate cake or brownies for a surprising twist, as the sweetness cuts through the chocolate while adding an exciting flavor layer.
How to Store and Freeze Jalapeño Jam
Fridge: Store opened jars of Jalapeño Jam in the refrigerator for up to 1 month. Make sure the lid is tightly sealed to maintain freshness and flavor.
Freezer: For longer storage, freeze your Jalapeño Jam in airtight containers or freezer-safe bags for up to 1 year. Remember to leave some headspace, as the jam will expand upon freezing.
Room Temperature: Unopened jars can be kept in a cool, dark place for up to 1 year. Ensure they are in a dry environment to prevent spoilage before opening.
Reheating: If the jam thickens after refrigeration, gently reheat it in a saucepan over low heat until it becomes spreadable again. Enjoy it fresh or warmed!
Jalapeño Jam Recipe FAQs
How do I choose the right jalapeños for this recipe?
Absolutely! Opt for firm, vibrant green jalapeños without dark spots or soft spots. The firmer they are, the fresher and tastier your jam will be. If you’re looking for more heat, consider selecting smaller jalapeños since they often pack more punch!
What is the best way to store unopened jars of Jalapeño Jam?
Very simple! Unopened jars of Jalapeño Jam can be stored in a cool, dark place like your pantry for up to 1 year. Just make sure the environment is dry and that the jars are tightly sealed to prevent any spoilage. Always label them with the date to keep track of their freshness!
Can I freeze Jalapeño Jam for long-term storage?
Certainly! To freeze your Jalapeño Jam, use airtight containers or freezer-safe bags. Leave some headspace—about 1 inch—as the jam will expand when frozen. It can be stored like this for up to 1 year. When you’re ready to use it, thaw in the fridge overnight or gently reheat in a saucepan over low heat.
What should I do if my Jalapeño Jam isn’t thickening?
No worries! If your jam hasn’t thickened as desired, you can try simmering it longer. Heat the jam on low until it thickens more, but if you prefer to thicken it quickly, dissolve an additional packet of pectin in a small amount of water and stir that in. Allow it to boil for 1-2 minutes while stirring continuously to reach the desired consistency.
Is Jalapeño Jam safe for pets?
Be cautious! Jalapeño Jam contains sugar and vinegar, which can be problematic for pets. While the jalapeños themselves aren’t poisonous, the sugar content can lead to health issues for your furry friends. It’s best to keep this delicious treat out of their reach and instead share some plain cooked vegetables if you want to include them in your culinary adventures!
Sweet and Spicy Jalapeño Jam to Elevate Your Meals
Ingredients
Equipment
Method
- Prepare jalapeños by thoroughly washing and drying them. For a milder flavor, remove the seeds and membranes before finely chopping.
- In a large pot, combine the finely chopped jalapeños with sugar and apple cider vinegar. Stir well to ensure even distribution.
- Increase heat to medium-high and bring the mixture to a rapid boil, stirring regularly for about 10 minutes.
- Stir in the packet of fruit pectin until it dissolves completely, then continue boiling for an additional 1 to 2 minutes.
- While the jam is cooking, sterilize canning jars by washing them in hot soapy water and placing them in a boiling water bath for 10 minutes.
- Ladle the hot jam into prepared sterilized jars, filling to about 1/4 inch from the top. Wipe down the rims of each jar.
- Secure the lids tightly onto the filled jars and place them upside down on a clean kitchen towel for 5 minutes to create a vacuum seal.
Leave a Reply