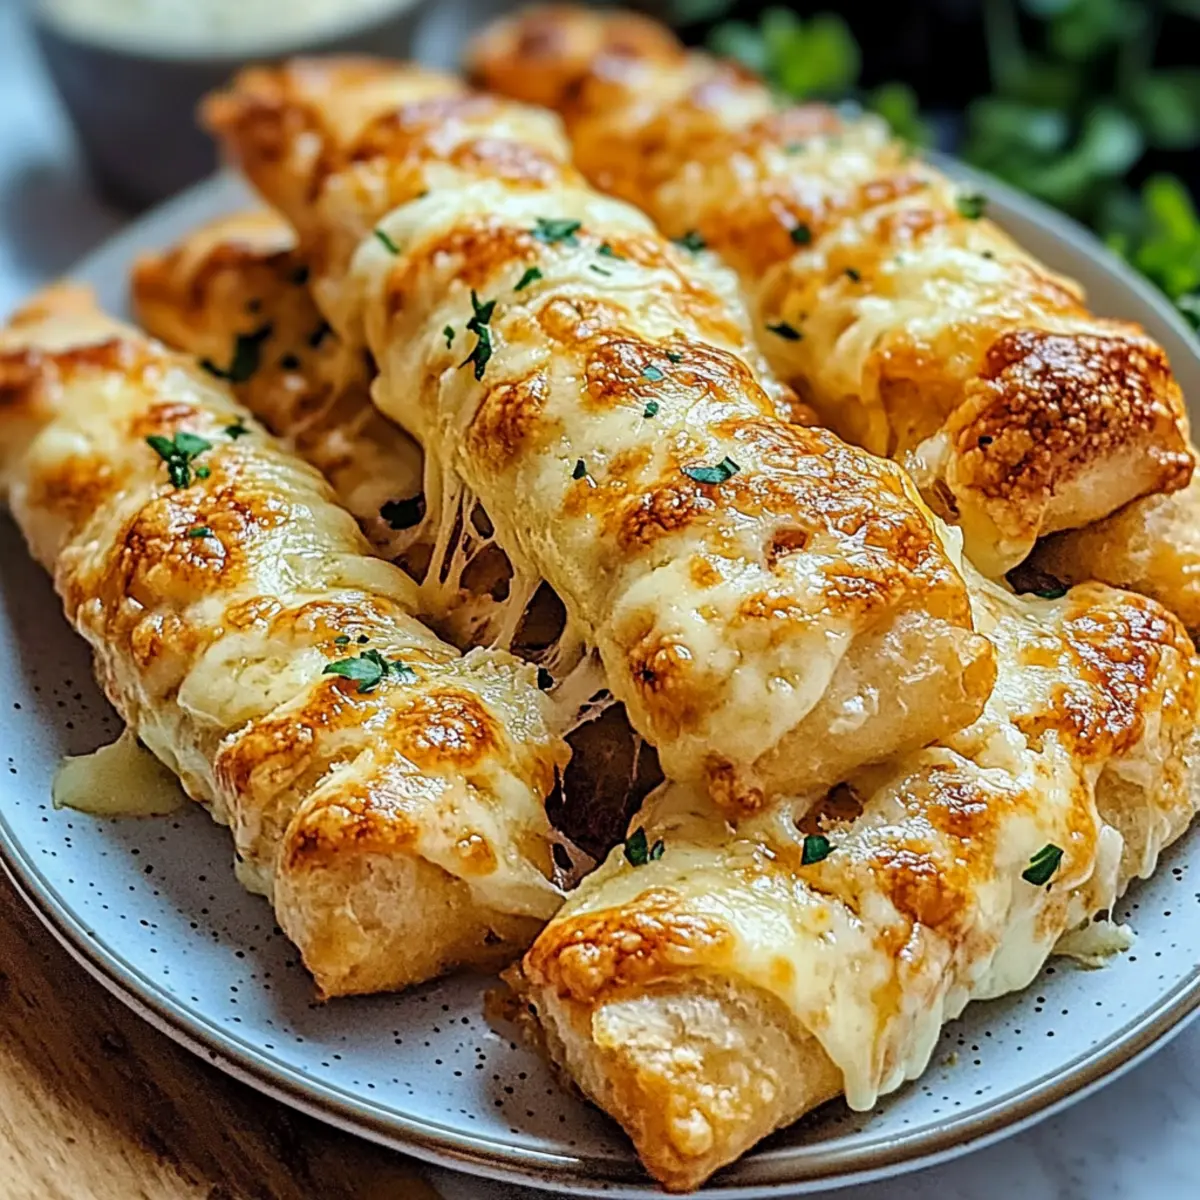
As I pulled a tray of Cheesy Breadsticks from the oven, the rich aroma of melted cheese mingled with warm, buttery goodness wafted through my kitchen, instantly transporting me to that comforting spot of a neighborhood pizzeria. These cheesy delights, with their perfectly crisp edges and soft, gooey centers, are more than just an appetizer; they’re a joyous reminder of the simple pleasures in homemade food. Whipping up these Cheesy Breadsticks not only quenches cravings for something more meaningful than fast food but also offers a comforting experience that’s quick to prepare and sure to impress family and friends alike. Whether paired with marinara sauce for dipping or enjoyed on their own, these breadsticks will soon become your go-to snack. Are you ready to bring a cheesy touch to your next gathering?
Why Are These Cheesy Breadsticks Special?
Simplicity at Its Finest: This recipe requires minimal ingredients and can be prepared in just 30 minutes, making it ideal for any home cook.
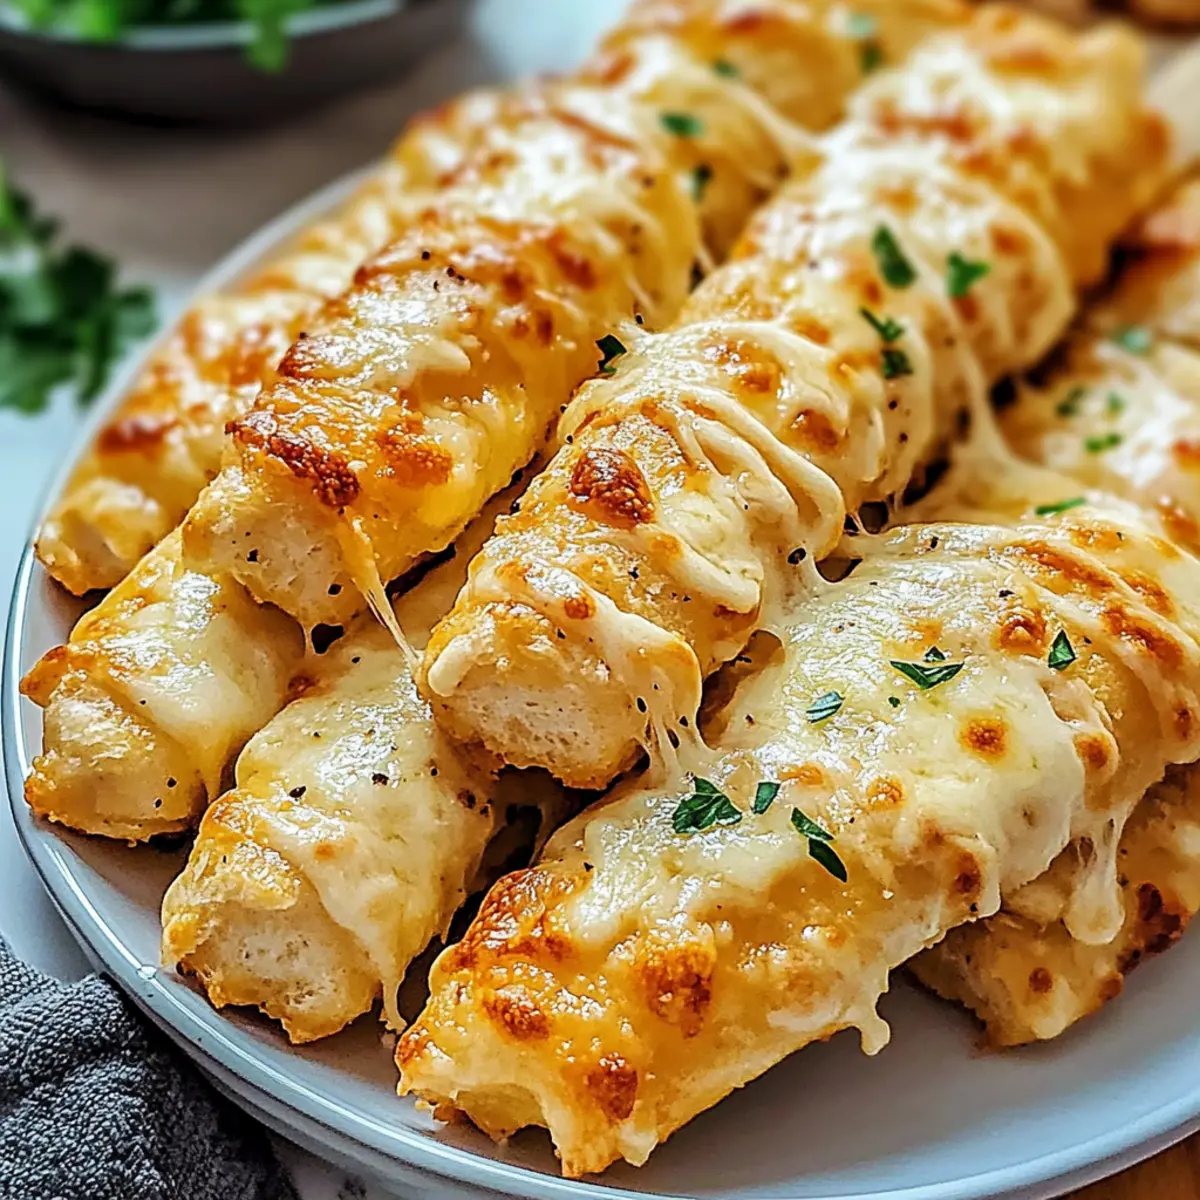
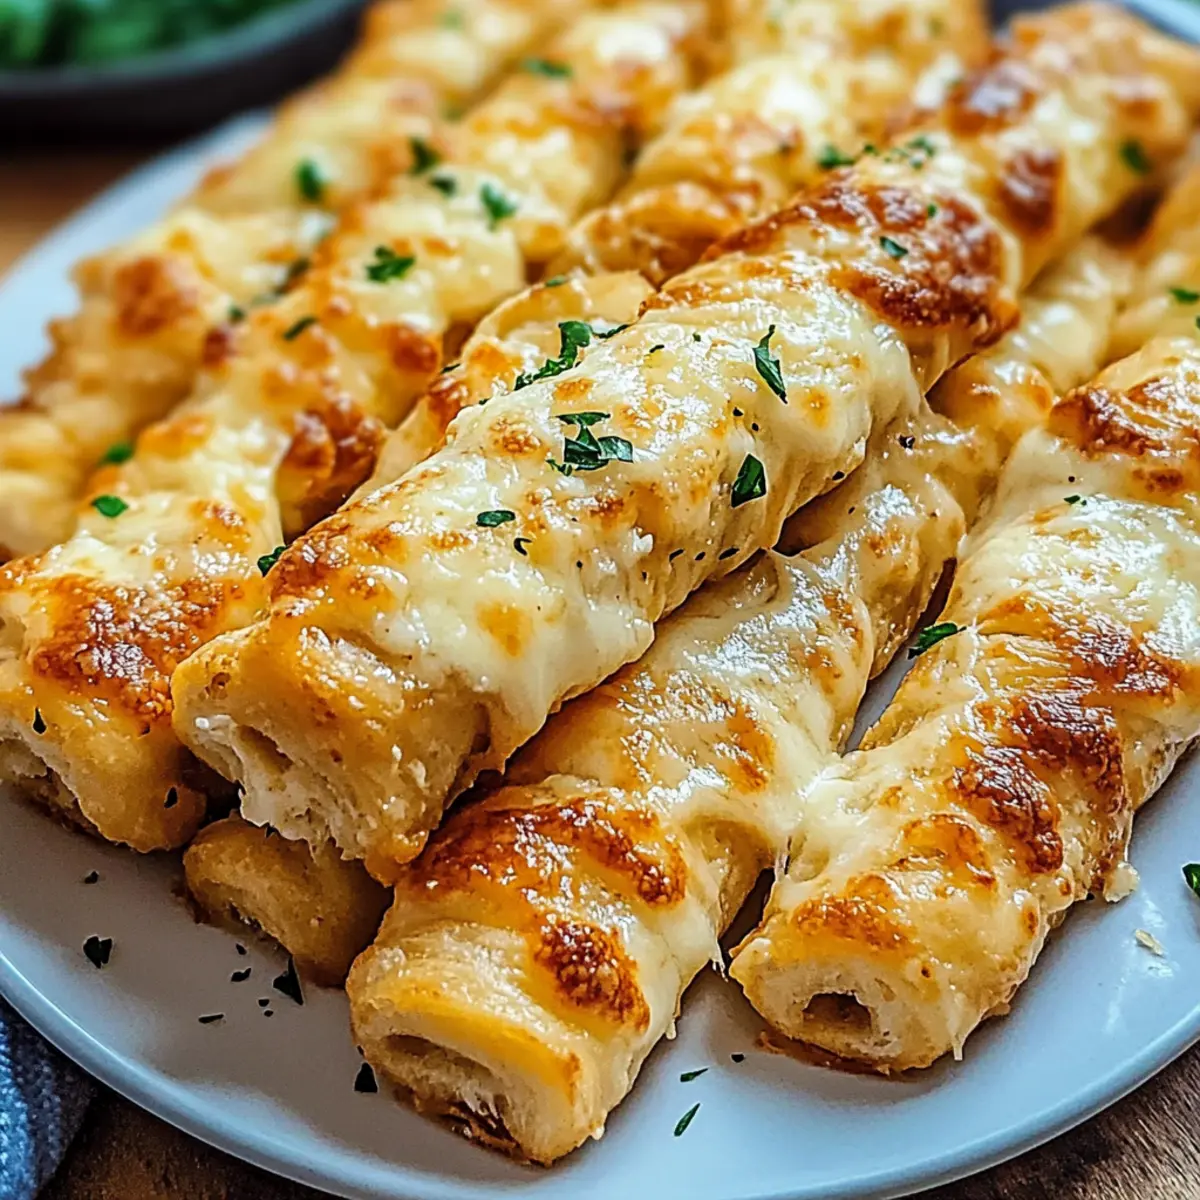
Gooey Goodness: The melty mozzarella blended with savory parmesan creates a cheese lover’s dream, providing an irresistible stretch with every bite.
Crowd-Pleaser: Perfect for parties, game nights, or as an appetizer, these cheesy sticks are sure to disappear quickly! Pair them with marinara sauce for an extra flavor punch.
Versatile Wonder: You can easily tweak the recipe by adding spices or herbs like oregano for a personalized twist. Also, consider serving them with a fresh garden salad, just like with my Smashburger Quesadillas Cheesy for a delightful meal!
Freezing Ready: Make a double batch and freeze the extras for a quick snack anytime. Simply pop them in the oven when the craving strikes!
Cheesy Breadsticks Ingredients
For the Dough
• Mozzarella Cheese – Provides gooeyness and melty texture; substitute with provolone for a stronger flavor.
• Breadsticks – The base of the recipe, offering structure; use store-bought or homemade options.
For the Cheese Mixture
• Butter – Adds richness and a shiny finish; can be replaced with olive oil for a lighter option.
• Garlic Powder – Enhances flavor profile; fresh minced garlic can also be used for a bolder taste.
• Parmesan Cheese – Adds a salty, nutty element; nutritional yeast can be a great vegan alternative.
Optional Extras
• Italian Herbs – Consider adding oregano and basil into the cheese mixture for extra flavor.
• Red Pepper Flakes – Spice things up for those who enjoy a little kick.
These Cheesy Breadsticks are sure to become a favorite in your home, offering a delightful blend of flavors in every bite!
Step‑by‑Step Instructions for Cheesy Breadsticks
Step 1: Prep Breadsticks
Begin by preheating your oven to 400°F (200°C), following the package instructions if using store-bought breadsticks. Line a baking sheet with parchment paper for easy cleanup. Once prepared, arrange the breadsticks neatly on the baking sheet, ensuring they’re spaced apart to allow for even cooking and cheese melty goodness.
Step 2: Make Cheese Mixture
In a large mixing bowl, combine the shredded mozzarella cheese and grated parmesan cheese, adding in the garlic powder and melted butter. Stir the mixture thoroughly until all ingredients are well incorporated. The goal is a creamy, cheesy blend that will envelop your breadsticks in gooey goodness once baked.
Step 3: Apply Cheese Mixture
Using a spatula or spoon, evenly distribute the cheese mixture over each breadstick. Make sure to cover them generously for that ultimate cheesy flavor experience. For a touch of personalization, consider sprinkling some extra garlic powder or Italian herbs for added aroma and taste before moving on to the next step.
Step 4: Bake
Carefully place the baking sheet in the preheated oven and bake the cheesy breadsticks for approximately 15 minutes. Keep an eye on them; you’re looking for a bubbly cheese top and golden edges that signal perfect doneness. The mouthwatering aroma will fill your kitchen as they bake!
Step 5: Cool and Serve
Once baked, remove the cheesy breadsticks from the oven and let them cool for a few minutes on the sheet. This brief cooling period ensures the cheese sets slightly for easier slicing. After cooling, use a pizza cutter to slice them for serving; enjoy this delightful snack warm, paired perfectly with marinara sauce if desired!

Expert Tips for Cheesy Breadsticks
-
Use Fresh Ingredients: For the best flavor, opt for freshly shredded cheese instead of pre-packaged. This enhances the gooey texture of your Cheesy Breadsticks.
-
Prevent Soggy Breadsticks: Ensure the oven is fully preheated before baking to achieve that perfect crispy texture. A cold oven can lead to sogginess.
-
Mix it Up: Don’t hesitate to get creative! Add toppings like chopped herbs or spices to the cheese mixture for a personalized twist on your Cheesy Breadsticks.
-
Watch the Clock: Baking times may vary slightly depending on your oven, so keep a close eye on your breadsticks, especially towards the end of cooking.
-
Storage for Later: Store leftovers in an airtight container in the fridge for up to 2 days. Reheat in the oven instead of the microwave to maintain their crispy quality.
Make Ahead Options
These Cheesy Breadsticks are perfect for meal prep enthusiasts! You can prepare the cheese mixture and apply it to the breadsticks up to 24 hours in advance, just refrigerate them tightly wrapped. To do this, mix the mozzarella, parmesan, garlic powder, and melted butter as directed, then spread it over the breadsticks. Cover with plastic wrap to keep them fresh and prevent browning. When you’re ready to serve, simply pop them in the preheated oven for about 15 minutes until the cheese is bubbly and edges are golden. This way, you can enjoy delicious, gooey Cheesy Breadsticks with minimal effort during your busy weeknights!
What to Serve with Gooey Cheesy Breadsticks
Savor the delightful moments of sharing a meal with loved ones, and let these cheesy delights elevate your dining experience.
-
Marinara Sauce: Perfectly complements the cheesy flavors, offering a tangy contrast that enhances each bite.
-
Garlic Butter Dip: A luscious blend of melted butter and garlic that adds an extra layer of indulgence to your breadsticks.
-
Caesar Salad: Crisp romaine, crunchy croutons, and creamy dressing provide a refreshing balance to the richness of the breadsticks.
-
Steak or Grilled Chicken: Hearty proteins that make for a satisfying meal; their savory flavors pair wonderfully with the cheesy goodness.
-
Vegetable Platter: A plethora of fresh, colorful veggies adds a crunchy contrast; dip them in ranch or hummus for added fun.
-
Wine Pairing: A chilled glass of white wine, like Chardonnay, complements the creamy texture with its crisp acidity and fruity notes.
-
Fruit Salad: A light and refreshing finish, offering a sweet contrast to the savory breadsticks and balancing out the meal beautifully.
-
Chocolate Fondue for Dessert: End the evening on a sweet note by dipping strawberries or marshmallows in a rich chocolate sauce after the savory bites.
How to Store and Freeze Cheesy Breadsticks
-
Room Temperature: Cheesy Breadsticks are best enjoyed fresh, but if you need to store them for a few hours, keep them covered at room temperature for up to 2 hours to maintain warmth.
-
Fridge: Store any leftovers in an airtight container in the refrigerator for up to 2 days. This helps keep the breadsticks from drying out while preserving their cheesy flavor.
-
Freezer: For longer storage, freeze Cheesy Breadsticks. Wrap them in foil or plastic wrap and place them in a freezer-safe bag for up to 3 months.
-
Reheating: To restore the cheesy gooeyness, reheat in a preheated oven at 350°F (175°C) for about 10-15 minutes until heated through and crisp – no one likes a soggy breadstick!
Cheesy Breadsticks Variations Made Easy
Feel free to mix and match these variations to create your perfect cheesy breadstick experience!
-
Dairy-Free: Use vegan mozzarella and olive oil to maintain that cheesy flavor without dairy.
-
Herb-Infused: Mix in dried oregano and basil into the cheese mixture for a delightful aromatic twist. The added herbs give your breadsticks a slice of Italian charm that is simply irresistible.
-
Spicy Kick: Add chopped jalapeños or a sprinkle of red pepper flakes for an extra layer of heat. This fiery twist will make your taste buds dance!
-
Veggie-Loaded: Fold in some finely chopped spinach or sun-dried tomatoes to the cheese mixture. This not only adds nutrition but also a pop of color and flavor that elevates your breadsticks.
-
Garlic Lovers’ Delight: Replace garlic powder with freshly minced garlic for a bolder flavor profile. The intoxicating aroma of fresh garlic will have everyone craving more.
-
Smoky Flavor: Incorporate smoked paprika or a splash of liquid smoke into the cheese mixture for a savory depth. This not only imparts a unique taste but takes these cheesy delights to another level.
-
Parmesan Topping: Sprinkle extra grated parmesan cheese on top before baking for a crunchy, cheesy crust. This will achieve that beautiful golden brown finish that everyone loves.
-
Artisan Twist: Swap the breadsticks for homemade dough using your favorite pizza or focaccia recipe. Just shape and bake them following the same method for a truly gourmet experience!
Once you’ve made these cheesy delights, don’t forget to pair them with marinara sauce for dipping, just like with my One Pot Cheesy Taco Pasta Skillet or enjoy them alongside a fresh garden salad!
Cheesy Breadsticks Recipe FAQs
How do I choose the right cheese for Cheesy Breadsticks?
Absolutely! For the best cheesy stretch and gooeyness, I recommend using fresh mozzarella cheese. If you want a stronger flavor, feel free to substitute it with provolone. Always look for cheese that feels soft and moist but has no dark spots, as that can indicate it’s past its prime.
How should I store leftover Cheesy Breadsticks?
Very! Store any leftovers in an airtight container in the refrigerator for up to 2 days. This method helps keep your breadsticks from drying out while preserving that delicious cheesy flavor. If they cool down completely, you can simply pop them back into a warm oven to revive their fresh-baked texture.
Can I freeze Cheesy Breadsticks?
Definitely! To freeze your Cheesy Breadsticks, wrap each one individually in foil or plastic wrap, or place them in a single layer in a freezer-safe bag. They will stay fresh for up to 3 months. When you’re ready to enjoy them, preheat your oven to 350°F (175°C) and reheat for about 10-15 minutes until they’re warmed through and perfectly crisp.
What should I do if my cheesy topping doesn’t melt properly?
I often recommend checking with your oven temperature first. Ovens can vary, so make sure yours is fully preheated before baking. If you find that the cheese hasn’t melted well, you can try covering the breadsticks with aluminum foil during the last few minutes of baking. This will help trap heat and moisture, ensuring that your cheese becomes gorgeously melty!
Are there any dietary considerations I should keep in mind with this recipe?
Absolutely! If you’re cooking for someone with lactose intolerance, you can substitute Mozzarella and Parmesan with lactose-free cheese or nutritional yeast for a cheesy, vegan alternative. Additionally, if you’re preparing these for pets, remember to keep any allium ingredients like garlic away, as they’re toxic to animals!
Irresistibly Gooey Cheesy Breadsticks You’ll Crave Daily
Ingredients
Equipment
Method
- Preheat oven to 400°F (200°C) and prepare a baking sheet with parchment paper. Arrange breadsticks on the sheet.
- In a large mixing bowl, combine shredded mozzarella, grated parmesan, garlic powder, and melted butter until well mixed.
- Evenly distribute the cheese mixture over each breadstick, covering generously.
- Bake in the preheated oven for about 15 minutes until cheese is bubbly and edges are golden.
- Remove from oven and let cool for 5 minutes before slicing with a pizza cutter. Serve warm with marinara sauce if desired.
Leave a Reply