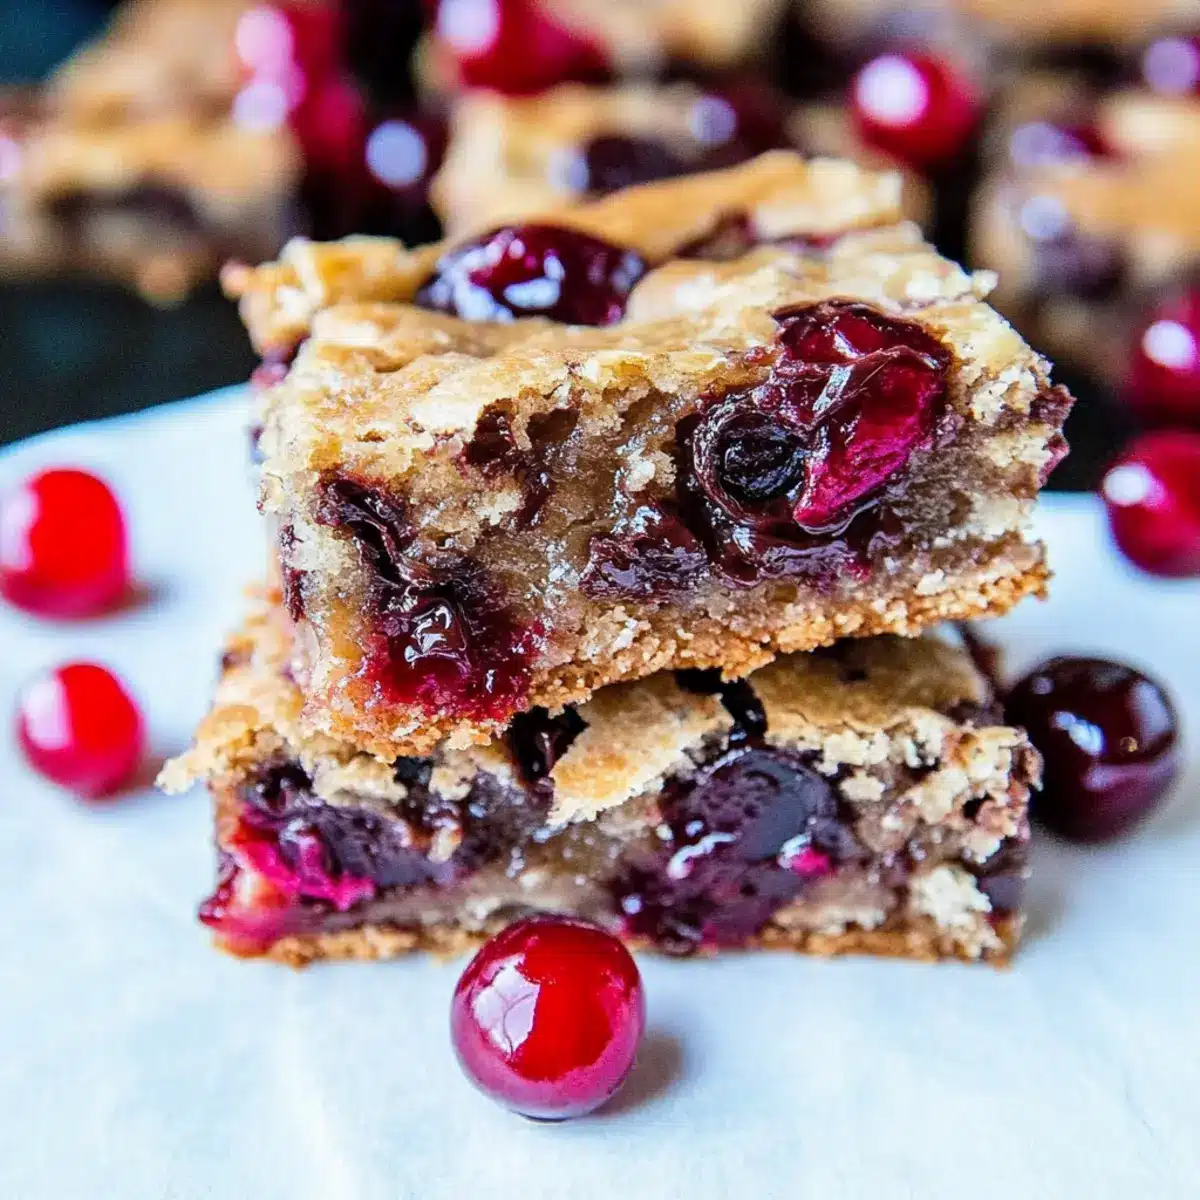
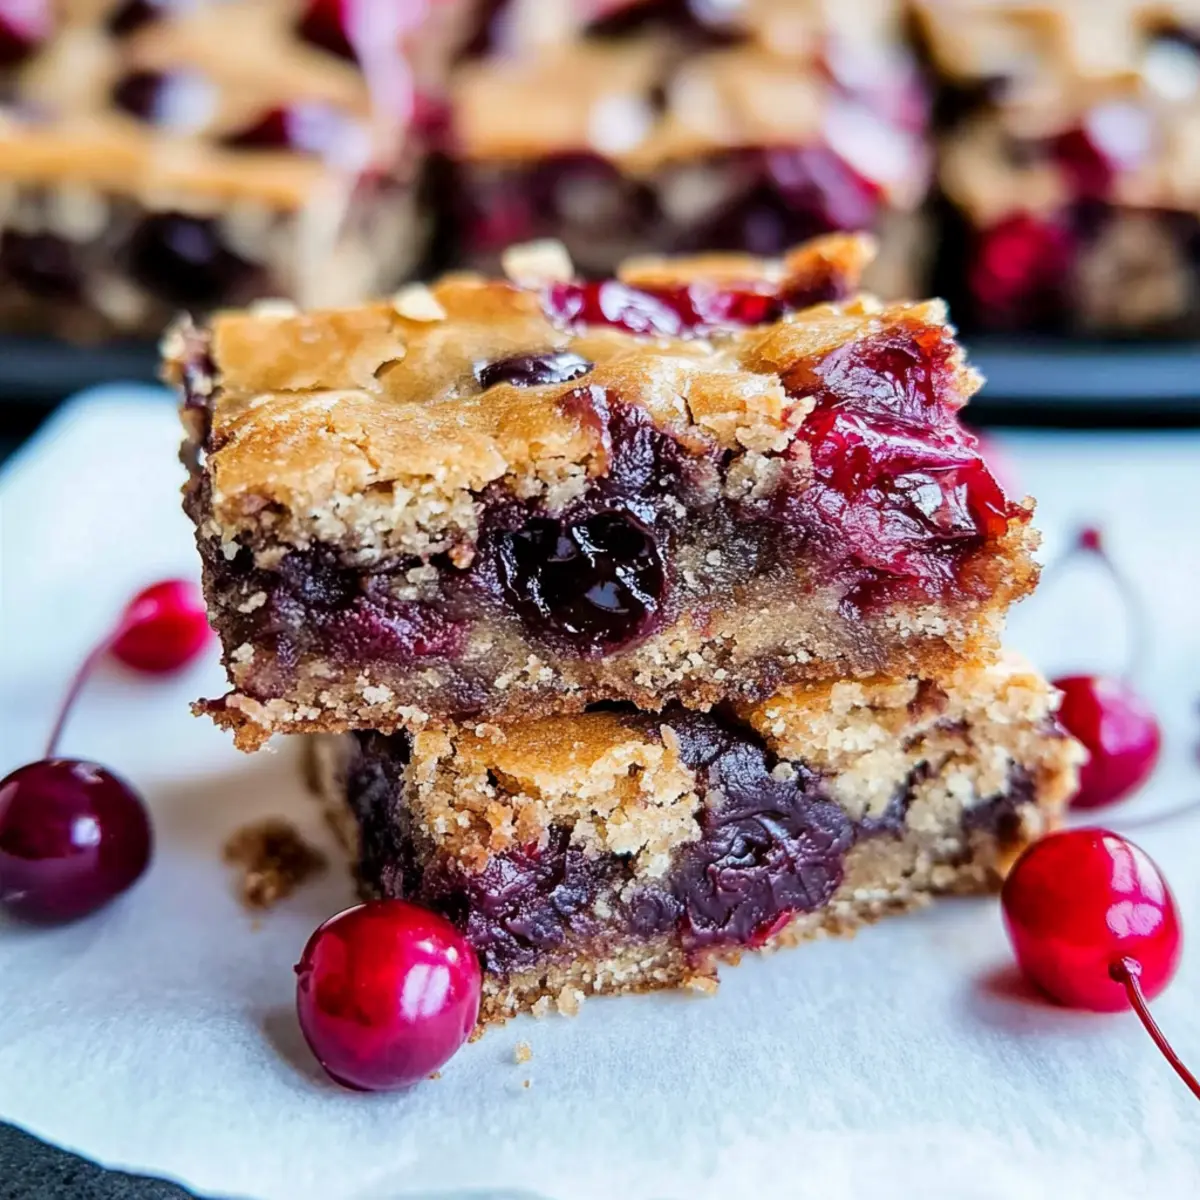
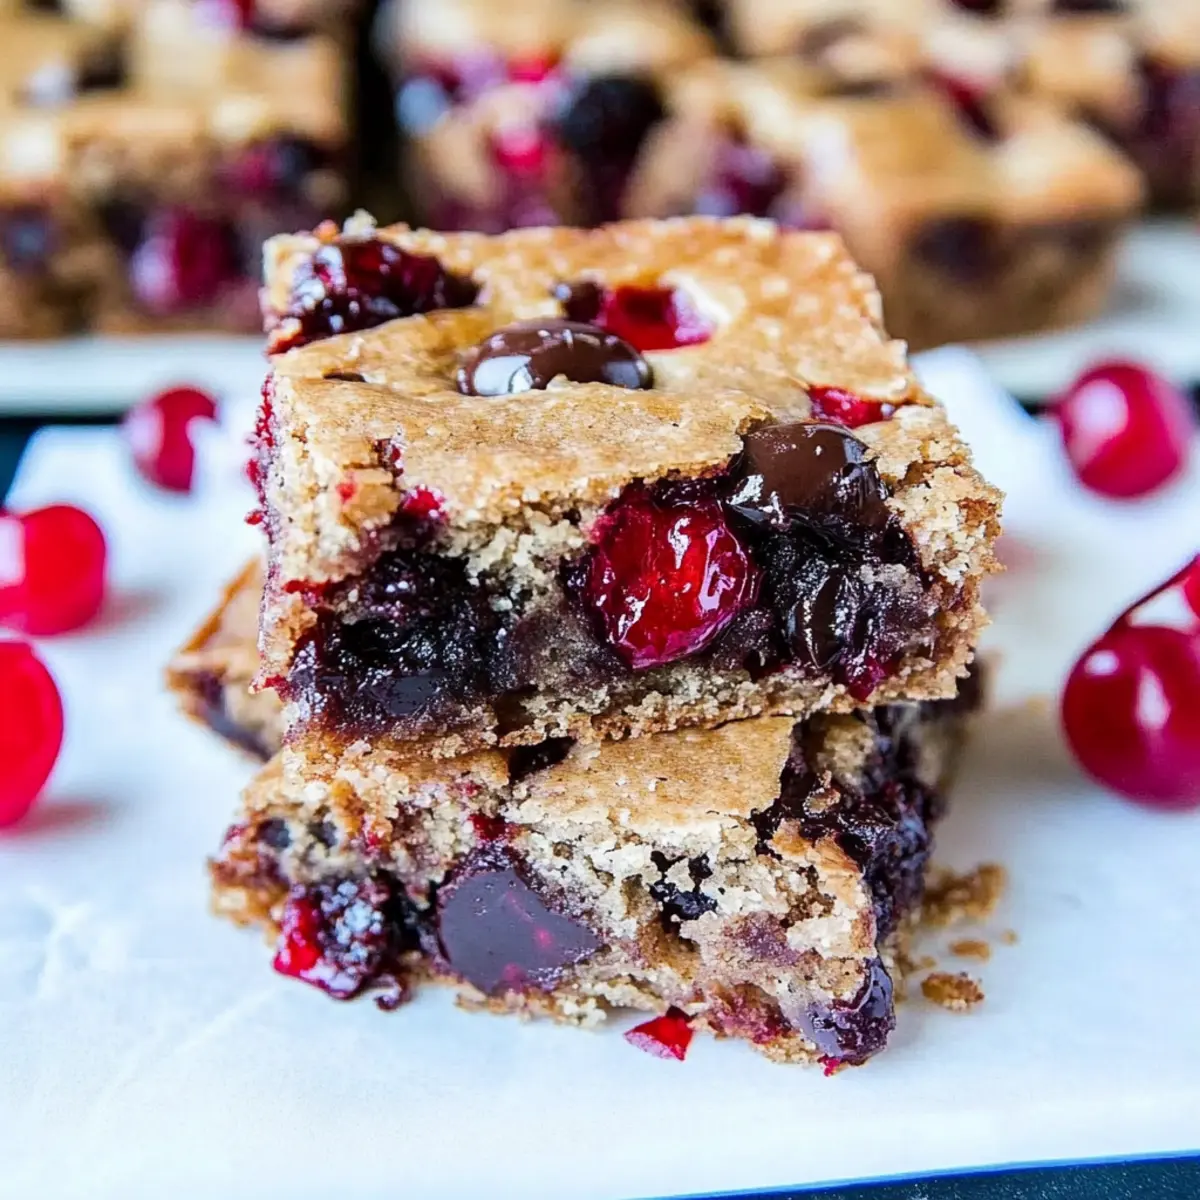
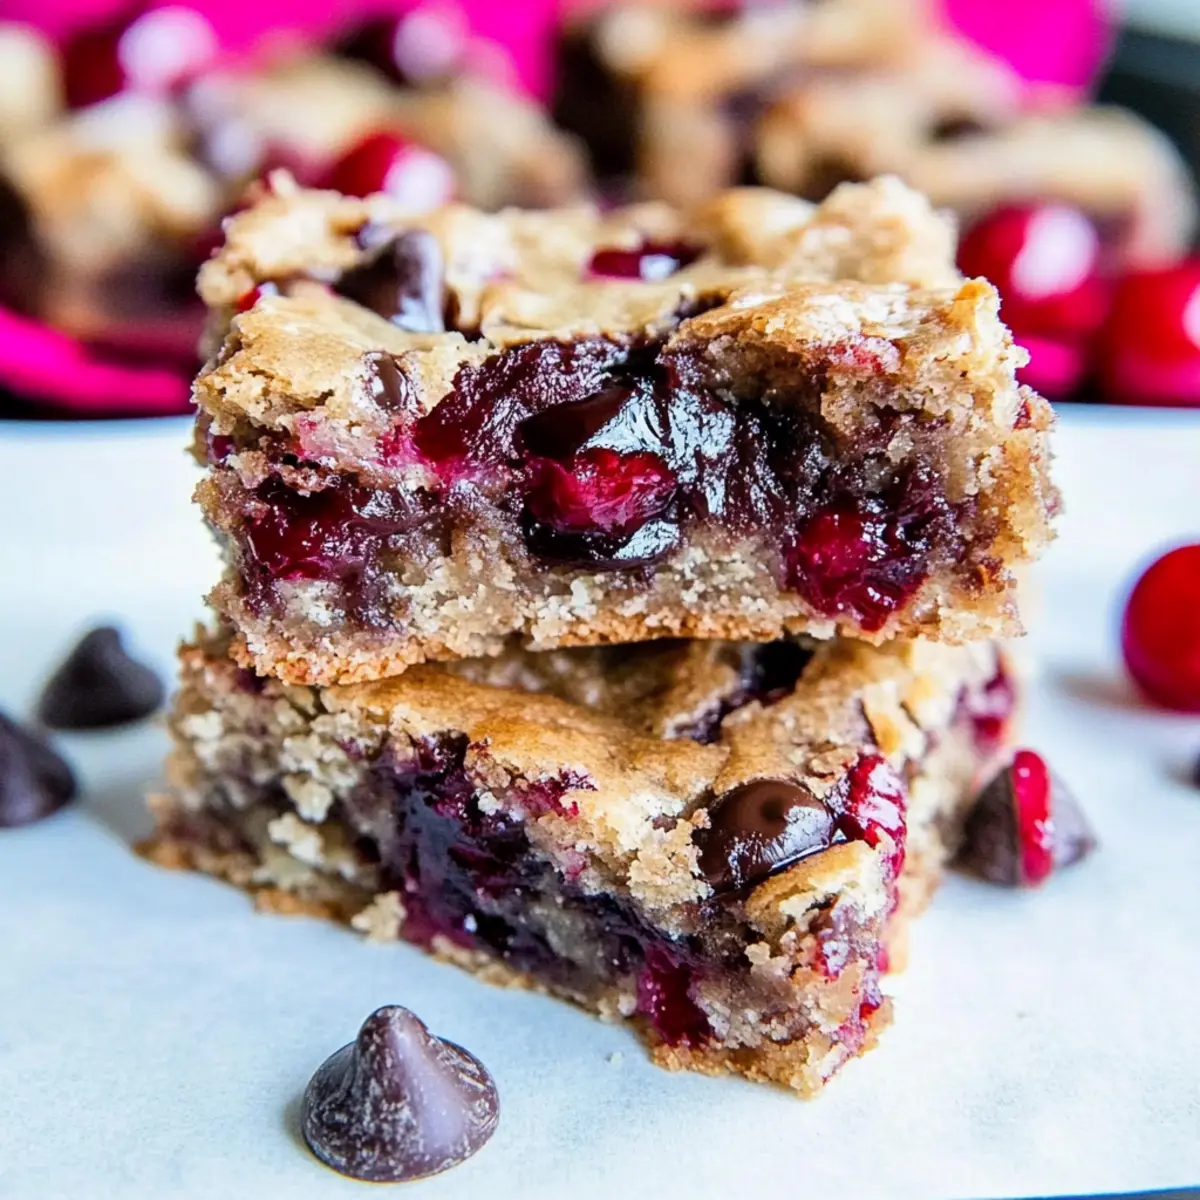
Summer is the season for sweet indulgence, and what better way to celebrate than with a batch of moist Chocolate Chip Cherry Bars? The combination of juicy cherries and rich chocolate creates a dessert that’s simply irresistible. What I love most about this one-bowl recipe is its simplicity—no mixer required! In just a few easy steps, you can whip up a treat that’s perfect for any gathering or a cozy night in. The chewy texture and delightful sweetness from brown sugar make every bite a delight. Plus, you can easily customize these bars by swapping in your favorite fruits or chocolate varieties. Curious to find out how to make these delicious bars? Let’s dive in!
Why Are These Bars So Irresistible?
Simplicity at Its Best: This one-bowl recipe means less mess and easier clean-up, making baking a breeze!
Delicious Flavor Combinations: The juicy cherries and melty chocolate chips create a harmonious balance that will leave your taste buds dancing.
Versatile & Adaptable: Feel free to swap out the cherries for other fruits like peaches or blueberries, or even experiment with different chocolate types to suit your cravings.
Perfect for Any Occasion: Whether it’s a summer picnic or a cozy family gathering, these bars are sure to impress and delight.
Quick Prep Time: In just a pinch, you can whip up these bars without the fuss of complicated steps, leaving you more time to enjoy the sweet rewards.
For more delightful desserts, check out my Chocolate Truffles Decadent or Harvest Marble Chocolate Chip Cookies.
Chocolate Chip Cherry Bars Ingredients
Now that you’re eager to try your hand at these delightful treats, let’s gather what you’ll need for your Chocolate Chip Cherry Bars!
For the Batter
- Unsalted Butter – Provides moisture and richness; margarine can be a substitute if needed.
- Light Brown Sugar – Adds sweetness and moisture; dark brown sugar can be used for a deeper flavor.
- Large Egg – Binds everything together; a flax egg works for a vegan option.
- Vanilla Extract – Enhances flavor; use pure vanilla extract for the best taste.
- All-Purpose Flour – Gives structure; opt for a gluten-free flour blend if desired.
- Salt (optional) – Balances the sweetness; feel free to omit for a low-sodium version.
For the Mix-Ins
- Semi-Sweet Chocolate Chips – These lend a rich chocolatey flavor; try dark or white chocolate chips for a twist.
- Cherries (fresh or frozen) – The star of the show, providing moisture and flavor; fresh cherries are best, but feel free to swap in peaches or other fruits!
Now that you have your ingredients ready, it’s time to make these delicious bars that will have everyone asking for seconds!
Step‑by‑Step Instructions for Chocolate Chip Cherry Bars
Step 1: Preheat the Oven
Start by preheating your oven to 350°F (175°C). Next, line an 8×8 inch baking pan with aluminum foil, letting it overhang slightly for easy removal later. Lightly spray the foil with cooking spray to prevent sticking, ensuring that your moist Chocolate Chip Cherry Bars will come out easily and retain their lovely texture.
Step 2: Melt the Butter
In a microwave-safe bowl, melt 1/2 cup of unsalted butter for about 60 seconds or until completely melted. Remove from the microwave and stir in 1 cup of light brown sugar. Mix until the ingredients are fully combined, creating a rich and glossy mixture that will add moisture and sweetness to your Chocolate Chip Cherry Bars.
Step 3: Add Egg and Vanilla
Once your butter and sugar mixture has cooled slightly, add in 1 large egg and 1 teaspoon of vanilla extract. Mix these ingredients until smooth, ensuring the egg is well incorporated. This step is crucial as it binds everything together while enhancing the flavor of your bars, setting the stage for a delightful treat.
Step 4: Incorporate Dry Ingredients
Gradually add 1 cup of all-purpose flour and a pinch of salt to the wet mixture. Stir gently with a spatula until just combined—be careful not to overmix, as this can lead to tough bars. The batter should be thick and slightly sticky, reinforcing the chewy texture of your Chocolate Chip Cherry Bars.
Step 5: Fold in Chocolate Chips and Cherries
Now, fold in 1 cup of semi-sweet chocolate chips and 1 cup of chopped cherries, ensuring they are evenly distributed throughout the batter. The juicy cherries paired with the melted chocolate will create delightful pockets of flavor in each bar, making them irresistible and perfect for summer gatherings.
Step 6: Spread the Batter
Pour the batter into your prepared pan, using a spatula to smooth the top gently. This will help ensure an even bake, allowing the edges to set beautifully while keeping the center chewy. Spread it out evenly, and your Chocolate Chip Cherry Bars are ready to go into the oven.
Step 7: Bake to Perfection
Place the pan in the preheated oven and bake for 27-32 minutes. You’ll know they’re done when the edges start to pull away from the pan and the center is set but still slightly soft. Keep an eye on them to avoid overbaking, as this can dry out these delicious bars.
Step 8: Cool and Slice
Once baked, remove the pan from the oven and let it cool at room temperature for at least 1 hour. This cooling period allows the bars to set up properly. Once cooled, lift the bars out of the pan using the overhanging foil, then slice into squares ready to serve your delightful Chocolate Chip Cherry Bars!
Chocolate Chip Cherry Bars Variations
Feel free to let your creativity shine when making these delectable bars!
-
Fruit Swap: Replace cherries with diced peaches or plums for a delightful twist. Their juicy flavors infuse the bars with summer vibes, making each bite a new surprise.
-
Chocolate Variation: Try using dark chocolate chips instead of semi-sweet for a richer, more decadent taste. Dark chocolate adds a lovely depth that complements the tartness of the cherries beautifully.
-
Nutty Addition: Fold in chopped walnuts or pecans for a delightful crunch. The nuts balance the chewy texture and add a hint of earthiness that pairs perfectly with the sweetness.
-
Gluten-Free Option: Substitute all-purpose flour with a gluten-free flour blend for a cheerful batch everyone can enjoy. The bars will still be moist and delicious, proving that gluten-free can be just as wonderful!
-
Heat It Up: Add a pinch of cayenne pepper or red pepper flakes for a spicy kick. This subtle heat brings a whole new dimension, making your sweets unforgettable.
-
Beyond Cherry: Mix in dried cranberries or blueberries for a burst of flavor and color. These fruits add a delightful sweetness and chewy texture, creating a tasty medley in every bite.
-
Frost It Up: Top the cooled bars with a simple cream cheese frosting or a drizzle of melted chocolate for an even sweeter treat. The rich topping elevates the bars to a whole new level of indulgence.
-
Enhance the Aroma: Include a teaspoon of almond extract along with the vanilla for a lovely nutty undertone. This little twist will enhance the flavor and make the kitchen smell incredible!
For more delicious recipes, don’t forget to check out my Harvest Marble Cookie Bars or dive into some Chocolate Truffles Decadent for an extra sweet experience!
Make Ahead Options
These Chocolate Chip Cherry Bars are perfect for busy home cooks looking to save some time during hectic weeks! You can prepare the batter up to 24 hours in advance; simply mix all the wet ingredients and dry ingredients separately, then refrigerate them until you’re ready to combine and bake. The cherries can also be chopped and stored in air-tight containers for up to 3 days to ensure they stay fresh and flavorful. When you’re ready to bake, just combine the components and follow the baking instructions as outlined. This way, you’ll enjoy the same delightful taste and texture, but with minimal effort when it’s time to serve!
Expert Tips for Chocolate Chip Cherry Bars
-
Avoid Overmixing: Mixing too much after adding flour can lead to tough bars. Stir gently until combined for that perfect chewy texture.
-
Use Fresh Cherries: If possible, opt for fresh cherries over frozen to maximize flavor and texture. If using frozen, make sure to drain them well to avoid excess moisture.
-
Let Them Cool: Allow the bars to cool for at least one hour before slicing. This helps set the bars, ensuring clean cuts and better texture.
-
Experiment with Flavors: Don’t hesitate to swap cherries for other fruits, like peaches or plums, or try different types of chocolate chips to tailor your Chocolate Chip Cherry Bars to your liking.
-
Storage Tips: Keep your bars in an airtight container at room temperature up to one week, or refrigerate for longer freshness. They also freeze well for up to three months!
What to Serve with Chocolate Chip Cherry Bars
Indulging in a batch of rich, fruity bars inspires a perfect spread of complementary sides.
-
Vanilla Ice Cream: Creamy and cool, a scoop on top elevates the bars, balancing sweetness and adding velvety texture.
-
Caramel Sauce: A drizzle of warm caramel not only enhances flavor but also provides a delightful contrast to the chewy bars while adding a touch of elegance.
-
Whipped Cream: Light and airy, freshly whipped cream adds a soft, fluffy element, making each chocolate-cherry bite even more indulgent.
-
Fresh Berries: A side of mixed berries, like raspberries or strawberries, offers a fresh burst of tartness that brightens the palate and contrasts the sweetness of the bars.
-
Mint Tea: A warm cup of soothing mint tea can cleanse the palate and enhance the flavor experience, offering a refreshing finish to your dessert.
-
Dark Chocolate Drizzle: For a chocolate lover’s dream, a simple drizzle of melted dark chocolate brings richness and depth, making the dessert even more irresistible.
-
Coffee: A strong, rich coffee balances sweetness and gives a sophisticated touch, perfect for enjoying with a slice of these delicious bars.
How to Store and Freeze Chocolate Chip Cherry Bars
Room Temperature: Store your bars in an airtight container at room temperature for up to 1 week to maintain their moist and chewy texture.
Fridge: For longer freshness, keep the bars in the refrigerator, where they can last for up to 2 weeks. Just be sure to wrap them tightly!
Freezer: You can freeze these Chocolate Chip Cherry Bars for up to 3 months. Wrap them individually in plastic wrap and place them in a freezer-safe bag.
Thawing: When you’re ready to enjoy, simply thaw at room temperature for a few hours or microwave for a few seconds until warm.
Chocolate Chip Cherry Bars Recipe FAQs
How do I select the best cherries for my bars?
Absolutely! When choosing cherries, look for fruits that are firm, plump, and glossy with vibrant color. Avoid any with dark spots or blemishes as these may indicate overripeness or spoilage. Sweet cherries will work perfectly, but feel free to experiment with sour cherries for a tangy twist.
What is the best way to store Chocolate Chip Cherry Bars?
Very good question! You can store these bars in an airtight container at room temperature for up to 1 week. If you want to keep them fresh longer, refrigerate them for up to 2 weeks, just ensure they are well-wrapped to maintain their moisture.
Can I freeze the Chocolate Chip Cherry Bars?
Absolutely! You can freeze your bars for up to 3 months. Just wrap them individually in plastic wrap, then place them in a freezer-safe bag or container. When you’re ready to enjoy, simply thaw at room temperature for a couple of hours, or microwave in short bursts until warm.
What should I do if my bars turn out too dry?
If your bars come out dry, it might be due to overmixing or baking them for too long. Always ensure you mix just until combined after adding flour and keep an eye on the bake time—27-32 minutes is ideal. To rescue dry bars, consider serving them warm with a generous scoop of vanilla ice cream or a drizzle of chocolate sauce to add moisture.
Are these bars suitable for someone with allergies?
Certainly! If you have allergy concerns, it’s wise to stick to substituting ingredients. For instance, use a gluten-free flour blend instead of all-purpose flour for those with gluten sensitivities. You can even replace the egg with a flax egg (1 tablespoon flaxseed meal mixed with 2.5 tablespoons water) for vegan options. Always ensure that your chocolate chips don’t contain allergens before using them!
Can I add other fruits or flavors to the recipe?
Very much! One of the best things about these Chocolate Chip Cherry Bars is their versatility. Feel free to swap the cherries for other fruits like blueberries, plums, or peaches. You can also experiment with different types of chocolate, such as dark or white chocolate chips, or even add nuts for an added crunch—make it your own!
Moist Chocolate Chip Cherry Bars for Sweet Summer Treats
Ingredients
Equipment
Method
- Preheat your oven to 350°F (175°C) and line an 8x8 inch baking pan with aluminum foil, then spray with cooking spray.
- Melt 1/2 cup of unsalted butter in a microwave-safe bowl for about 60 seconds, then stir in 1 cup of light brown sugar until combined.
- Add 1 large egg and 1 teaspoon of vanilla extract to the mixture, mixing until smooth.
- Gradually add 1 cup of all-purpose flour and a pinch of salt to the wet mixture, stirring gently until just combined.
- Fold in 1 cup of semi-sweet chocolate chips and 1 cup of chopped cherries, ensuring even distribution.
- Pour the batter into the prepared pan and smooth the top gently.
- Bake in the preheated oven for 27-32 minutes until the edges are set and the center is slightly soft.
- Let cool at room temperature for at least 1 hour, then lift out of the pan using the foil and slice into squares.
Leave a Reply