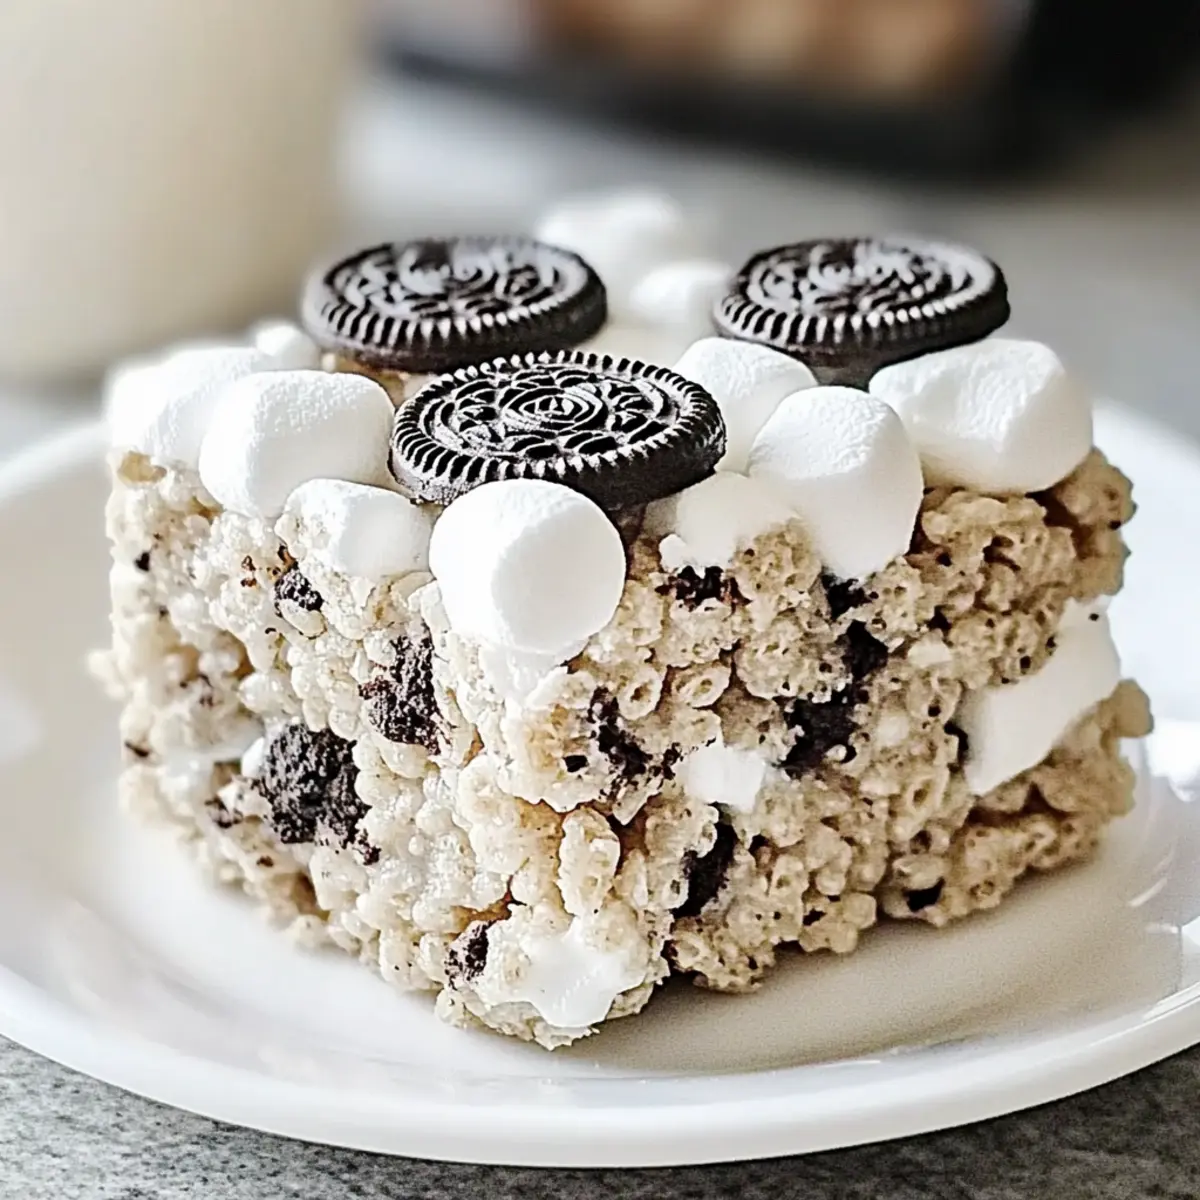
You won’t believe how easy it is to whip up a delightful dessert in just ten minutes! These No-Bake Oreo Krispies bring together the nostalgic flavors of Oreo cookies and gooey marshmallows, creating a chewy treat that’s perfect for both kids and the young at heart. With just a few simple ingredients, this crowd-pleasing recipe is not only quick to prepare but also completely customizable—add your favorite mix-ins to make it uniquely yours. Imagine serving these sweet squares at your next gathering, watching smiles spread as they savor each bite. Ready to discover how to bring this delightful dessert to life? Let’s get started!
Why Are Oreo Krispies a Must-Try?
Quick Preparation: These treats come together in just 10 minutes, making them a perfect solution for last-minute cravings or unexpected guests.
Kid-Friendly Fun: With their delicious combination of Oreo cookies and marshmallows, kids will love helping you make these simple, no-bake bars.
Customizable Delight: The recipe is highly versatile; try adding peanut butter, nuts, or even colorful sprinkles to suit your taste and mood!
Nostalgic Flavor: Reminiscent of classic Rice Krispies treats, but with an irresistible cookies and cream twist that will delight guests of all ages.
Crowd-Pleasing Appeal: Serve these at your next gathering, and prepare for the compliments to roll in—everyone loves a sweet, gooey treat!
For more delightful dessert ideas, check out our easy no-bake recipes.
Oreo Krispies Ingredients
• For the Base
- Butter – Provides richness and moisture. Use salted for balanced flavor.
- Mini Marshmallows – Key binding agent that creates a chewy texture. Use regular-sized marshmallows if cutting down on quantity.
- Krispie Cereal – Offers crunch and structure. Other puffed cereals can be substituted for variety.
- Oreo Cookies – Adds classic cookies and cream flavor. Whole Oreos are recommended for maximum flavor.
• For the Flavor Boost
- Salt – Enhances the sweetness of the dessert. Omit if using salted butter.
This no-bake Oreo Krispies recipe is not just delicious; it’s a fun and quick way to whip up a treat in no time at all! Let’s bring these sweet squares to life!
Step‑by‑Step Instructions for Oreo Krispies
Step 1: Prepare Ingredients
Start by gathering all your ingredients for the Oreo Krispies. You’ll need 6 cups of Krispie cereal, 1 cup of crushed Oreo cookies, and 1 cup of mini marshmallows in a large mixing bowl. Ensure the Oreos are finely crushed to distribute their flavor evenly throughout the mixture. This setup will make the next steps seamless and efficient.
Step 2: Melt Butter and Marshmallows
In a medium saucepan over medium heat, melt 4 tablespoons of butter until it begins to bubble gently. Add 8 cups of mini marshmallows along with a pinch of salt to enhance the sweetness. Stir continuously for about 3-4 minutes or until the mixture becomes completely melted and smooth. You’ll know it’s ready when the marshmallows glisten and no lumps are visible.
Step 3: Combine Mixtures
Pour the melted marshmallow mixture over the dry ingredients in your mixing bowl. Using a spatula, gently fold the marshmallow mix into the cereal and crushed Oreos for about 2-3 minutes. Aim to coat all the dry ingredients thoroughly, but be careful not to crush the Krispies too much, as you want to maintain that wonderful crunch in your Oreo Krispies.
Step 4: Transfer to Pan
Prepare a 9-inch square pan by greasing it lightly with butter or cooking spray to prevent sticking. Carefully pour the Oreo Krispies mixture into the pan, spreading it evenly. Use your hands or the spatula to press the mixture down firmly, ensuring a smooth, flat top. This step is key to achieving well-formed bars that hold together nicely.
Step 5: Cool and Cut
Allow the pan of Oreo Krispies to cool at room temperature for about 30 minutes. This wait will help the bars to set properly, enhancing their texture. Once cooled, use a sharp knife to cut into squares or rectangles. You’ll be rewarded with chewy, crunchy bars that are ready to delight at any gathering.
What to Serve with No-Bake Oreo Krispies
These delightful no-bake treats are perfect for any occasion, and you’ll want the perfect pairings to elevate your dessert experience!
-
Vanilla Ice Cream: A scoop of creamy vanilla ice cream adds a cool contrast to the chewy texture of the Oreo Krispies. The combination will remind you of classic ice cream sandwiches.
-
Fresh Strawberries: Juicy strawberries offer a fresh burst of flavor that cuts through the sweetness, bringing balance to the dessert. Plus, their vibrant color makes for an appealing presentation!
-
Chocolate Drizzle: Drizzling warm chocolate over your Oreo Krispies injects an extra layer of indulgence. This simple touch transforms a quick treat into a decadent dessert worthy of any celebration.
-
Whipped Cream: Light and fluffy whipped cream beautifully softens the rich flavors of the Krispies. Serve it on the side for a delightful dip or dollop on top!
-
Milkshake: Pair your Krispies with a thick, chocolatey milkshake for a nostalgic dessert experience that’ll take you back to your childhood. The combination is sure to satisfy any sweet tooth.
-
Coffee: A warm cup of coffee serves as a perfect companion, contrasting the sweet, chewy bars with hints of bitterness. It’s an ideal way to round off a casual gathering.
-
Nutty Trail Mix: For a crunchy complement, consider a scoop of nutty trail mix. The mix of textures and flavors enhances the overall indulgence while providing a healthy contrast.
-
Ice-Cold Lemonade: For a refreshing zing, serve these treats alongside ice-cold lemonade. The tartness will perfectly balance the sweetness of the Oreo Krispies.
-
Chocolate-Covered Pretzels: Pair with these sweet bars for a salty crunch that enhances the treat’s richness. The sweet and salty combo is simply irresistible!
How to Store and Freeze Oreo Krispies
Room Temperature: Store Oreo Krispies in an airtight container for up to 1 week, ensuring they stay fresh and chewy.
Fridge: If you prefer your bars chilled, keep them in the fridge in an airtight container for up to 2 weeks; just let them sit at room temperature for a few minutes before enjoying.
Freezer: For longer storage, wrap the Oreo Krispies tightly in plastic wrap and then place them in a freezer-safe bag. They can last up to 3 months in the freezer.
Thawing: To enjoy frozen Oreo Krispies, simply thaw them at room temperature for about 30 minutes, and they will be ready to delight your taste buds again!
Oreo Krispies Variations & Substitutions
Explore delightful ways to customize your Oreo Krispies and make them truly your own!
-
Chocolate Swap: Use chocolate sandwich cookies instead of Oreos for a rich, decadent twist.
-
Nutty Addition: Incorporate ½ cup of chopped nuts for a satisfying crunch that complements the chewy texture beautifully.
-
Peanut Butter Swirl: Mix in ½ cup of creamy peanut butter into the melted marshmallow mixture for an irresistible, rich flavor. Just imagine that delightful combination!
-
Festive Touch: Decorate with colorful sprinkles or a drizzle of melted chocolate before setting to add a fun and festive flair. Perfect for any celebration!
-
Fruit Add-ins: Add freeze-dried strawberries or raspberries for a fruity contrast that balances the sweetness—an unexpected delight!
-
Coconut Bliss: Sprinkle in some shredded coconut for an exotic touch that provides a great chewy texture and tropical flavor.
-
Flavor Boost: Stir in a teaspoon of vanilla extract for an aromatic enhancement that uplifts the delightful cookies and cream flavor even more.
-
Heat It Up: For spice lovers, a hint of cayenne pepper or chili powder mixed into the melted marshmallows gives these treats a surprising kick that’s sure to intrigue!
Feel free to explore these variations, and for more inspiration, check out our easy no-bake recipes for delightful dessert ideas!
Make Ahead Options
These No-Bake Oreo Krispies are perfect for meal prep, allowing you to enjoy a delicious dessert with minimal last-minute effort. You can prepare the mixture up to 24 hours in advance; simply combine the butter, marshmallows, cereal, and crushed Oreos as directed, then transfer the mixture into the greased pan and press down firmly. Cover it tightly with plastic wrap and refrigerate to maintain its freshness. When ready to serve, allow the bars to come to room temperature, then cut into squares. This way, you’ll have sweet, chewy treats just waiting to impress your family or guests, perfectly preserved and just as delicious!
Tips for the Best Oreo Krispies
• Perfecting the Fold: Gently fold the mixture instead of stirring vigorously to keep the Krispies crunchy. This ensures your Oreo Krispies have the right texture!
• Marshmallow Consistency: Be sure the marshmallows are fully melted and smooth; any lumps can affect the gooiness of your bars.
• Grease for Ease: Greasing your hands and tools with butter or cooking spray makes transferring and pressing the mixture much easier, preventing sticky mishaps.
• Cooling Time: Allowing ample cooling time is vital. This helps the bars firm up and enhances the chewiness; don’t rush this step!
• Batch Variations: Consider experimenting with different flavors or mix-ins, such as sprinkles or crushed nuts, to elevate your Oreo Krispies to new heights.
Oreo Krispies Recipe FAQs
How do I choose the right Oreos for this recipe?
Absolutely! For the best flavor and texture in your Oreo Krispies, I recommend using whole Oreo cookies. Their consistent crunch and creamy center create that iconic cookies and cream taste we’re after. If you want to experiment with flavors, chocolate or mint Oreos can provide a fun twist!
What’s the best way to store Oreo Krispies?
You can store Oreo Krispies in an airtight container for up to 1 week at room temperature. Keeping them sealed will help maintain their chewy texture. If you prefer to refrigerate them, they’ll last up to 2 weeks—just remember to let them sit out for a few minutes before serving for optimal softness!
Can I freeze Oreo Krispies? How?
Yes, you can absolutely freeze Oreo Krispies! First, wrap the bars tightly in plastic wrap to prevent freezer burn. Then, place them in a freezer-safe bag or container. They can last up to 3 months in the freezer. To enjoy, simply thaw them at room temperature for about 30 minutes before digging in.
What if my marshmallows don’t melt smoothly?
Very! If your marshmallows aren’t melting smoothly, it could be due to cooking them at too high a heat. Try stirring over medium-low heat instead, and ensure you’re continuously mixing for about 3-4 minutes until the mixture is completely smooth. This gentle approach helps maintain a lovely gooey texture!
Are there any dietary considerations for Oreo Krispies?
Oreo Krispies are generally safe for a wide audience; however, they do contain allergens like gluten from Oreos, and dairy from butter. If you’re making them for those with allergies, you can substitute gluten-free Oreos and dairy-free butter alternatives. Always check individual ingredient labels to be sure!
Can I customize the ingredients in the recipe?
Of course! The more the merrier! Add-ins like chopped nuts, dried fruits, or colorful sprinkles can turn your Oreo Krispies into a personalized treat. For an extra twist, try stirring in ½ cup of peanut butter with the melted marshmallows for a nutty flavor boost. Have fun creating your unique version!
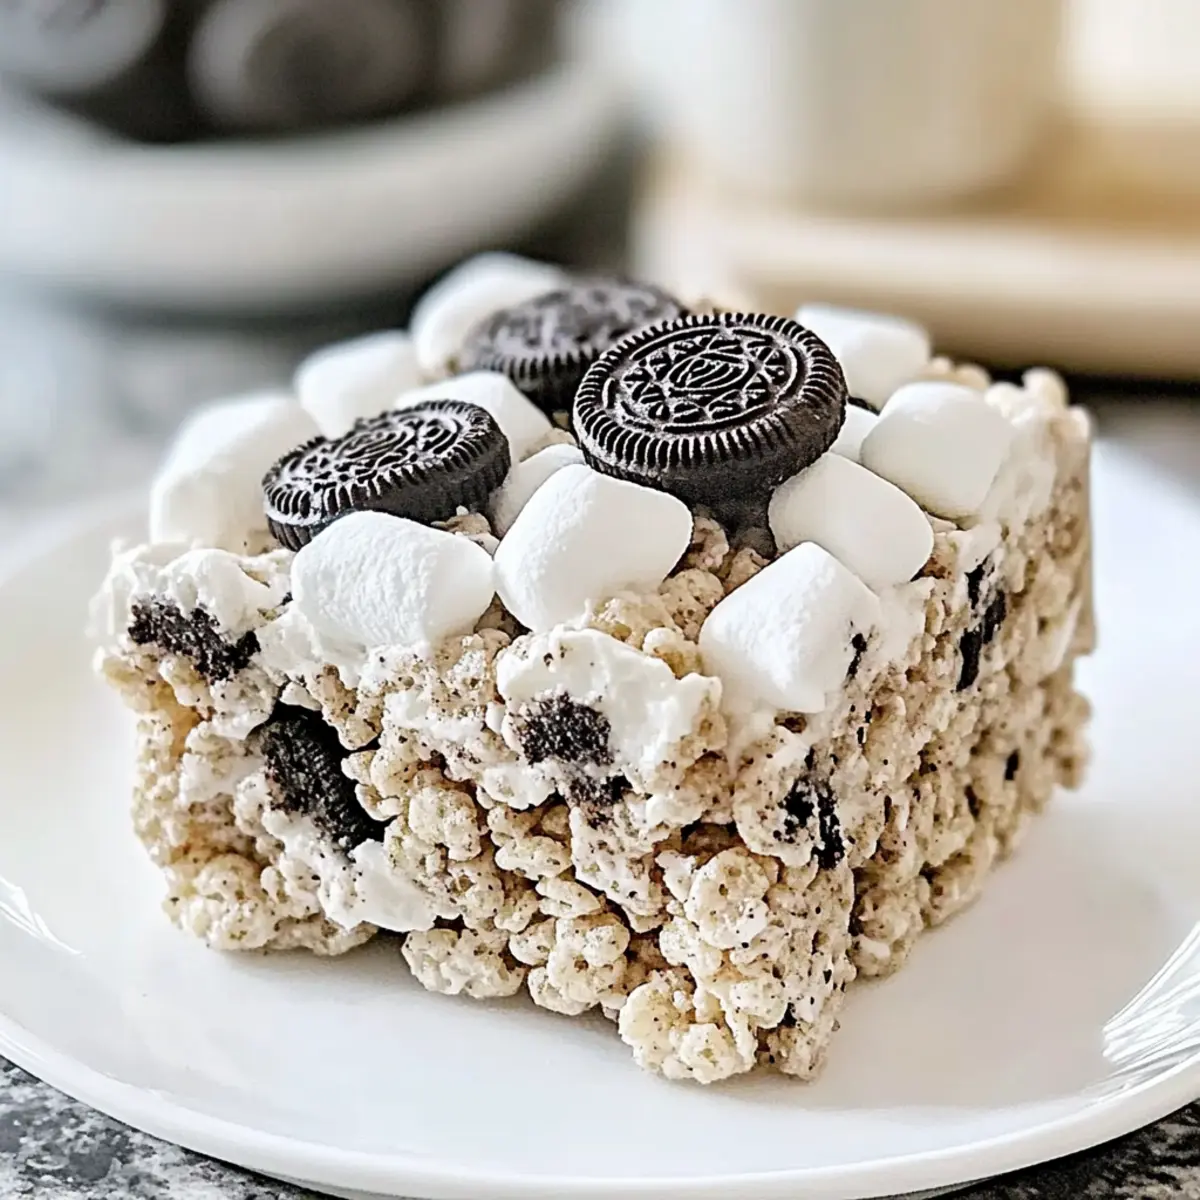
Oreo Krispies: No-Bake Treats Ready in Just 10 Minutes
Ingredients
Equipment
Method
- Prepare all ingredients by gathering 6 cups of Krispie cereal, 1 cup of crushed Oreo cookies, and 1 cup of mini marshmallows in a large mixing bowl.
- In a medium saucepan over medium heat, melt 4 tablespoons of butter until it bubbles gently. Add 8 cups of mini marshmallows and a pinch of salt, stirring continuously until completely melted and smooth.
- Pour the melted marshmallow mixture over the dry ingredients in your mixing bowl and gently fold for about 2-3 minutes, ensuring all ingredients are coated.
- Prepare a 9-inch square pan by greasing it lightly. Pour the mixture into the pan, spreading it evenly and pressing down firmly to ensure a smooth top.
- Allow the mixture to cool at room temperature for about 30 minutes before cutting into squares or rectangles.
Leave a Reply