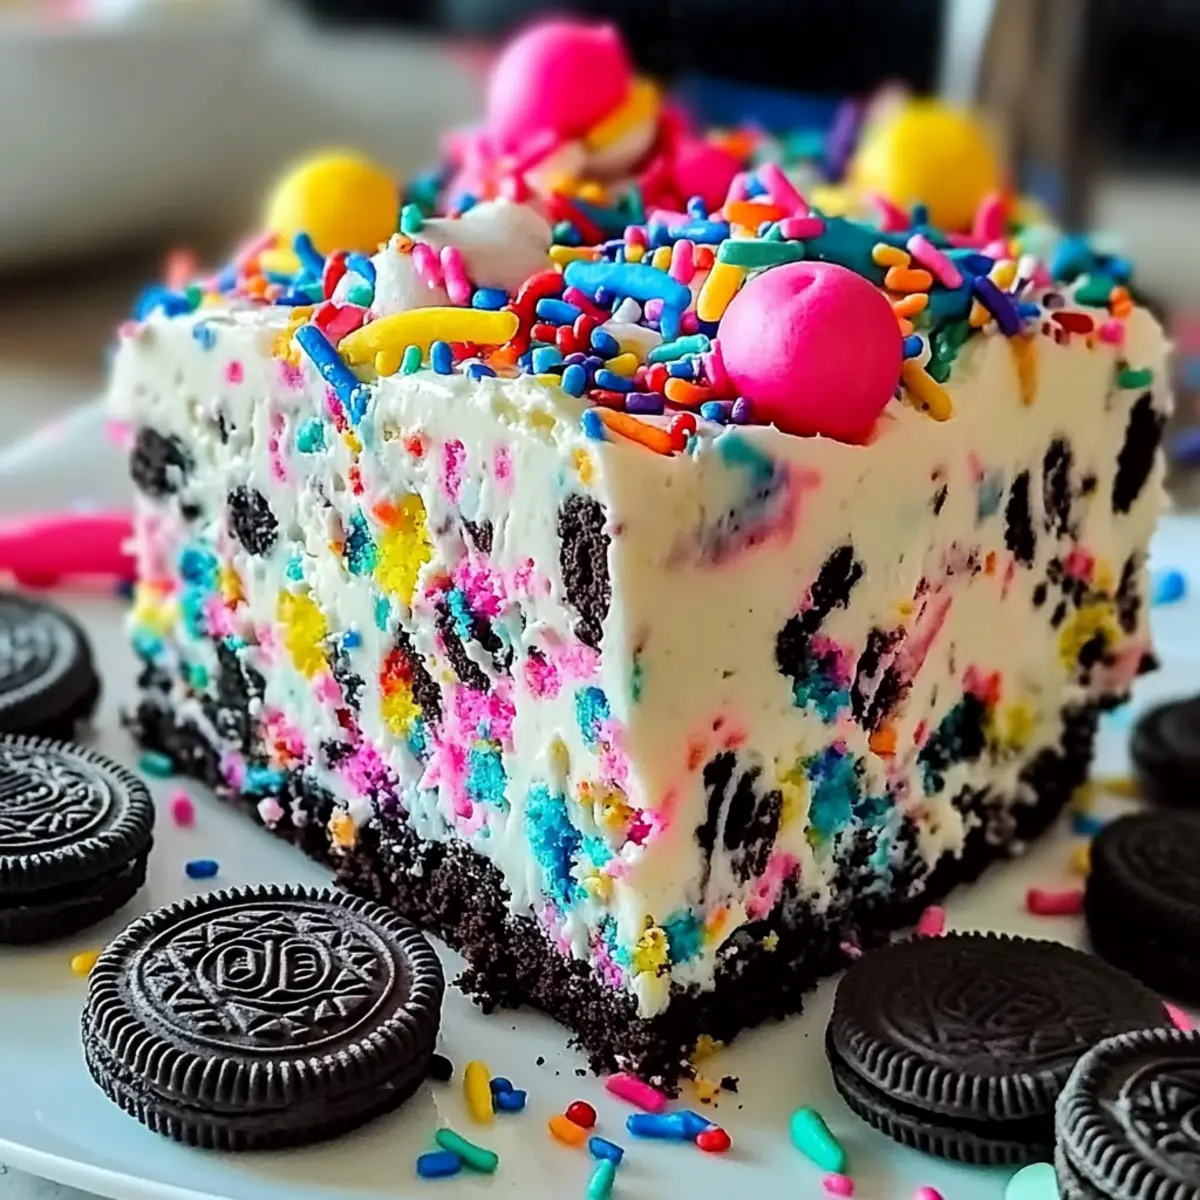
As I ambled through the colorful aisles of my local grocery store, a cheerful display of sprinkles and cookies caught my eye—immediately igniting a spark of inspiration. That’s when the idea for a No-Bake Funfetti Oreo Icebox Cake came to life, combining the beloved flavors of creamy Oreos and the celebratory spirit of Funfetti. Not only is this delightful dessert a true crowd-pleaser, but it also offers a simple, no-fuss approach perfect for those of us who cherish homemade sweetness without dedicating hours to baking. In just a few easy steps, you’ll create a show-stopping cake that’s as fun to make as it is to devour. Are you ready to dive into a world of creamy layers and crunchy bites? Let’s get started!
Why is this icebox cake a must-try?
Easy Delight: With minimal effort and no baking required, this No-Bake Funfetti Oreo Icebox Cake is your go-to dessert for any occasion. Vibrant Layers: The colorful sprinkles and creamy fillings create a beautiful focal point at parties or gatherings. Versatile Base: Feel free to swap the Oreos for your favorite cookies to customize the flavor and suit your taste. If you’re looking for more fun treats, check out my Christmas Carrot Cake Cookies! Crowd Favorite: Whether it’s birthdays or holiday celebrations, this dessert is sure to impress family and friends alike. You can’t go wrong with a recipe that embodies both fun and deliciousness!
No-Bake Funfetti Oreo Icebox Cake Ingredients
For the Creamy Filling
• Heavy Cream – Adds richness and forms the whipped cream layer; ensure it’s chilled for better volume.
• Powdered Sugar – Sweetens the whipped cream; granulated sugar can be substituted if desired, although it will alter the texture.
• Vanilla Extract – Enhances the flavor in the whipped cream; try almond extract for a unique twist.
• Cream Cheese – Provides a creamy texture; opt for vegan cream cheese for a dairy-free alternative.
• Funfetti Cake Mix – Adds vibrant flavor and color; consider using a homemade vanilla mix or a gluten-free option.
For the Crunchy Layers
• Oreo Cookies – Delivers the beloved crunchy layers and iconic flavor; gluten-free Oreo cookies work as a substitute.
• Milk – Helps soften the cake mix; use non-dairy milk for a vegan-friendly version.
For the Fun Touch
• Sprinkles – Offers fun color and texture; choose various types for more visual appeal or skip for simplicity.
Make this No-Bake Funfetti Oreo Icebox Cake your centerpiece dessert, perfect for any celebration!
Step‑by‑Step Instructions for No-Bake Funfetti Oreo Icebox Cake
Step 1: Whip the Cream
In a large mixing bowl, pour in the chilled heavy cream, adding powdered sugar and vanilla extract. Using an electric mixer, whip the mixture on medium speed for about 3-5 minutes until stiff peaks form. You’ll know it’s ready when the cream holds its shape and is light and fluffy, creating a delightful base for your No-Bake Funfetti Oreo Icebox Cake.
Step 2: Combine Cream Cheese and Mix
In a separate bowl, take the softened cream cheese and the Funfetti cake mix, blending them together using a spatula or electric mixer on low speed. Gradually add in the milk, mixing until the combination is smooth and creamy, which should take about 1-2 minutes. This mixture will add a rich, flavor-packed layer to your cake.
Step 3: Fold in Whipped Cream
Gently fold the whipped cream into the cream cheese mixture using a rubber spatula. Be careful not to deflate the whipped cream; you want to retain that airy texture. Continue folding until just combined, ensuring no streaks remain. This light, fluffy filling is key to your No-Bake Funfetti Oreo Icebox Cake!
Step 4: Prepare the Oreo Layer
Take your Oreo cookies and quickly dip each one into the milk for a few seconds, allowing them to soften just slightly. Arrange the soaked Oreos in a single layer at the bottom of a rectangular serving dish, creating a sturdy base for your cake. This crunchy layer will be a wonderful contrast to the creamy filling.
Step 5: Build the Layers
Spread a generous portion of the cream mixture over the Oreos, smoothing it with a spatula. Sprinkle a handful of colorful sprinkles generously over the cream. Repeat the process by layering more dipped Oreos followed by the cream mixture and more sprinkles, continuing until all ingredients are used, finishing with a final layer of the cream.
Step 6: Chill to Set
Cover the assembled cake with plastic wrap or a lid, and place it in the refrigerator for at least 4 hours, although overnight is preferred for the best results. This chilling time allows the flavors to meld and ensures that your No-Bake Funfetti Oreo Icebox Cake sets properly, resulting in a beautifully structured dessert.
No-Bake Funfetti Oreo Icebox Cake Variations
Feel free to make this delightful dessert your own by trying out these fun twists and swaps!
- Dairy-Free: Substitute heavy cream with coconut cream and use dairy-free cream cheese for a vegan delight.
- Gluten-Free: Use gluten-free Oreos and a gluten-free cake mix to keep the same beloved flavors without the gluten.
- Flavor Boost: Swap the vanilla extract for almond extract for an exciting nutty note that changes the profile.
- Fruit Layers: Add sliced strawberries or bananas between layers for a refreshing fruity contrast in each bite.
- Chocolate Lovers: Incorporate crumbled chocolate cookies instead of Oreos to amplify the chocolatey goodness in this cake.
- Extra Crunch: Sprinkle crushed nuts, like pecans or walnuts, in between layers to add a delightful crunch and richness.
- Frosting Twist: Choose a flavored frosting instead of cream cheese for a sweeter, more vibrant filling that’ll satisfy your sweet tooth.
- Zesty Touch: Mix in citrus zest, like lemon or orange, in the filling for a burst of fresh flavor that’ll brighten up the dish.
Explore your creativity with these suggestions! If you’ll love to add even more fun to your dessert repertoire, don’t forget to check out my Cranberry Cake Wow and Warm Caramel Cake for delightful inspirations.
Expert Tips for No-Bake Funfetti Oreo Icebox Cake
-
Chill Your Ingredients: Ensure your heavy cream is chilled before whipping. This increases volume and results in a fluffier whipped cream layer.
-
Gentle Folding: Use a rubber spatula to gently fold the whipped cream into the cream cheese mixture. This technique helps maintain the airy texture essential for the No-Bake Funfetti Oreo Icebox Cake.
-
Milk Dipping Time: Be careful not to soak the Oreo cookies in milk for too long. A quick dip ensures they soften without turning mushy, keeping a delightful contrast in texture.
-
Layering Order: Alternate between cream and Oreos to ensure the flavors mix well and each bite delivers that perfect balance of crunchy and creamy.
-
Set Overnight: For the best texture and flavor, let your cake set overnight. The flavors meld beautifully over time, making every bite even more delicious!
Make Ahead Options
These No-Bake Funfetti Oreo Icebox Cakes are perfect for meal prep enthusiasts who want to streamline their celebrations! You can whip up the creamy filling (heavy cream, cream cheese, and Funfetti cake mix) up to 24 hours in advance and keep it tightly covered in the refrigerator. Additionally, you can prepare the dipped Oreo layers a few hours ahead—just remember to assemble the cake only within 4 hours of serving to maintain its perfect texture. If made ahead, the cake can be stored for up to 3 days, and the flavors will meld beautifully, making it just as delicious! When you’re ready to serve, simply slice and enjoy this joyful treat with family and friends.
What to Serve with No-Bake Funfetti Oreo Icebox Cake
Elevate your dessert experience by pairing this eye-catching cake with complementary flavors and textures that will delight your guests.
-
Creamy Vanilla Ice Cream: A scoop of vanilla ice cream adds a smooth, creamy contrast to the cake’s texture, enhancing the fun flavors of Funfetti and Oreo.
-
Chocolate Covered Strawberries: These juicy fruits deliver a burst of freshness and a touch of indulgence, making them a perfect fruity complement to the rich cake.
-
Whipped Cream: Light and airy, a dollop of freshly made whipped cream can bring extra sweetness and fluffiness, allowing your guests to personalize their dessert.
-
Fruit Salad: A bowl of mixed berries or a tropical fruit medley adds vibrant color, freshness, and a zesty contrast to every rich bite of the cake.
-
Sparkling Lemonade: This refreshing drink perfectly balances the sweetness of the cake with its citrusy fizz, making each mouthful feel like a celebration.
-
Chocolate Ganache: Drizzling warm ganache over the slices adds an extra layer of decadence, complementing the chocolatey Oreos and enhancing the visual appeal.
-
Coffee: A warm cup of coffee will cut through the cake’s sweetness, providing a cozy finish to your dessert experience, perfect for after meals or gatherings.
-
Miniature Cupcakes: Serve a selection of funfetti or chocolate cupcakes as a whimsical side, encouraging guests to mix and match flavors for an exciting dessert spread.
Storage Tips for No-Bake Funfetti Oreo Icebox Cake
Fridge: Store leftovers in an airtight container in the refrigerator for up to 5 days. This keeps the No-Bake Funfetti Oreo Icebox Cake fresh and delicious.
Freezer: You can freeze slices of the cake for up to 3 months. Wrap each slice tightly in plastic wrap and then in aluminum foil to prevent freezer burn.
Thawing: When ready to enjoy, simply transfer the frozen slice to the fridge for a few hours or overnight to thaw, preserving its creamy texture.
Serving: This dessert is best served cold. No reheating is necessary, allowing you to enjoy it straight from the fridge just like the first day!
No-Bake Funfetti Oreo Icebox Cake Recipe FAQs
How do I choose the right cream for this recipe?
Absolutely! For the best results, select heavy cream that’s fresh and chilled for whipping. This ensures that you achieve the maximum volume and fluffy texture. If you’re looking for a dairy-free option, go for a non-dairy heavy cream alternative, which can work wonders without sacrificing creaminess!
What’s the best way to store leftovers?
No problem! Store any leftovers of your No-Bake Funfetti Oreo Icebox Cake in an airtight container in the refrigerator for up to 5 days. This helps maintain freshness and texture while keeping it conveniently on hand for those sweet cravings!
Can I freeze this dessert?
Yes, indeed! You can freeze slices of the cake for up to 3 months. Just wrap each slice tightly in plastic wrap, followed by aluminum foil to prevent freezer burn. When you’re ready to indulge, simply transfer a slice to the fridge for a few hours to thaw—what a treat!
What if my whipped cream isn’t thickening properly?
Very common! If your whipped cream isn’t thickening, there are a few things you can check. First, make sure your heavy cream is cold, as room temperature cream won’t whip properly. If you find it’s still not thickening, try increasing the speed of your mixer and adding a little more powdered sugar. This will help create that luscious volume you seek!
Are there any dietary considerations I should be aware of?
Absolutely! If you have any allergies, it’s essential to check the ingredient labels for potential allergens. For instance, Oreos contain gluten, so opt for gluten-free cookies for a gluten-free version, and use vegan cream cheese and dairy-free milk to cater to a vegan diet. Just remember to always enjoy responsibly based on your needs!
How long should I let the cake chill before serving?
To achieve the best flavor and texture, it’s recommended to chill your No-Bake Funfetti Oreo Icebox Cake for at least 4 hours, although letting it set overnight is preferred. This allows the layers to meld beautifully and ensures a delightful experience in every bite!
No-Bake Funfetti Oreo Icebox Cake
Ingredients
Equipment
Method
- In a large mixing bowl, pour in the chilled heavy cream, adding powdered sugar and vanilla extract. Whip on medium speed for 3-5 minutes until stiff peaks form.
- In a separate bowl, take the softened cream cheese and Funfetti cake mix, blending them together. Gradually add in the milk, mixing until smooth, about 1-2 minutes.
- Gently fold the whipped cream into the cream cheese mixture, being careful not to deflate it.
- Dip each Oreo cookie into the milk for a few seconds and arrange them in a single layer at the bottom of a rectangular serving dish.
- Spread a generous portion of the cream mixture over the Oreos, sprinkle colorful sprinkles, and repeat with more Oreos, cream, and sprinkles, finishing with cream.
- Cover with plastic wrap or a lid and refrigerate for at least 4 hours, preferably overnight.
Leave a Reply