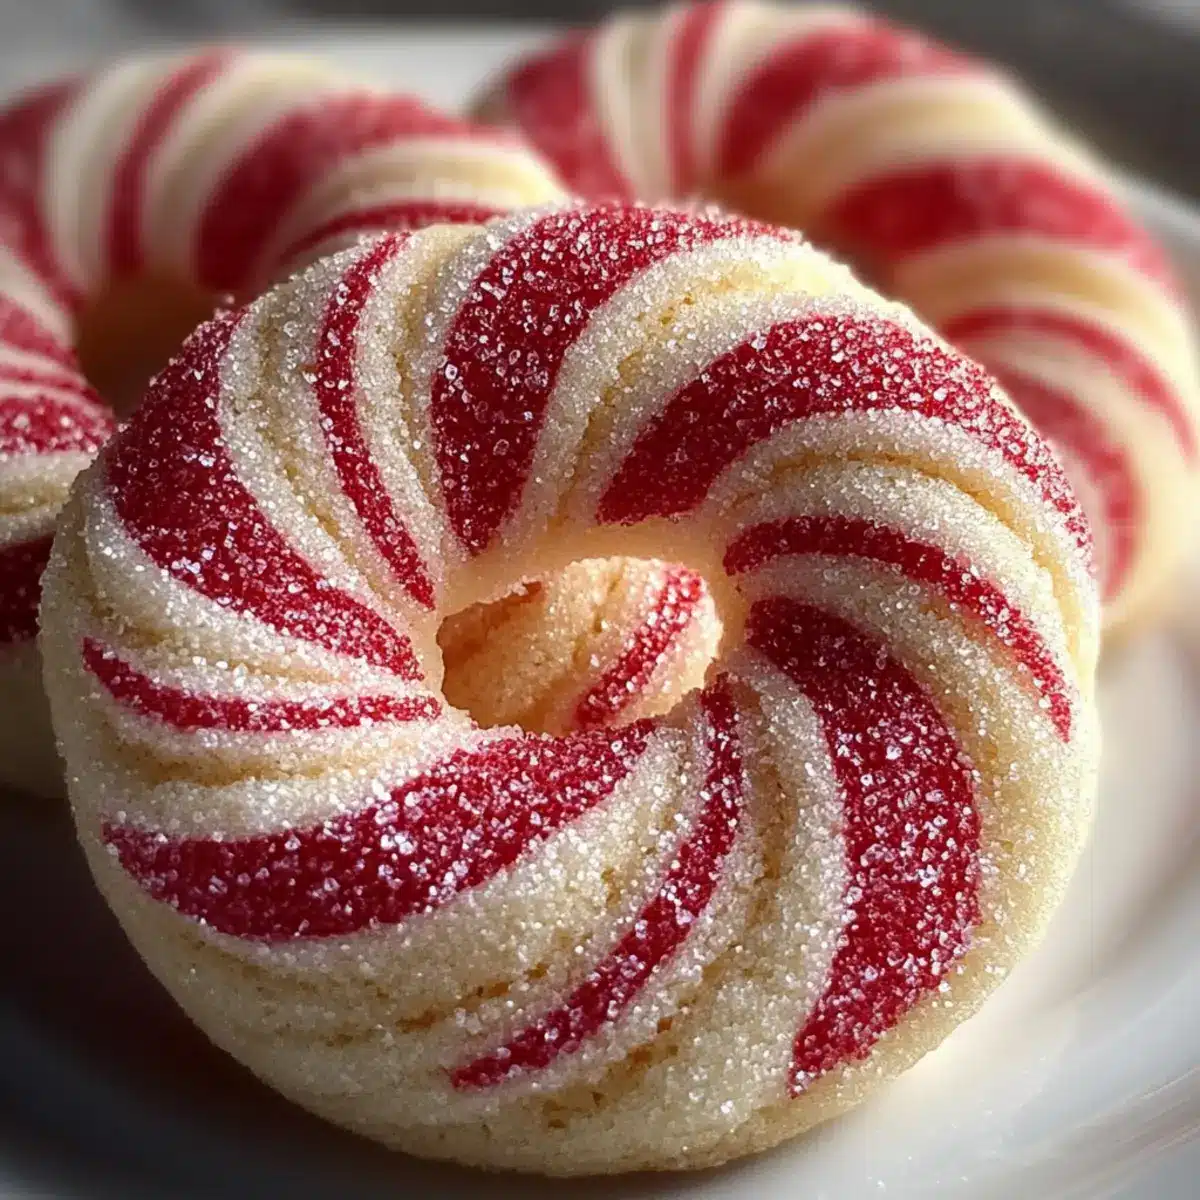
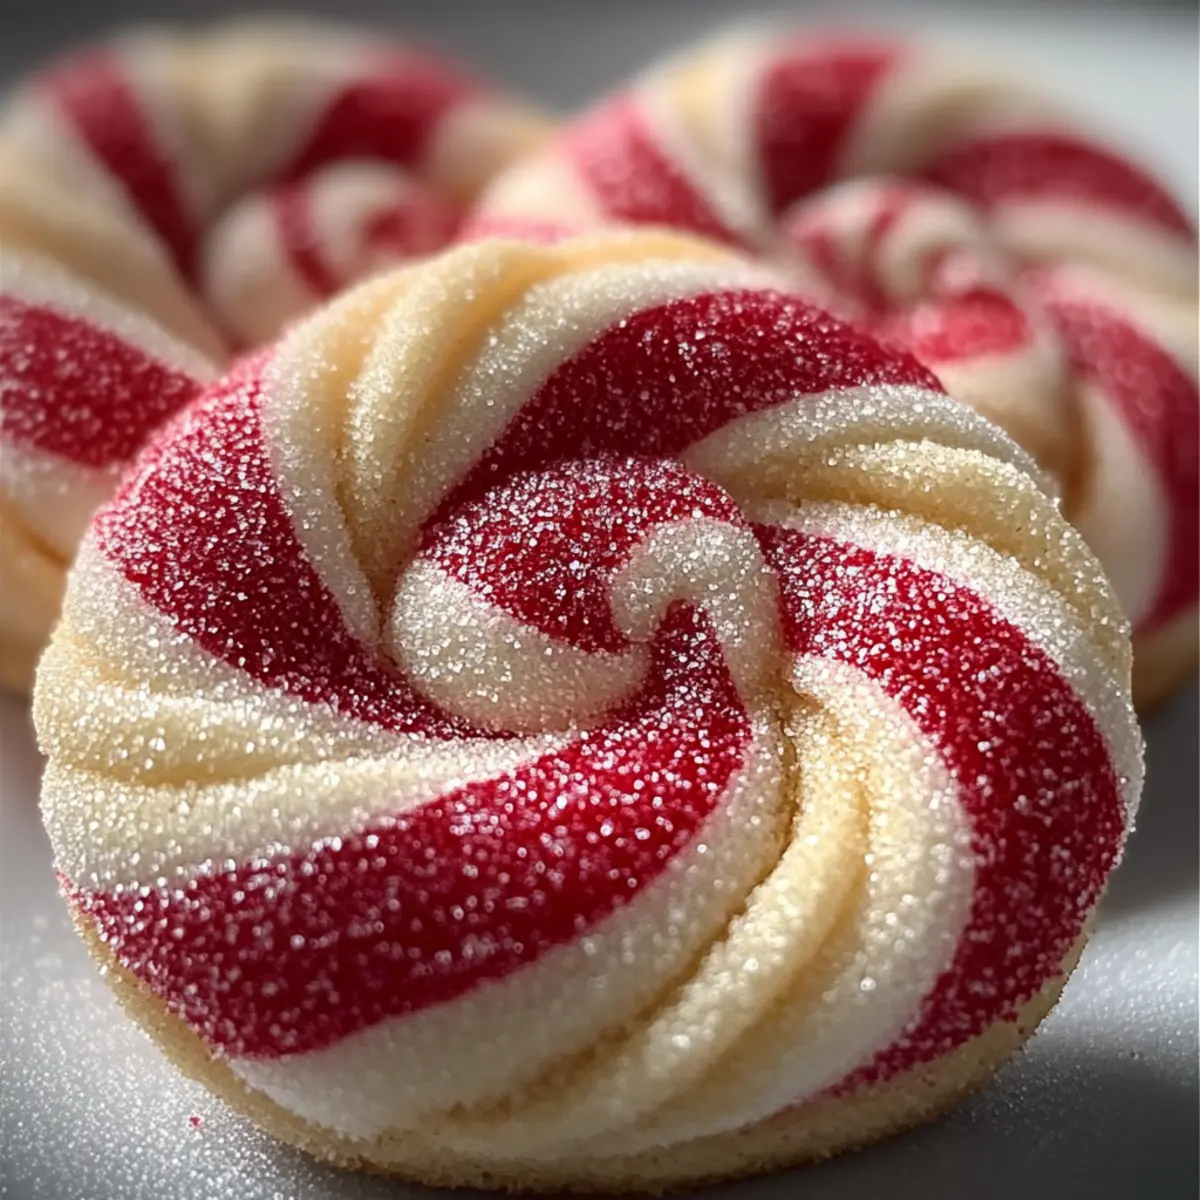
As I stood in my cozy kitchen, the delightful aroma of peppermint began to swirl around me, instantly transporting me to my childhood holiday memories. There’s truly nothing like baking a batch of Magic of Candy Cane Cookies during the festive season. These vibrant red and white swirls not only brighten up your table but also fill your home with a sweet, inviting scent that captures the spirit of Christmas. Plus, they’re quick and easy to whip up, making them a perfect project for both novice and seasoned bakers alike. Whether you’re preparing for a holiday gathering or simply indulging in a little festive fun, these cookies are guaranteed to impress. Ready to embark on a sweet baking adventure? Let’s get started!
Why are Candy Cane Cookies a Must-Bake?
Festive Delight: These Magic of Candy Cane Cookies bring the spirit of the holidays straight to your kitchen with their vibrant red and white swirls.
Easy to Make: With simple ingredients and straightforward steps, even novice bakers can create these delightful treats in no time.
Customizable Fun: You can easily switch things up—try dipping them in chocolate or adding citrus zest for a unique twist! Check out our Pecan Snowball Cookies for another festive option.
Crowd Favorite: These cookies are perfect for holiday gatherings, sure to impress both family and friends with their delicious peppermint flavor and charming presentation.
Irresistible Aroma: Baking these cookies fills your home with a warm, inviting scent that’s as delightful as the treats themselves.
With these irresistible reasons, are you ready to make some holiday magic?
Magic of Candy Cane Cookies Ingredients
• Get ready to bring festive cheer to your kitchen!
For the Cookie Dough
- Butter – Provides richness and tenderness; use unsalted for better control over saltiness.
- Powdered Sugar – Adds sweetness and a light texture; can substitute with granulated sugar, but may alter texture.
- Egg – Binds the dough and adds moisture; no suitable vegan substitute suggested for this recipe.
- Vanilla Extract – Enhances flavor; can be replaced with additional almond extract for a unique twist.
- Peppermint Extract – Imparts the classic holiday flavor; try using almond or orange zest for seasonal variations.
- All-Purpose Flour – The main structure component of the cookie; gluten-free flour can be used, but results may vary.
- Salt – Balances sweetness and is essential for flavor enhancement.
- Red Gel Food Coloring – Creates a vibrant red dough; avoid liquid food coloring for best results.
With these simple ingredients, you’re just a step away from creating the enchanting Magic of Candy Cane Cookies that will fill your home with holiday joy!
Step‑by‑Step Instructions for Magic of Candy Cane Cookies
Step 1: Prepare Dough
Begin by creaming together 1 cup of softened unsalted butter and 1 cup of powdered sugar in a large mixing bowl. Use an electric mixer on medium speed for about 2 minutes until the mixture is smooth and fluffy. Next, add in 1 egg, 1 teaspoon of vanilla extract, and 1 teaspoon of peppermint extract, mixing until just combined to achieve a creamy base.
Step 2: Mix Dry Ingredients
In a separate bowl, whisk together 2 ¼ cups of all-purpose flour and ½ teaspoon of salt. Gradually add this dry mixture into the creamed butter mixture, stirring until a soft dough forms. You’ll know it’s ready when the dough pulls away from the sides of the bowl and feels slightly tacky yet manageable.
Step 3: Color the Dough
Divide the dough in half, keeping one half plain. In the other half, add red gel food coloring and mix until you achieve your desired vibrant hue. Once combined, wrap each portion separately in plastic wrap and chill in the refrigerator for at least 1 hour to firm up, ensuring they hold their shape during baking.
Step 4: Shape Cookies
Preheat your oven to 350°F (180°C) and line baking sheets with parchment paper. Once the dough is chilled, roll 1 teaspoon of each color into long ropes. Gently twist them together and shape into candy cane forms. Place the shaped cookies on the prepared baking sheets, leaving enough space between each for expansion.
Step 5: Bake
Bake the cookies in your preheated oven for 8-10 minutes, or until they are set but not browned. The edges should look firm, while the centers remain slightly soft. After baking, let them cool on the tray for about 5 minutes, allowing them to firm up before transferring them to a cooling rack to fully cool down.
Step 6: Optional Garnish
If you’d like an extra festive touch, consider dusting the cookies with sanding sugar before baking for a sparkling finish. This lovely addition will catch the light and enhance the holiday spirit of your Magic of Candy Cane Cookies, making them truly eye-catching!

What to Serve with Magic of Candy Cane Cookies
Bring the holidays to life with delightful pairings that enhance your festive cookie experience!
-
Peppermint Hot Cocoa: Rich and creamy, this drink brings out the peppermint flavors in the cookies while keeping you warm and cozy.
-
Eggnog Lattes: Creamy and spiced, this festive twist on coffee offers a lovely balance to the sweet treat, elevating your holiday brunch.
-
Mulled Wine: The warm, spiced notes of mulled wine perfectly complement the peppermint sweetness of the cookies, making for a sophisticated pairing.
-
Pineapple-Citrus Salad: Fresh, tangy notes contrast beautifully with the sweetness of the cookies, adding a vibrant and refreshing element to your plate.
-
Chocolate Dipped Fruit: Juicy strawberries or raspberries dipped in chocolate provide a rich, decadent complement that enhances the cookies’ festive appeal.
-
Christmas Sugar Cookies: For a delightful cookie platter, serve these alongside classic sugar cookies. Their contrasting flavors and textures will be a hit at any gathering.
-
Sparkling Cider: This bubbly beverage is a festive fusion of sweet and tart, serving as a perfect refreshing sip next to your candy cane delights.
Helpful Tricks for Magic of Candy Cane Cookies
- Use Gel Coloring: Opt for gel food coloring instead of liquid to maintain dough consistency and achieve vibrant colors without stickiness.
- Chill Dough: Remember to chill your dough for at least an hour. This helps the cookies keep their shape and prevents them from spreading too much while baking.
- Dust with Sugar: For an extra sparkle, dust your cookies with sanding sugar before baking. It adds a festive touch and a delightful crunch!
- Space Them Out: Don’t overcrowd your baking sheets. Give each cookie enough room; they expand while baking and need space to maintain their lovely shapes.
- Watch Baking Time: Keep an eye on the cookies as they bake. They should be set but not browned to preserve that soft, chewy texture.
Variations & Substitutions for Magic of Candy Cane Cookies
Feel free to unleash your creativity and customize these cookies to fit your taste and dietary needs!
-
Dairy-Free: Substitute butter with a plant-based butter alternative to create a lactose-free version that doesn’t skimp on flavor.
-
Chocolate-Dipped: Dip half of each cookie in melted dark chocolate and sprinkle with crushed peppermint for a decadent twist that’s simply irresistible.
-
Almond Flavor: Replace peppermint extract with almond extract for a fragrant nutty flavor, enhancing the sweetness beautifully. This unique twist is sure to surprise your guests!
-
Citrus Zest: Incorporate orange or lemon zest into the dough to brighten up the flavor profile, adding a fresh and zesty note to these cookies.
-
Gluten-Free: Use a gluten-free all-purpose flour blend as a direct substitute for the regular flour, allowing everyone to enjoy them without the gluten worry.
-
Shape Alternatives: Instead of candy canes, create festive shapes like stars or hearts. Just roll the dough into different forms to keep things fun and interesting!
-
Sprinkle Toppings: Before baking, sprinkle the cookies with festive sanding sugar or colored sprinkles for an extra pop of color—perfect for holiday celebrations!
-
Mint Chocolate Variations: Mix in mini chocolate chips or chunks to the dough for a delightful surprise that adds both texture and depth of flavor.
For even more festive inspiration, try our Harvest Marble Cookies or take a look at the delicious Pecan Pie Cookies that capture the warmth of the season!
Make Ahead Options
These Magic of Candy Cane Cookies are perfect for busy home cooks looking to save time during the bustling holiday season! You can prepare the cookie dough up to 3 days in advance. Simply follow the first three steps to make your dough, wrap each portion tightly in plastic wrap, and refrigerate. For longer storage, freeze the dough for up to 3 months—just thaw it in the refrigerator before shaping. Once you’re ready to serve, roll out the dough, shape the cookies, and bake them as directed. This way, you can enjoy the same delightful peppermint flavor and festive look without the last-minute stress of baking!
Storage Tips for Magic of Candy Cane Cookies
Airtight Container: Store your Magic of Candy Cane Cookies in an airtight container at room temperature for up to 1 week to keep them fresh and chewy.
Layer with Parchment: To prevent sticking, layer the cookies with parchment paper inside the container, which allows for easy access without damaging their festive shapes.
Freezing: If you want to enjoy them later, freeze the cookies in a single layer on a baking sheet before transferring to a freezer-safe container. They can be stored for up to 3 months.
Reheating: To bring back their soft texture, simply reheat frozen cookies in a microwave for about 10-15 seconds, and enjoy that delightful peppermint aroma wafting through your home once again!

Magic of Candy Cane Cookies Recipe FAQs
What kind of butter should I use for the Magic of Candy Cane Cookies?
I recommend using unsalted butter for this recipe. It provides richness and tenderness while giving you better control over the cookie’s overall saltiness. If you only have salted butter on hand, just reduce the salt added in the recipe slightly.
How should I store my finished cookies?
To keep your Magic of Candy Cane Cookies fresh and chewy, store them in an airtight container at room temperature for up to 1 week. For best results, layer them with parchment paper to prevent sticking.
Can I freeze the cookies, and if so, how?
Absolutely! You can freeze your cookies for up to 3 months. First, place the baked cookies in a single layer on a baking sheet to freeze them individually. Once frozen, transfer them to a freezer-safe container, layering with parchment paper between the stacks. When ready to enjoy, simply thaw at room temperature or microwave for about 10-15 seconds for a freshly baked taste!
What if my dough feels too sticky?
If your dough is too sticky to shape, it’s typically a sign that it needs more chilling. Wrap it back up in plastic wrap and chill it in the fridge for an additional 30 minutes. Alternatively, you can sprinkle a little flour on your hands and the work surface to help manage stickiness when rolling out the dough.
Are there any allergy considerations for this recipe?
Yes, this recipe contains common allergens such as eggs and gluten. If you have dietary restrictions, you might consider using gluten-free flour; however, the texture may vary. Also, note that there’s no vegan substitute for the egg that will yield the same results in this recipe. Be sure to check labels if you’re cooking for those with allergies!
Magic of Candy Cane Cookies for a Festive Holiday Treat
Ingredients
Equipment
Method
- Cream together 1 cup of softened unsalted butter and 1 cup of powdered sugar in a large mixing bowl using an electric mixer on medium speed for about 2 minutes until smooth and fluffy.
- Add in 1 egg, 1 teaspoon of vanilla extract, and 1 teaspoon of peppermint extract, mixing until just combined.
- In a separate bowl, whisk together 2 ¼ cups of all-purpose flour and ½ teaspoon of salt, gradually adding into the creamed butter mixture until a soft dough forms.
- Divide the dough in half, keeping one half plain. In the other half, add red gel food coloring and mix until desired hue is achieved.
- Wrap each portion separately in plastic wrap and chill in the refrigerator for at least 1 hour.
- Preheat the oven to 350°F (180°C). Roll 1 teaspoon of each color into ropes, twist them together and shape into candy cane forms.
- Place on prepared baking sheets, baking for 8-10 minutes, until set but not browned.
- Let cool on the tray for about 5 minutes before transferring to a cooling rack.
- Optionally, dust with sanding sugar before baking for a sparkling finish.
Leave a Reply