As I stood in my kitchen, the sweet aroma of ricotta and vanilla wafted through the air, creating a comforting embrace that reminded me of family gatherings and cherished traditions. Today, I’m excited to share my Cannoli Cheesecake recipe, a delightful fusion of two beloved Italian desserts that never fails to impress. This creamy, dreamy cheesecake boasts a satisfying crunch from the cannoli shell crust, making it a crowd-pleaser that effortlessly elevates any gathering. Plus, it can be made ahead of time, leaving you with more moments to share laughter and create memories. Are you ready to discover the magic of this enchanting dessert and elevate your next celebration?

Why is Cannoli Cheesecake a Must-Try?
Decadent Flavor: The combination of creamy ricotta and sweet orange zest creates a delightful taste experience that will leave your taste buds dancing with joy.
Versatile Crust Options: While the cannoli shell crust is a showstopper, feel free to experiment with graham crackers or waffle cones for a fun twist.
Impress Your Guests: This elegant dessert is guaranteed to wow your family and friends, making it perfect for celebrations or special gatherings.
Make Ahead & Chill: Prepare it a day in advance for hassle-free entertaining—just bake, chill, and serve for an unforgettable finish to your meal.
Celebrate Tradition: Cannoli cheesecake is a beautiful homage to Italian-American heritage, melding two beloved classics into one irresistible dessert that feels like a hug from Nonna.
Pair this dessert with a side of Pumpkin Pie Cheesecake for a festive touch, or enjoy it alongside Strawberry Cheesecake Protein for a wholesome snack.
Cannoli Cheesecake Ingredients
For the Crust
• 7 oz pkg cannoli shells – Provides a crunchy crust for the cheesecake; substitute with graham crackers or waffle cones if unavailable.
• 3 tablespoons unsalted butter – Binds the crushed cannoli shells for the crust.
• 2 tablespoons sugar – Adds sweetness to the crust.
For the Cheesecake Filling
• 4 cups whole milk ricotta cheese – Creates the creamy filling, integral for a true cannoli experience; do not substitute.
• 1 1/2 cups sugar – Sweetens the filling mixture.
• 1/4 cup flour – Helps stabilize the filling and gives it structure.
• 1/2 cup whipping cream – Enhances creaminess; use heavy cream for a richer flavor.
• 2 teaspoons pure vanilla extract – Adds depth of flavor.
• 1 teaspoon orange zest – Gives a fresh, citrusy note reminiscent of classic cannoli.
• 5 large eggs – Provides structure and helps set the cheesecake.
Optional Garnishes
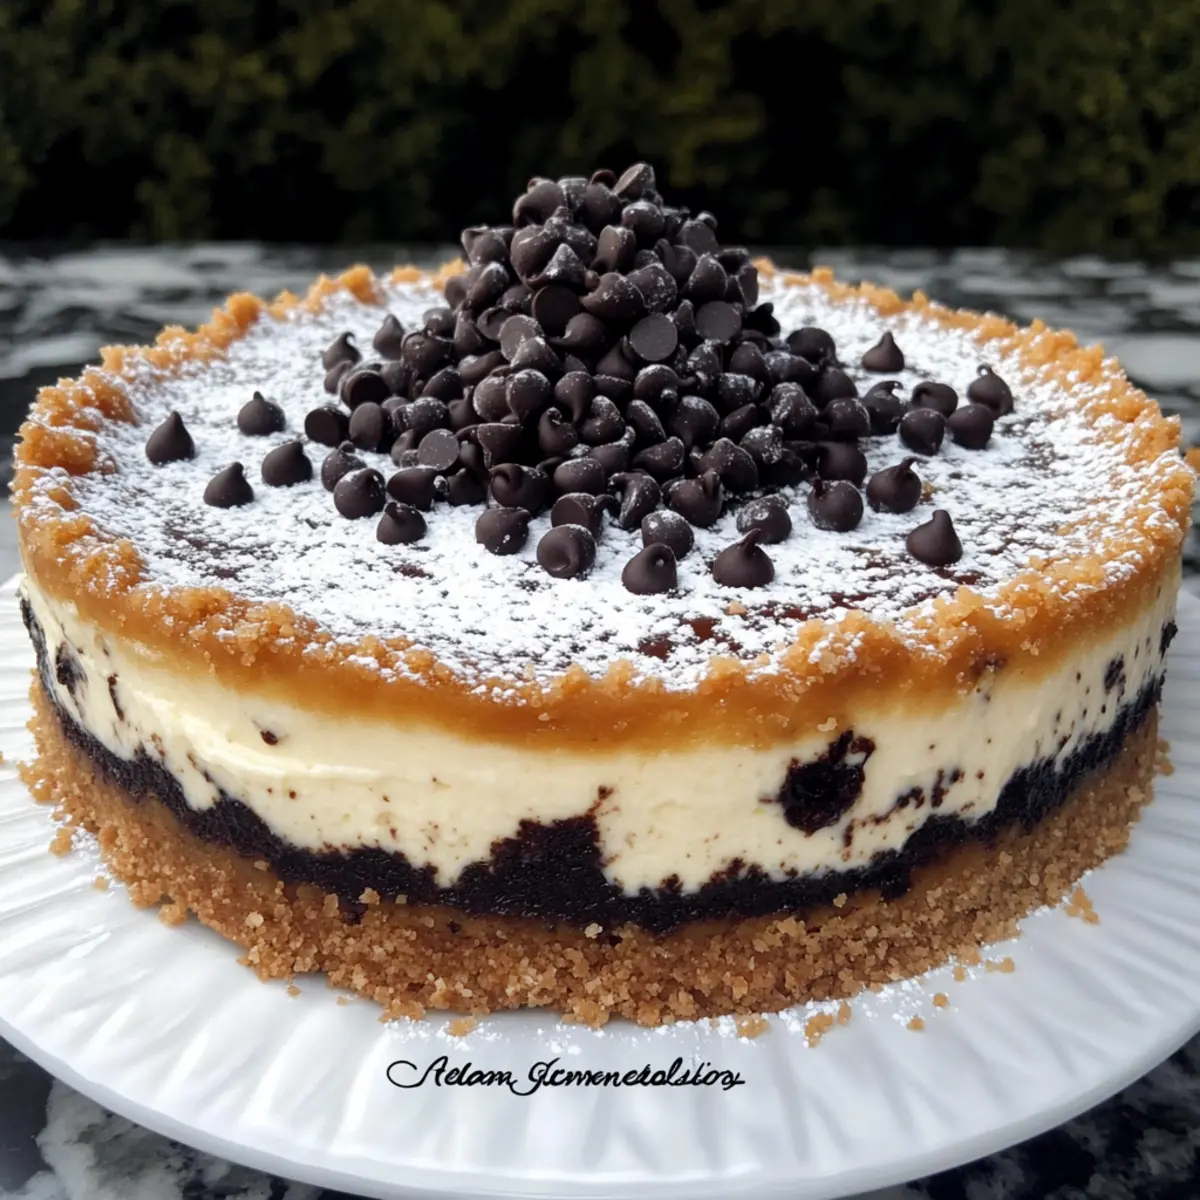
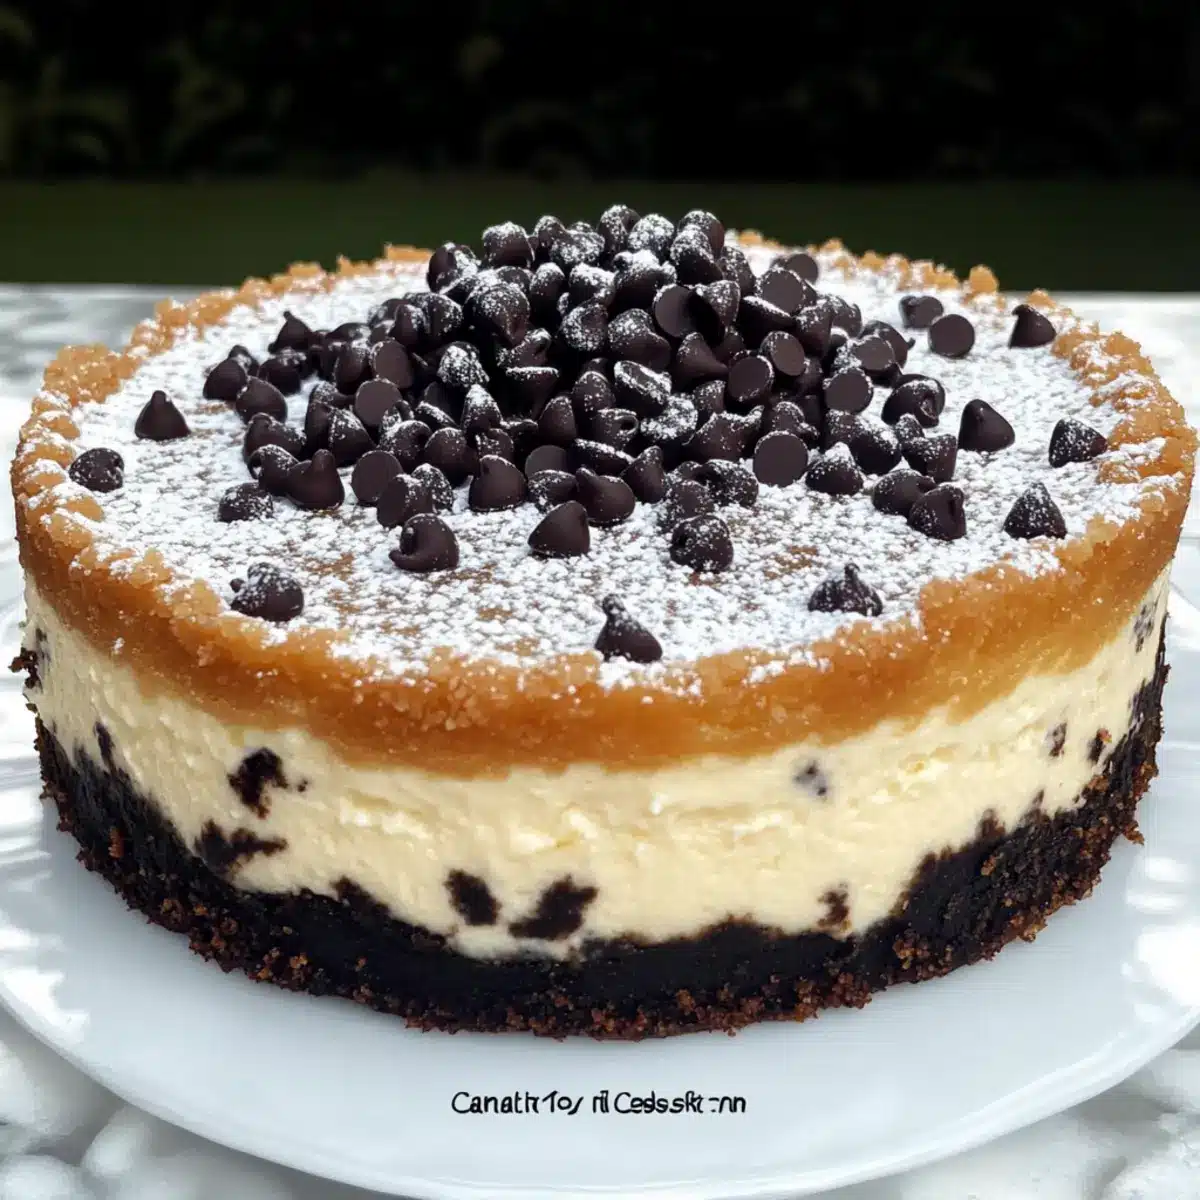
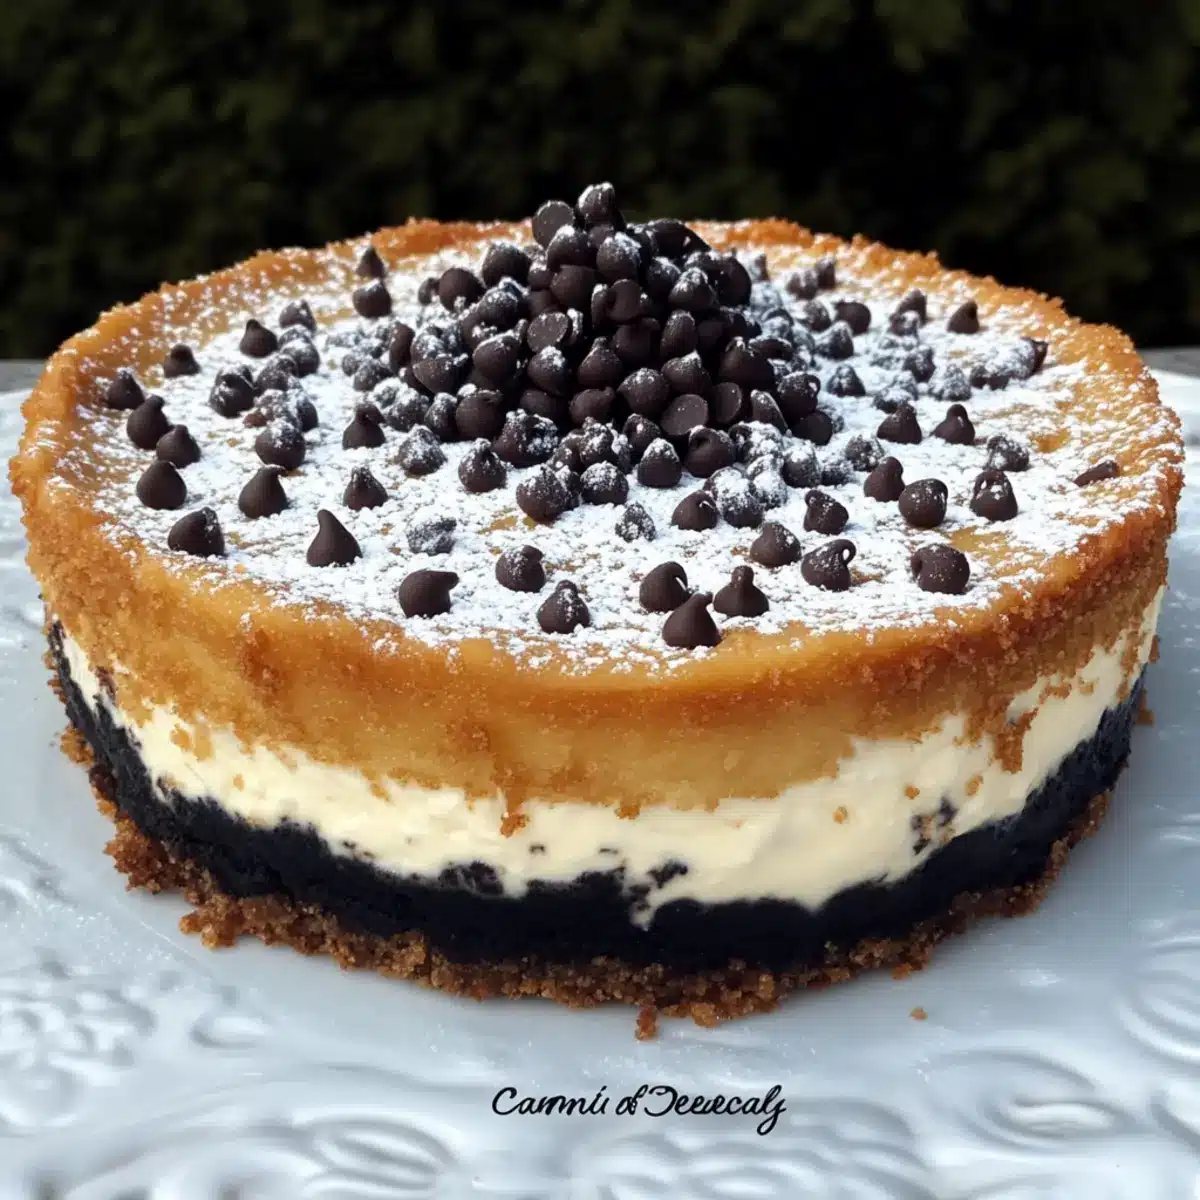
• 1/3 cup mini chocolate chips – Adds sweetness and richness; a delightful optional garnish.
• Confectionery sugar for sprinkling – For a sweet finish on top.
• Optional: Almonds – Can be ground and added for texture or as a topping.
These ingredients come together to create a luscious Cannoli Cheesecake that is sure to be the star of any gathering! Enjoy crafting this delightful dessert that marries two beloved classics.
Step‑by‑Step Instructions for Cannoli Cheesecake
Step 1: Preheat and Prepare
Begin by preheating your oven to 350°F (175°C). Take a 9-inch springform pan and line the bottom with parchment paper, ensuring it sticks well to the sides. This little prep will help your Cannoli Cheesecake release easily after baking, ensuring a beautiful presentation when it’s time to serve.
Step 2: Make the Crust
Using a food processor, crush the entire package of cannoli shells until they resemble fine crumbs. Transfer the crumbs to a mixing bowl, then add melted unsalted butter and sugar. Stir the mixture until it’s well combined, resembling damp sand. Press this mixture firmly into the bottom of your prepared springform pan, creating an even layer.
Step 3: Bake the Crust
Place the crust into the preheated oven and bake for 10 minutes until it’s lightly golden and slightly set. This step is crucial as it creates a firm base for your Cannoli Cheesecake. Once baked, remove from the oven and set aside to cool while you prepare the filling.
Step 4: Blend the Filling
In a large electric mixer bowl, combine the whole milk ricotta cheese, remaining sugar, and flour. Mix on medium speed until the mixture is smooth and creamy, ensuring there are no lumps. This is the heart of your Cannoli Cheesecake, so take your time to achieve the perfect texture.
Step 5: Add Cream and Flavorings
Once smooth, pour in the whipping cream, vanilla extract, and orange zest. Continue to mix on low speed until everything is tightly blended together. The addition of cream will enrich the filling, making it beautifully creamy.
Step 6: Incorporate the Eggs
Crack the large eggs, adding them one at a time into the batter while mixing on low speed. Ensure each egg is fully incorporated before adding the next. This method helps maintain a light and airy texture in your Cannoli Cheesecake, ensuring a perfectly risen dessert.
Step 7: Pour the Filling
Carefully pour the rich ricotta filling over the cooled crust in the springform pan. Use a spatula to spread it evenly to the edges. Take a moment to admire the combination of the crunchy crust and creamy filling, as this Cannoli Cheesecake is coming together beautifully!
Step 8: Bake the Cheesecake
Bake the cheesecake in your preheated oven for approximately 1 hour and 15 minutes. The center should be slightly jiggly when pulled from the oven, with the edges set. You’ll know it’s ready when it’s puffed up and lightly golden. After this time, sprinkle mini chocolate chips on top.
Step 9: Final Bake
Return the Cannoli Cheesecake to the oven for an additional 10 minutes. This will allow the chocolate chips to melt slightly and infuse flavor into the filling. Once done, check that the center is still slightly jiggly to prevent a dry outcome.
Step 10: Cool and Chill
Remove the cheesecake from the oven and allow it to cool in the pan for about 30 minutes. After cooling, carefully remove the springform ring. For the best flavor and texture, refrigerate your Cannoli Cheesecake for at least 4 hours, or overnight if time permits.
Step 11: Serve with Style
Just before serving, dust the top of the cheesecake with confectionery sugar for a sweet touch and garnish with whipped cream if you like. This lovely Cannoli Cheesecake is now ready to be the star of your gathering, a delightful fusion of flavors just waiting to be savored!
What to Serve with Cannoli Cheesecake?
Pairing the delightful Cannoli Cheesecake with complementary dishes elevates your dessert experience and creates a memorable meal.
-
Espresso or Coffee: The bold flavors of a rich espresso enhance the sweet creaminess of the cheesecake, making for a classic Italian pairing.
-
Fresh Berries: Juicy strawberries or raspberries add a burst of freshness that contrasts beautifully with the creamy texture of the cheesecake.
-
Whipped Cream: A dollop of freshly whipped cream adds an airy lightness, providing a perfect balance to the rich cheesecake.
-
Chocolate Sauce: Drizzling warm chocolate sauce over your slice transforms your dessert into an indulgent treat that chocolate lovers will adore.
-
Limoncello: This vibrant lemon liqueur is a refreshing palate cleanser that complements the sweet and citrus notes in the cheesecake.
-
Pistachio Ice Cream: The nutty creaminess of pistachio ice cream pairs wonderfully with the flavors of the Cannoli Cheesecake, adding a delightful textural contrast.
-
Biscotti: Crunchy almond or chocolate biscotti served on the side offers a satisfying crunch that enhances the overall dessert experience.
-
Italian Red Wine: A glass of sweet Italian wine like Vin Santo creates a luxurious finish, celebrating the rich flavors of your Cannoli Cheesecake.
Elevate your gathering with these delightful pairings, ensuring each bite of your Cannoli Cheesecake is savored to the fullest.
Make Ahead Options
These Cannoli Cheesecake is perfect for busy home cooks looking to save time! You can prepare the crust and filling up to 24 hours in advance. Begin by making the crust and letting it cool completely, then wrap it in plastic wrap to keep it fresh. For the filling, mix all the ingredients and store it in an airtight container in the refrigerator. When you’re ready to bake, simply pour the filling over the crust and follow the usual baking instructions. This method ensures that your Cannoli Cheesecake remains just as delicious, with that delightful contrast of crunchy crust and creamy filling, allowing you more time to enjoy with family and friends!
How to Store and Freeze Cannoli Cheesecake
Fridge: Store your Cannoli Cheesecake covered in plastic wrap or in an airtight container for up to 5 days. This keeps it fresh and ready for you to enjoy at any time.
Freezer: If you have leftovers, slice the cheesecake and wrap individual pieces in plastic wrap, then place them in a freezer-safe container. It can be frozen for up to 3 months.
Thawing: To enjoy frozen Cannoli Cheesecake, transfer it to the fridge to thaw overnight. For a quicker option, let it sit at room temperature for about an hour.
Reheating: While it’s best enjoyed chilled, if you prefer a slightly warm slice, microwave it for about 10-15 seconds. Enjoy the creamy and rich flavors!
Expert Tips for Cannoli Cheesecake
-
Room Temperature Dairy: Ensure all dairy ingredients are at room temperature before mixing for a smoother and creamier Cannoli Cheesecake filling.
-
Mix Eggs One-By-One: Incorporate eggs individually while mixing to maintain a light, airy texture in the cheesecake—this helps it rise perfectly.
-
Watch the Bake Time: Avoid overbaking! The center should have a slight jiggle when you take the Cannoli Cheesecake out of the oven to prevent a dry texture.
-
Use a Water Bath: For a gentler baking experience, try a water bath. It helps provide even heat and keeps your cheesecake moist, though it’s optional for this recipe.
-
Chill for Best Flavor: Refrigerate the cheesecake for at least 4 hours (or overnight) before serving to allow the flavors to meld and enhance the overall taste.
Cannoli Cheesecake Variations & Substitutions
Feel inspired to make this Cannoli Cheesecake your own with these delightful twists and substitutions—let your imagination run wild!
-
Graham Cracker Crust: Swap out cannoli shells for crushed graham crackers for a more traditional cheesecake base. The flavor remains sweet and satisfying!
-
Waffle Cone Twist: Use crushed waffle cones instead of cannoli shells for an added touch of crunch and a subtly sweet profile that’s sure to impress.
-
Lemon Zest Alternative: If orange zest isn’t your style, try lemon zest to brighten the filling with a fresh, zesty kick—it perfectly complements the richness of the ricotta.
-
Almond Extract Addition: A splash of almond extract can elevate the flavor of your cheesecake, bringing a nutty undertone that pairs beautifully with the creamy filling.
-
Dairy-Free Option: Substitute ricotta with a dairy-free cream cheese alternative, and use coconut cream instead of whipping cream to create a luscious, plant-based version.
-
Chocolate Chip Variations: Experiment with different types of chocolate chips—dark, white, or even mint-flavored—to infuse new flavors into your cheesecake.
-
Spiced Up: Add a dash of cinnamon or nutmeg to the filling for a warm, inviting spice that complements the creamy texture beautifully.
-
Mini Cheesecakes: For a fun twist, make mini cannoli cheesecakes in muffin tins for individual servings that are perfect for gatherings—just remember to adjust the baking time!
These variations can give your Cannoli Cheesecake a fresh twist and allow more versatility. For additional creative ideas, check out the stunning Pumpkin Cheesecake Gingersnap or indulge in the nutritious Strawberry Cheesecake Protein for a guilt-free treat!
Cannoli Cheesecake Recipe FAQs
How do I choose the right cannoli shells?
Absolutely! When selecting cannoli shells, look for ones that are dry and crunchy, avoiding any that show signs of moisture or have dark spots all over. Freshness is key to get that perfect texture contrast with the creamy filling, so check the packaging date if available. If cannoli shells aren’t readily available, substituting with graham crackers or waffle cones works beautifully!
How should I store leftover Cannoli Cheesecake?
Very! To keep your Cannoli Cheesecake fresh, cover it tightly with plastic wrap or transfer it to an airtight container. Stored this way in the refrigerator, it will stay delicious for up to 5 days. You can also place individual slices in separate wrappers for easy grab-and-go options!
Can I freeze Cannoli Cheesecake?
Of course! To freeze your Cannoli Cheesecake, first ensure it’s fully cooled and set. Slice the cheesecake into individual pieces and wrap each slice tightly in plastic wrap. Place the wrapped slices into a freezer-safe container, where they can be stored for up to 3 months. When you’re ready to enjoy a slice, just transfer it to the fridge for an overnight thaw or let it sit at room temperature for about an hour.
What if my Cannoli Cheesecake cracks while baking?
It happens to the best of us! To avoid cracks, ensure your ingredients—especially the dairy—are at room temperature before mixing. Also, mixing the eggs in one at a time helps maintain lightness in your cheesecake. If cracks do occur, don’t worry! You can cover them up beautifully with a dusting of confectionery sugar or some whipped cream when serving.
Is Cannoli Cheesecake safe for those with nut allergies?
Absolutely! This Cannoli Cheesecake recipe can be made nut-free as it doesn’t contain any nuts in its base ingredients. However, if you choose to add ground almonds or any other nuts as toppings, just give a heads-up to your guests who may have allergies. Always double-check labels on all ingredients used to ensure they are nut-free.
Irresistible Cannoli Cheesecake You'll Adore Making at Home
Ingredients
Equipment
Method
- Preheat your oven to 350°F (175°C) and line a 9-inch springform pan with parchment paper.
- Crush the cannoli shells in a food processor until fine crumbs. Mix with melted butter and sugar, then press firmly into the bottom of the pan.
- Bake the crust for 10 minutes until lightly golden and set. Allow to cool.
- In a large mixer, combine ricotta cheese, sugar, and flour. Mix until smooth.
- Add whipping cream, vanilla extract, and orange zest. Mix on low until combined.
- Add the eggs one at a time, mixing on low speed until each is incorporated.
- Pour the ricotta filling into the cooled crust and spread evenly.
- Bake for approximately 1 hour and 15 minutes. The center should jiggle slightly when done.
- Sprinkle mini chocolate chips on top and bake for an additional 10 minutes.
- Cool in the pan for 30 minutes, then refrigerate for at least 4 hours or overnight.
- Dust with confectionery sugar before serving and garnish as desired.
Leave a Reply