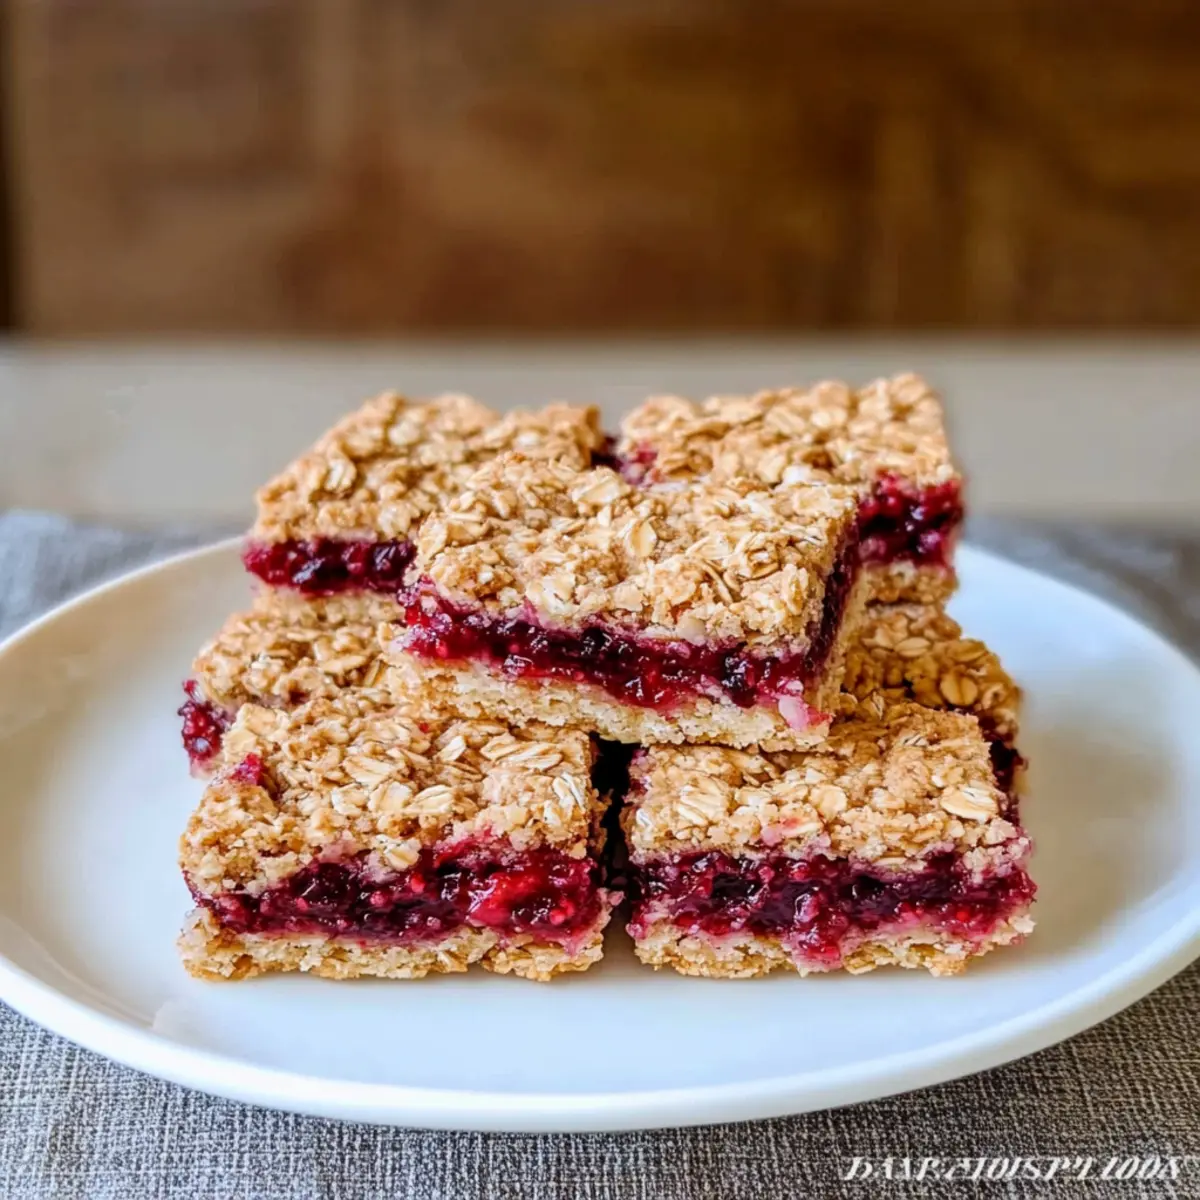
Rushing out the door with only a granola bar in your hand? It’s a familiar scene many of us know all too well. Enter my irresistible Berry Oat Bars, the perfect solution for those hectic mornings when you crave something wholesome and satisfying. These delightful bars combine a hearty oat base with a luscious berry filling, creating a portable treat that’s quick to prepare and allows you to customize flavors with your favorite fruits. Not overly sweet, they’re a guilt-free snack that works wonders as an easy breakfast option or a charming dessert for picnics. Have you ever thought about making your own on-the-go snacks that cater to your taste buds? Let’s dive into creating these Berry Oat Bars that will elevate your snack game!
Why make Berry Oat Bars?
Hearty, Chewy Texture: The rolled oats create a satisfying bite that fills you up without weighing you down.
Customizable Flavors: Mix and match your favorite berries or even experiment with bananas and chocolate chips to create your ideal treat.
Quick and Easy: With straightforward steps and minimal prep, you’ll have delicious snacks ready in no time — perfect for busy mornings!
Less Sweet Satisfaction: Enjoy a wholesome snack that’s perfectly balanced, offering natural sweetness that doesn’t overwhelm your palate — ideal for a guilt-free indulgence.
Crowd-Pleasing Treat: Whether you’re hosting a picnic or need a family-friendly snack, these bars are sure to impress and disappear quickly! For more delightful snack ideas, check out my Strawberry Honey Custard and Harvest Marble Bars.
Berry Oat Bars Ingredients
• To create your own delectable Berry Oat Bars, gather these essential ingredients for the perfect balance of flavors and textures.
For the Base
- Rolled Oats – Provides structure and chewiness; feel free to use gluten-free oats for a GF version.
- All-Purpose Flour – Adds stability to the bars; substitute with whole wheat flour for extra flavor and fiber.
- Light Brown Sugar – Sweetens and adds moisture; coconut sugar can be used for a less processed option.
- Baking Powder – Helps the bars rise slightly; ensure it’s fresh for optimal effectiveness.
- Salt – Balances sweetness and enhances overall flavor.
- Unsalted Butter – Adds richness and binds the ingredients; swap with coconut oil for a dairy-free version.
For the Berry Filling
- Mixed Berries – Provides natural sweetness and flavor; fresh or frozen works well, just adjust sugar based on ripeness.
- Granulated Sugar – Adds a touch of sweetness to the berry mix; consider reducing or substituting with honey.
- Cornstarch – Thickens the berry filling to prevent it from being too runny; arrowroot starch can be an excellent substitute.
- Vanilla Extract – Enhances the overall flavor; feel free to omit if desired.
Now you have everything you need to whip up these delightful Berry Oat Bars that are sure to brighten up your day!
Step‑by‑Step Instructions for Berry Oat Bars
Step 1: Preheat the Oven
Begin by preheating your oven to 350°F (175°C). While it heats, line an 8×8-inch baking pan with parchment paper, ensuring it overhangs the edges for easy removal later. This setup will help your Berry Oat Bars release effortlessly once baked, so take a moment to get this ready.
Step 2: Mix Dry Ingredients
In a large mixing bowl, combine the rolled oats, all-purpose flour, light brown sugar, baking powder, and salt. Stir the mixture well until all the dry ingredients are evenly incorporated, creating a lovely, inviting aroma. This step lays the foundation for the hearty texture of your Berry Oat Bars, so don’t rush through it!
Step 3: Incorporate the Butter
Next, pour the melted unsalted butter into your dry mixture. Use a fork or your hands to mix everything together until it becomes crumbly, resembling wet sand. This process ensures the buttery richness binds the oats and flour, creating a tasty base for your bars, so take your time to achieve a uniform crumb.
Step 4: Form the Crust
Press about two-thirds of the oat mixture firmly into the bottom of the prepared baking pan, creating an even layer to form a sturdy crust. Use your fingertips or the back of a measuring cup to smooth it out. This layer will cradle the berry filling, so make sure it’s compact and well-formed before moving on to the next step.
Step 5: Prepare the Berry Filling
In a separate bowl, toss your mixed berries with granulated sugar, cornstarch, and vanilla extract. Gently combine until the berries are coated, ensuring they are sweetened and thickened. This mixture will become the juicy highlight of your Berry Oat Bars, so be careful not to overmix and crush the berries.
Step 6: Assemble the Bars
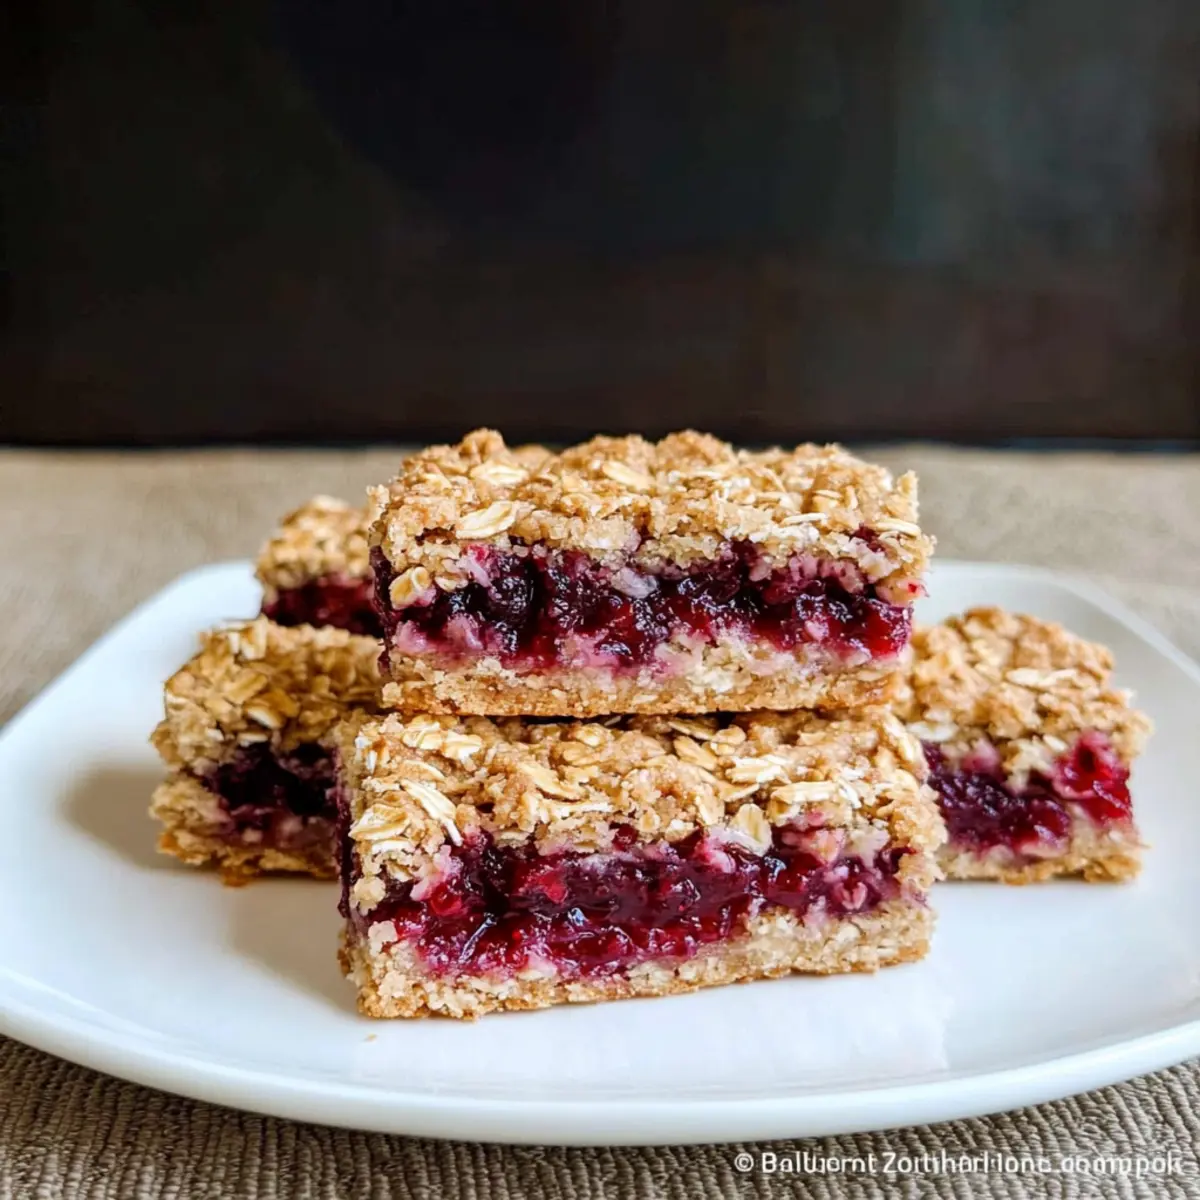
Spread the prepared berry mixture evenly over the crust in the baking pan, allowing the sweet, colorful berries to shine. Then, sprinkle the remaining oat mixture over the top, creating a delightful crumble effect. This layering adds both texture and beauty to your Berry Oat Bars, ensuring each bite is flavorful and satisfying.
Step 7: Bake to Perfection
Place the assembled bars in the preheated oven and bake for 30 minutes, or until the top is golden brown and the berry filling is bubbling. Keep an eye on the edges to ensure they don’t burn; the perfect visual cue is the golden color appearing as the aromas fill your kitchen with warmth.
Step 8: Cool and Slice
Once baked, remove the pan from the oven and allow the Berry Oat Bars to cool completely in the pan. This cooling process helps the filling set further, making it easier to cut clean slices. Once cooled, lift the bars out using the parchment paper and slice them into squares, ready to enjoy or store for later.

Expert Tips for Berry Oat Bars
-
Butter Temperature: Ensure that the butter is melted and slightly cooled before adding it to avoid cooking the oats, which could affect texture.
-
Pan Size Matters: Use an 8×8-inch baking pan for optimal results; using a larger size may result in thinner bars and require less baking time.
-
Cool Before Cutting: Let the Berry Oat Bars cool completely before slicing to prevent crumbling and to ensure clean cuts for an appealing presentation.
-
Berry Choices: Feel free to mix and match berries; just remember that different fruits may require slight adjustments in sugar levels depending on their sweetness.
-
Storage Solution: Store your Berry Oat Bars in an airtight container at room temperature for up to 2 days or refrigerate for a week to keep them fresh and delicious.
What to Serve with Berry Oat Bars?
Elevate your Berry Oat Bars experience with delightful pairings that complement their sweet and hearty nature.
-
Greek Yogurt: A dollop of creamy Greek yogurt adds a refreshing tang that perfectly balances the sweetness of the bars. Enjoy them as a quick breakfast, topped with some honey!
-
Fresh Fruit Salad: Light and vibrant, a fruit salad with seasonal fruits lends freshness and brightness, making it a perfect side. The variety of textures enhances every bite of the bars.
-
Nut Butter Spread: Drizzling almond or peanut butter on top not only adds extra protein but also a nutty richness that creates a delightful contrast to the berry filling.
-
Herbal Tea: A warm cup of chamomile or mint tea pairs beautifully for a cozy afternoon snack, bringing aromatic notes that enhance the whole experience, creating a soothing moment.
-
Chocolate Chia Pudding: For a dessert twist, serve alongside a rich chocolate chia pudding. The smooth texture and chocolate flavor create a delightful indulgence and satisfy both healthy cravings and sweet tooth!
-
Almonds or Walnuts: A handful of toasted nuts contributes crunch and healthy fats, which contrast nicely with the chewy oats and juicy berries, making your snack satisfying and nutritious.
-
Ice Cream: For a truly indulgent treat, serve warm bars with a scoop of vanilla ice cream, allowing the cold creaminess to mingle with the warm, sweet berries—pure bliss!
Storage Tips for Berry Oat Bars
Room Temperature: Store Berry Oat Bars in an airtight container at room temperature for up to 2 days. This keeps them fresh and chewy for those quick snacks!
Fridge: If you prefer to enjoy them chilled, refrigerate Berry Oat Bars for up to one week. Just ensure they’re in a well-sealed container to prevent drying out.
Freezer: For longer storage, freeze the bars for up to 3 months. Layer with parchment paper between bars to prevent sticking, then seal in a freezer-safe bag.
Reheating: To enjoy warm, reheat individual bars in the microwave for about 10-15 seconds, or until just warm. Perfect for that cozy treat any time!
Berry Oat Bars Variations & Substitutions
Feel free to personalize your Berry Oat Bars to match your taste preferences and dietary needs—get creative!
-
Dairy-Free: Substitute unsalted butter with coconut oil for a rich, dairy-free option that keeps the bars delightful.
-
Gluten-Free: Use certified gluten-free rolled oats and replace all-purpose flour with almond flour to enjoy these bars without gluten.
-
Less Sweet: Reduce the amount of granulated sugar in the berry filling and opt for fresh, ripe berries for natural sweetness.
-
Flavor Twist: Swap the mixed berries for chopped apples and add cinnamon for a cozy, autumn-inspired variation that warms the soul.
-
Nutty Crunch: Incorporate chopped nuts or seeds into the oat base for an extra crunch and a protein boost that makes for a more satisfying snack.
-
Tropical Delight: Substitute berries with diced pineapple and add shredded coconut to create a sunny, tropical treat that transports you to paradise with every bite.
-
Chocolate Boost: Stir in dark chocolate chips with the oat mixture for a decadent twist that pairs beautifully with any berry combination.
For more delicious snacks, consider trying my Strawberry Cheesecake Protein or some tempting Harvest Marble Bars. Let your creativity shine!
Make Ahead Options
These Berry Oat Bars are perfect for meal prep lovers! You can prepare the dry ingredients (rolled oats, flour, brown sugar, baking powder, and salt) up to 24 hours in advance. Just store them in an airtight container at room temperature to maintain freshness. Additionally, you can mix the berry filling (berries, sugar, cornstarch, and vanilla) a day ahead and refrigerate it overnight, which allows the flavors to meld beautifully. When you’re ready to bake, simply combine the components, press the crust into the pan, add the berry mixture, and sprinkle with the remaining oat crumble. Then bake at 350°F (175°C) for that scrumptious, fresh-out-of-the-oven taste, saving you time on busy mornings!
Berry Oat Bars Recipe FAQs
What berries should I use for my Berry Oat Bars?
You can use a mix of fresh or frozen berries like blueberries, raspberries, or strawberries for your Berry Oat Bars. If you’re using fresh, look for berries that are plump and firm, without any dark spots or signs of mold. Frozen berries work well, too; just remember to let them thaw slightly and drain excess liquid.
How should I store my Berry Oat Bars?
Store your Berry Oat Bars in an airtight container at room temperature for up to 2 days, or refrigerate them for up to one week. If you choose to refrigerate, ensure the container is well-sealed to prevent them from drying out. For longer freshness, you can freeze the bars for up to 3 months.
Can I freeze my Berry Oat Bars?
Absolutely! To freeze your Berry Oat Bars, first, let them cool completely. Then, slice them into individual bars and layer them with parchment paper to prevent sticking. Place the layers in a freezer-safe bag or container, and they will stay fresh for up to 3 months. When you’re ready to enjoy, simply thaw them in the fridge or microwave for a quick treat!
What should I do if my berry filling is too runny?
If your berry filling turns out too runny, it may be due to an excess of juiciness from the berries used. To fix this, you can mix in a bit more cornstarch (about 1 teaspoon at a time) until it thickens to your desired consistency. Just remember to gently fold in the cornstarch to avoid crushing the berries.
Are Berry Oat Bars suitable for allergies or dietary restrictions?
Yes! You can easily adapt your Berry Oat Bars for various dietary needs. For a gluten-free version, simply substitute the all-purpose flour with gluten-free flour and make sure to use gluten-free oats. For dairy-free, swap the unsalted butter for coconut oil or a plant-based butter. Always check your ingredients for potential allergens, especially if serving to others.
How long do Berry Oat Bars last in the fridge?
When stored correctly in an airtight container, your Berry Oat Bars can last in the fridge for up to one week. They tend to taste best when fresh, but chilling them can also enhance their flavor and give them a delightful chewy texture. Enjoy your tasty, homemade treat!
Berry Oat Bars: Deliciously Hearty and Easy to Make!
Ingredients
Equipment
Method
- Preheat the oven to 350°F (175°C) and line an 8x8-inch baking pan with parchment paper.
- In a large mixing bowl, combine rolled oats, all-purpose flour, light brown sugar, baking powder, and salt; stir well.
- Pour melted butter into the dry mixture and mix until crumbly, resembling wet sand.
- Press about two-thirds of the oat mixture into the bottom of the prepared baking pan.
- Toss mixed berries with granulated sugar, cornstarch, and vanilla extract in a separate bowl until coated.
- Spread the berry mixture evenly over the crust and sprinkle the remaining oat mixture over the top.
- Bake for 30 minutes or until the top is golden brown and the berry filling is bubbling.
- Allow bars to cool completely in the pan before lifting out and slicing into squares.
Leave a Reply