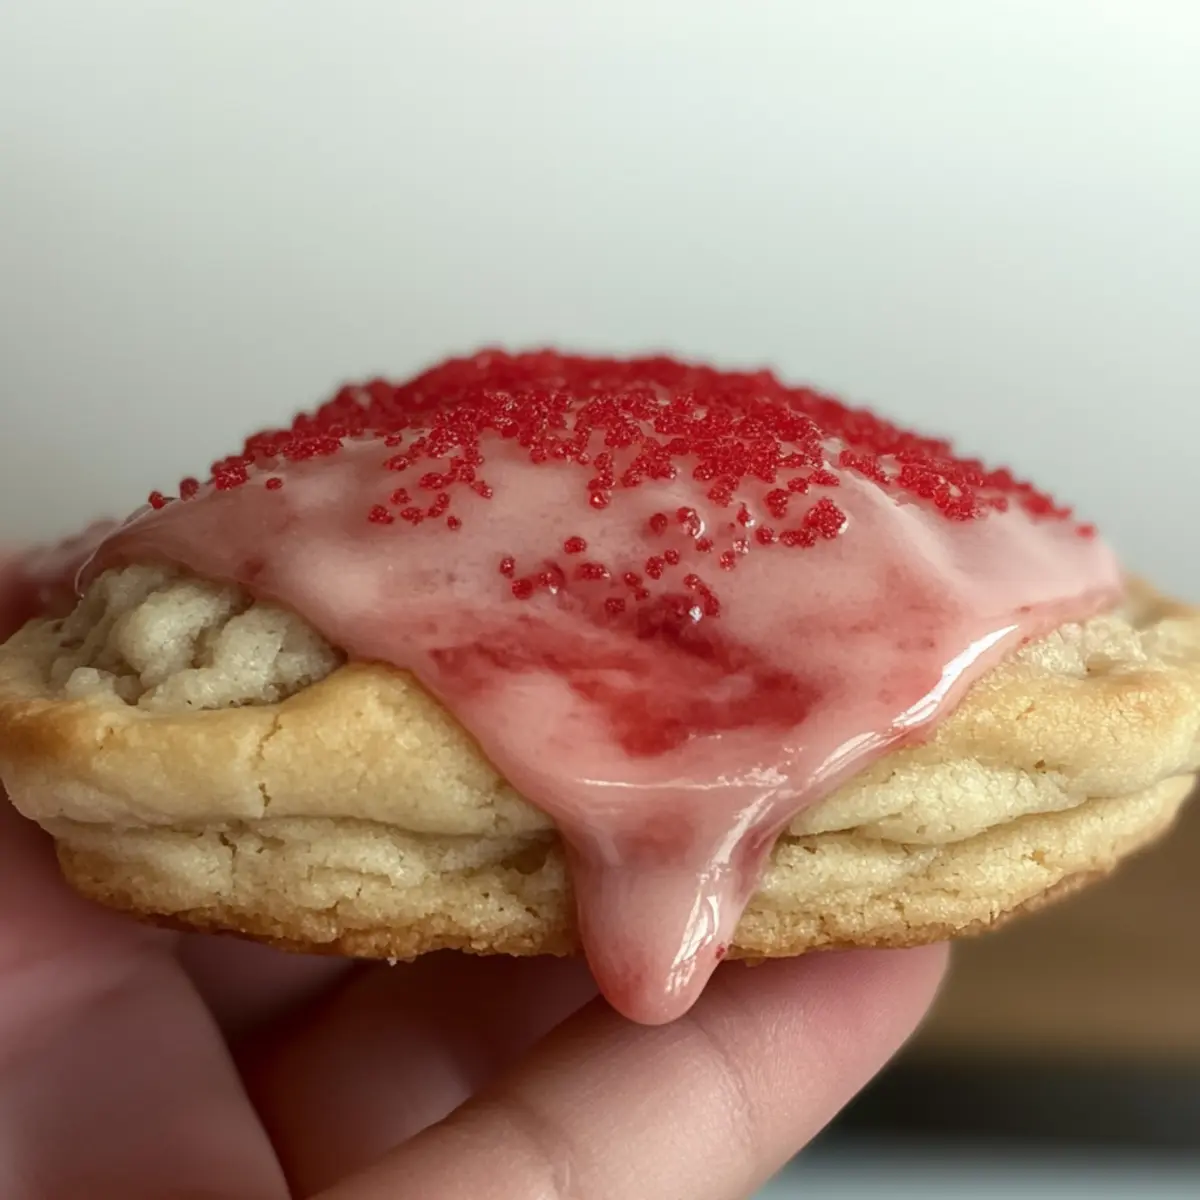
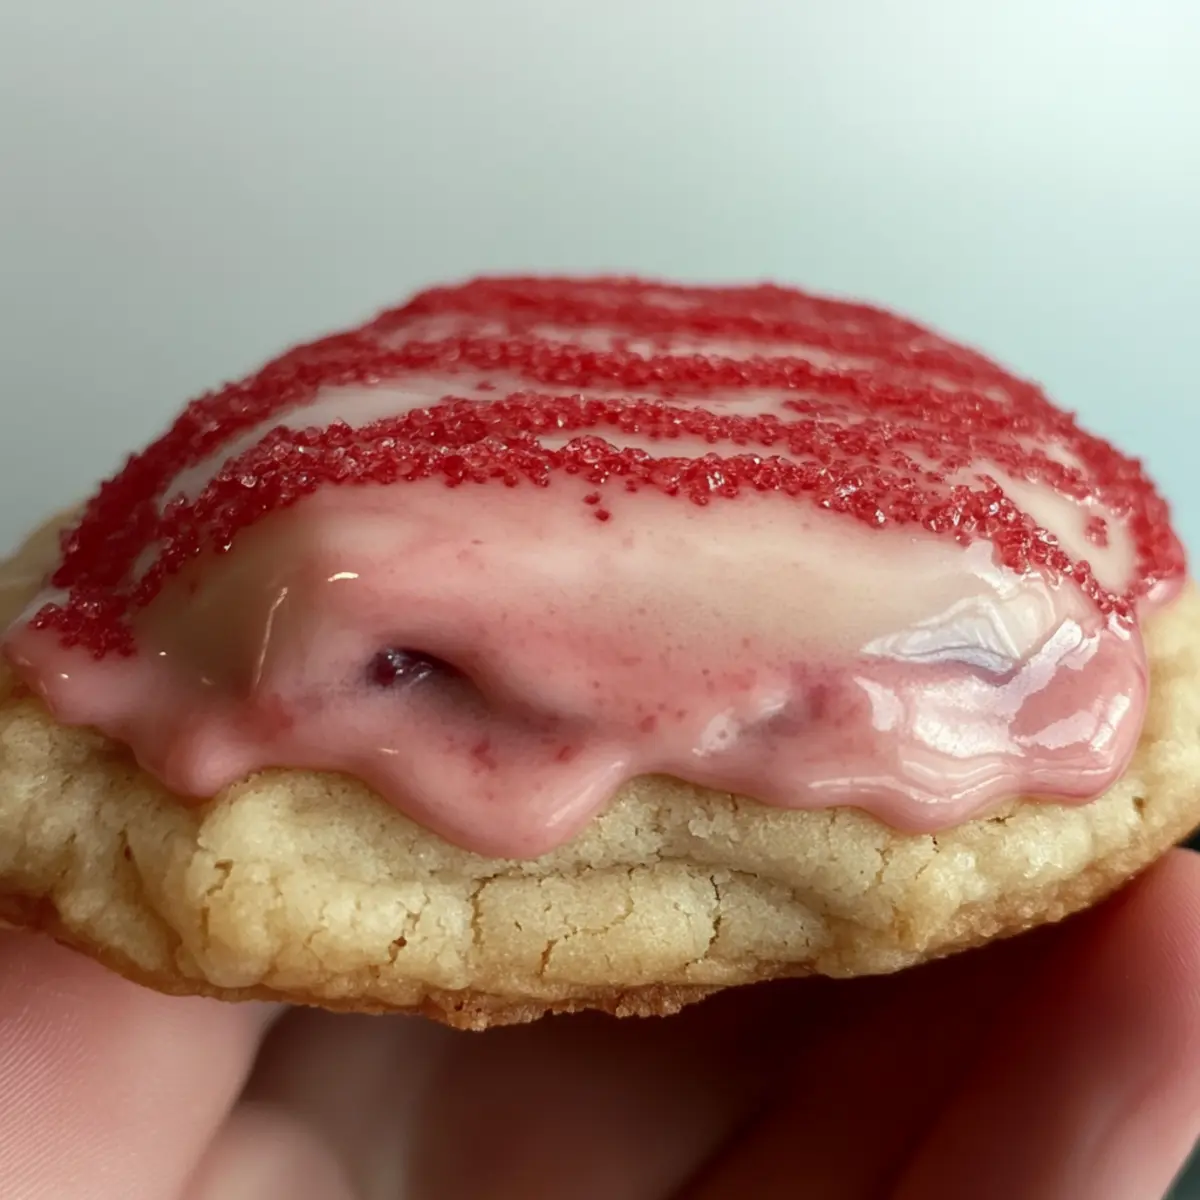
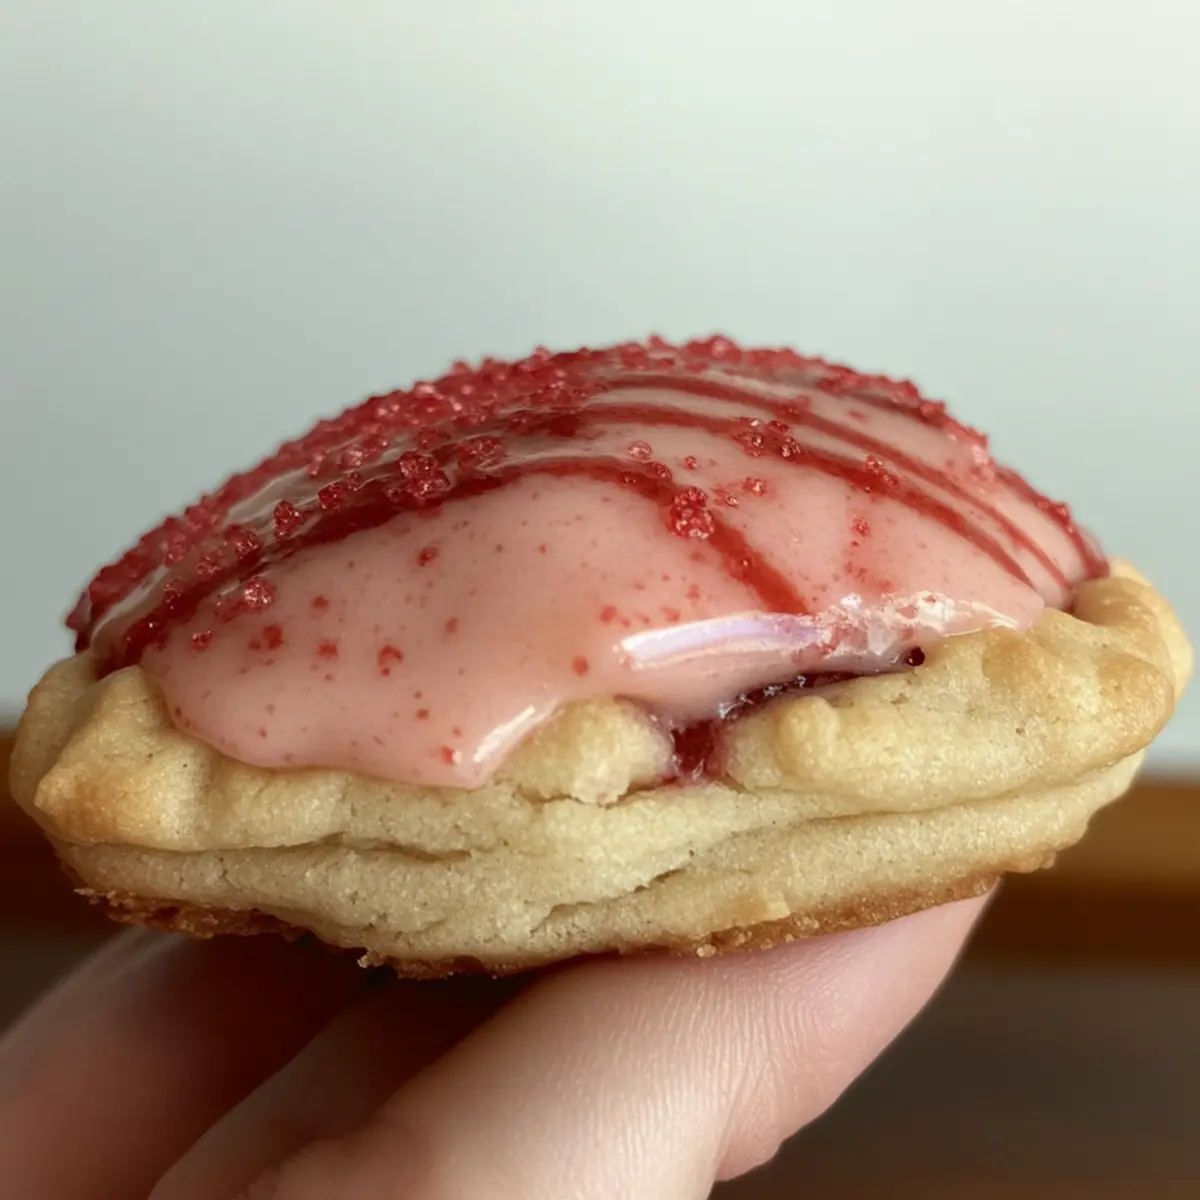
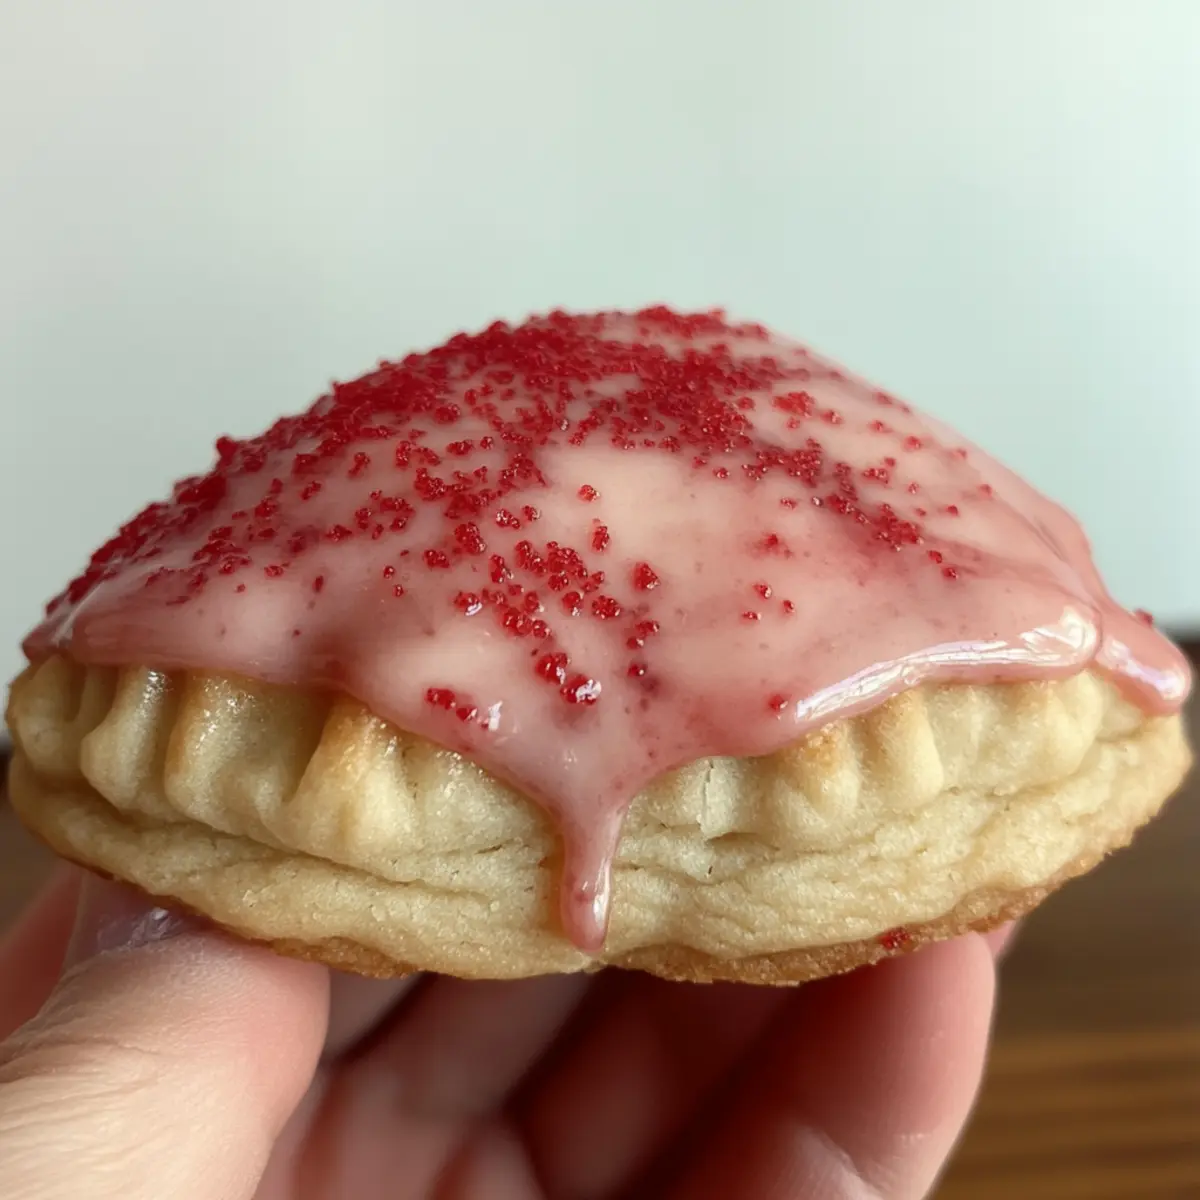
As I pulled a batch of cookies from the oven, the sweet scent of cherries wafted through my kitchen, instantly taking me back to summer picnics and childhood treats. These Cherry Pop-Tart Cookies are not just a delicious indulgence but offer a nostalgic twist on the classic bakery-style favorite. Each bite features a tender cookie dough enveloping a luscious cherry pie filling, finished off with a glossy glaze and cheerful red sugar sprinkles. It’s a cozy, comforting dessert that’s easy to whip up and always a crowd-pleaser. Whether you’re enjoying them with your morning coffee or sharing them with loved ones at a gathering, they promise to bring smiles to everyone’s faces. Are you ready to relive those sweet memories with me and create a delightful new tradition?
Why are these cookies so special?
Nostalgic Flavors: These Cherry Pop-Tart Cookies evoke fond memories of childhood treats, mixing fun and indulgence in every bite.
Easy to Make: With just a handful of ingredients, you’ll whip these up in no time, making them perfect for beginner bakers.
Versatile Variations: Feel free to swap out the cherry filling for other favorites like blueberry or chocolate ganache, ensuring there’s something for everyone.
Crowd-Pleasing Treat: Ideal for gatherings, these cookies spark joy and delight, reminiscent of summer picnics. For additional sweet inspiration, try making Pecan Pie Cookies or Peppermint Sugar Cookie bites for your next event!
Perfect Texture: The delightful combination of chewy dough and gooey filling will have everyone asking for seconds.
Make-Ahead Option: You can prepare and freeze the dough to bake fresh cookies whenever the craving hits!
Cherry Pop-Tart Cookie Ingredients
For the Cookie Dough
• All-purpose flour – Structure; can be substituted with a gluten-free flour blend for a gluten-free version.
• Granulated sugar – Adds sweetness and moisture; brown sugar can be used for a deeper flavor.
• Baking soda – Leavening agent; ensure it is fresh for optimal rise.
• Salt – Enhances flavor; essential for balancing sweetness.
• Unsalted butter – Provides richness and texture; use softened or substitute with coconut oil for a dairy-free option.
• Egg – Acts as a binder; can substitute with a flax egg for a vegan option.
• Vanilla extract – Enhances flavor; use pure extract for best results.
For the Cherry Filling
• Cherry pie filling – The star of the cookie; use homemade or store-bought for convenience.
For the Glaze
• Powdered sugar – Essential for glaze consistency; adjust liquid to reach desired thickness.
• Milk (or milk alternative) – Combines for glaze; non-dairy milk can be used as a substitute.
• Red sugar sprinkles – Decorative touch; optional, can use any colored sprinkles for a festive look.
This ingredient breakdown ensures you’ll create the most delightful Cherry Pop-Tart Cookies, infused with sweet memories and smiles!
Step‑by‑Step Instructions for Cherry Pop-Tart Cookie
Step 1: Prepare Dough
In a mixing bowl, cream together 1 cup of softened unsalted butter and 1 cup each of granulated and brown sugar until the mixture is light and fluffy, about 3-5 minutes. Next, beat in 1 large egg and 1 teaspoon of pure vanilla extract until well combined. This will create a rich and creamy base for your Cherry Pop-Tart Cookies.
Step 2: Combine Dry Ingredients
In a separate bowl, whisk together 2 cups of all-purpose flour, 1 teaspoon of baking soda, and ½ teaspoon of salt. Gradually add this dry mixture to your wet ingredients, stirring gently until just combined. The dough should be thick but moist, ready to be formed into the perfect cookie shape.
Step 3: Chill the Dough
For optimal texture, chill the dough in the refrigerator for at least 30 minutes. This step is essential for making your Cherry Pop-Tart Cookies easier to handle while enhancing their chewiness. You can cover the bowl with plastic wrap or transfer the dough to an airtight container while it cools.
Step 4: Portion the Dough
Once chilled, preheat your oven to 350°F (175°C) and prepare a lined baking sheet. Use a cookie scoop to portion out generous balls of dough, about 6 ounces (170g) each. Place the dough balls on the baking sheet, slightly flattening them with your hand to make room for the delicious cherry filling that will follow.
Step 5: Fill with Cherry Mixture
Create a small indentation in the center of each dough ball using your thumb or a spoon. Spoon approximately one tablespoon of cherry pie filling into the cavity and carefully cover it with another mound of dough, sealing the filling inside. Ensure the edges are tightly pinched together to prevent any filling from leaking out during baking.
Step 6: Bake
Place your filled cookies in the preheated oven and bake for 12-15 minutes. Keep an eye on them; the edges should be golden brown, while the center remains soft. This baking process will help the flavors meld beautifully, creating that nostalgic Cherry Pop-Tart character everyone loves.
Step 7: Cool and Glaze
Once baked, allow your Cherry Pop-Tart Cookies to cool on a wire rack for about 10 minutes. Meanwhile, prepare the glaze by whisking together 1 cup of powdered sugar and 2 tablespoons of milk until smooth. Once cookies are completely cooled, drizzle the glaze over the tops and sprinkle with festive red sugar sprinkles for an extra touch of sweetness.
Expert Tips for Cherry Pop-Tart Cookies
- Chill the Dough: Make sure to chill the dough for at least 30 minutes before baking. This step helps create chewier cookies and makes the dough easier to handle.
- Proper Sealing: When filling the cookies, ensure the dough is tightly sealed around the cherry pie filling to prevent any leakage during baking.
- Use a Cookie Scoop: For uniformity in size, utilize a cookie scoop when portioning out the dough; this ensures even baking and a consistent cookie shape.
- Watch Your Bake Time: Keep an eye on the cookies while baking. Every oven is different; they should be golden brown on the edges but still soft in the middle, capturing that nostalgic Cherry Pop-Tart texture.
- Test the Filling: Opt for cherry pie filling that isn’t too runny. If it’s overly liquid, it can make the cookies soggy and affect the final result.
- Storage Essentials: Store any leftover cookies in an airtight container at room temperature for up to three days to maintain freshness.
Make Ahead Options
These Cherry Pop-Tart Cookies are perfect for meal prep enthusiasts! You can prepare the cookie dough up to 24 hours in advance and refrigerate it, ensuring it remains fresh and ready to bake. Once you’ve made the dough, simply chill it in an airtight container. Additionally, you can portion out the dough balls and freeze them for up to 3 months; to do this, place the rolled balls on a baking sheet until firm, then transfer them to a zip-lock bag. When you’re ready to bake, just add a couple of extra minutes to the baking time directly from the freezer. This way, you’ll enjoy warm, gooey Cherry Pop-Tart Cookies with minimal effort whenever a craving hits!
Cherry Pop-Tart Cookie Variations
Embrace the joy of customization as you explore these delightful variations to your Cherry Pop-Tart Cookies!
- Gluten-Free: Substitute all-purpose flour with a 1:1 gluten-free flour blend for a tasty option everyone can enjoy.
- Fruit-Filled: Swap cherry pie filling for blueberry, strawberry, or even apple pie filling to create a medley of flavors. Imagine the vibrant colors and irresistible sweetness!
- Nutty Addition: Mix in chopped nuts like pecans or walnuts for a satisfying crunch that complements the chewy cookie texture.
- Chocolate Delight: Fold in semi-sweet or dark chocolate chips to the dough for a delicious chocolatey twist. Pairing chocolate with cherry is always a winning combination!
- Almond Infusion: Add a touch of almond extract alongside the vanilla for a warm, nutty flavor that pairs perfectly with the cherry filling. It adds an aromatic surprise!
- Dairy-Free: Use coconut oil or a plant-based butter alternative in place of regular butter, making these cookies friendly for dairy-sensitive diets.
- Spicy Kick: Incorporate a pinch of cinnamon or nutmeg into the dough for a cozy, seasonal twist. This brings an extra layer of warmth to every bite!
- Frosting Fun: Instead of a glaze, top cookies with your favorite store-bought frosting to turn these treats into showstoppers at any gathering. Consider festive colors for special occasions!
Each of these variations adds its own character to the beloved Cherry Pop-Tart Cookie recipe. While you’re at it, why not sweeten your dessert table with a few more delightful options? Check out the delicious Pecan Pie Cookies or try crafting some whimsical Peppermint Sugar Cookie bites for a festive touch!
Storage Tips for Cherry Pop-Tart Cookies
- Room Temperature: Store cookies in an airtight container for up to 3 days to maintain their soft, chewy texture; they make a delightful snack anytime.
- Fridge: If you prefer a colder treat, you can refrigerate them. Just be sure to seal them well in an airtight container to prevent the cookies from drying out.
- Freezer: For long-term storage, freeze cookies in a single layer, then transfer to a zip-lock bag. They’ll keep well for up to 3 months; just thaw at room temperature before enjoying.
- Reheating: To enjoy warm cookies again, pop them in the microwave for about 10-15 seconds for that fresh-out-of-the-oven experience.
What to Serve with Cherry Pop-Tart Cookies
Pair these delightful cookies with tantalizing sides and drinks that will elevate your snacking experience.
-
Vanilla Ice Cream: The creamy, cool sweetness perfectly balances the chewy cookie, creating a comforting dessert that’s hard to resist. A scoop of vanilla ice cream alongside your Cherry Pop-Tart Cookies feels like a warm hug on a plate, enhancing the nostalgic flavors.
-
Fresh Berries: Juicy strawberries or tart raspberries add a refreshing contrast to the rich filling. Their bright, juicy pop dances on your palate, bringing a burst of freshness that complements the sweetness of the cookies.
-
Strong Coffee: Rich, robust coffee plays off the sweet cherry flavor beautifully, balancing indulgence with a little kick. Sipping on a bold coffee while enjoying one of these cookies transports you to a cozy café, perfect for slow, lingering moments of joy.
-
Milk or Chocolate Milk: A classic pairing that evokes childhood memories, the creamy texture of milk complements the buttery cookies. Whether you prefer regular or chocolate milk, it’s a nostalgic touch that makes every bite more enjoyable.
-
Coconut Macaroons: These chewy coconut treats provide a delightful tropical twist that contrasts with the cherry sweetness. Their satisfying chewiness and toasty flavor pair beautifully with the cookies, adding an exotic flair to the dessert table.
-
Lemonade: A tangy glass of lemonade cuts through the richness, providing a refreshing balance to the sweet, gooey filling of the cookies. The zesty citrus notes are invigorating, perfect for a summer gathering or picnic.
-
Chocolate Drizzle: A simple drizzle of melty chocolate enhances the flavor while adding an extra layer of decadence. The sweet, silky chocolate complements the cookies’ cherry center, creating a delightful harmony of flavors.
Cherry Pop-Tart Cookies Recipe FAQs
How do I select ripe cherries for the filling?
Absolutely! When choosing cherries for your filling, look for plump, firm cherries with a deep red color. Avoid cherries with dark spots or wrinkles, as these may indicate overripeness. If you’re using a store-bought pie filling, check the label for whole cherries to ensure quality and flavor.
How should I store my Cherry Pop-Tart Cookies?
You can store your cookies in an airtight container at room temperature for up to 3 days, keeping that delightful texture intact! If they last beyond that, I recommend freezing them. Place the cookies in a single layer on a baking sheet, freeze until solid, and then transfer them to a zip-lock bag for up to 3 months.
Can I freeze the dough before baking?
Very! Freezing the unbaked dough is a fantastic option. After portioning the dough into balls, place them on a baking sheet and freeze until solid. Then, transfer the dough balls to a zip-lock bag and store for up to 3 months. When you’re ready to bake, simply place the frozen dough on a lined baking sheet and add an extra 2-3 minutes to the baking time.
What should I do if my cookies spread too much while baking?
If you notice your cookies spreading excessively, it may be due to the butter being too warm or not chilling the dough long enough. To prevent this, make sure your butter is softened, not melted, and take a moment to chill the dough for at least 30 minutes before baking. Also, consider using a cookie scoop to help maintain uniform sizes.
Are there any dietary considerations for pets with cherry ingredients?
Definitely! While cherries are delicious for humans, they can be toxic to pets, especially the pits and stems. Always ensure that when using cherry pie filling, all pits and stems are removed, and be cautious not to share any cookies with your furry friends. If there’s a concern about allergies, check the ingredient labels to keep safe.
Can I use a different type of filling for my Cherry Pop-Tart Cookies?
Absolutely! Feel free to get creative! You can swap out the cherry pie filling for your favorite flavors like blueberry, strawberry, or even chocolate ganache. This allows for fun flavor variations while keeping the same delightful cookie texture intact. Just remember to adjust the sugar level if your alternate filling is sweeter or less sweet than cherries!
Cherry Pop-Tart Cookie: Your New Favorite Nostalgic Treat
Ingredients
Equipment
Method
- In a mixing bowl, cream together 1 cup of softened unsalted butter and 1 cup each of granulated and brown sugar until light and fluffy, about 3-5 minutes.
- Beat in 1 large egg and 1 teaspoon of pure vanilla extract until well combined.
- In a separate bowl, whisk together 2 cups of all-purpose flour, 1 teaspoon of baking soda, and ½ teaspoon of salt.
- Gradually add this dry mixture to wet ingredients, stirring gently until just combined.
- Chill the dough in the refrigerator for at least 30 minutes.
- Preheat your oven to 350°F (175°C) and prepare a lined baking sheet.
- Use a cookie scoop to portion out generous balls of dough, about 6 ounces each.
- Create a small indentation in the center of each dough ball, spoon approximately one tablespoon of cherry pie filling, and cover with another mound of dough.
- Bake for 12-15 minutes until edges are golden brown.
- Allow to cool on a wire rack for about 10 minutes before glazing.
- Whisk together 1 cup of powdered sugar and 2 tablespoons of milk for glaze, drizzle over cooled cookies, and sprinkle with red sugar sprinkles.
Leave a Reply