As I stood in my kitchen, the warm aroma of baking cookies wafted through the air, instantly taking me back to cozy afternoons spent indulging in sweet treats. That’s the magic behind this Biscoff Cheesecake Brownie Recipe: The Ultimate Dessert Combo, where luscious flavors meet decadent textures in perfect harmony. Picture a buttery Biscoff cookie crust cradling a fudgy chocolate brownie, all lovingly swirled with creamy cookie butter and finished off with a spiced cheesecake layer that feels like a hug in dessert form. Not only is this indulgent treat a foolproof crowd-pleaser, but it also offers the joy of baking from scratch without demanding hours in the kitchen. Whether you’re hosting a gathering or simply craving something special for yourself, these brownies are about to become your go-to dessert. Curious to uncover the secrets to this delightful recipe? Let’s dive in and create something truly unforgettable!
Why You’ll Love This Biscoff Brownie?
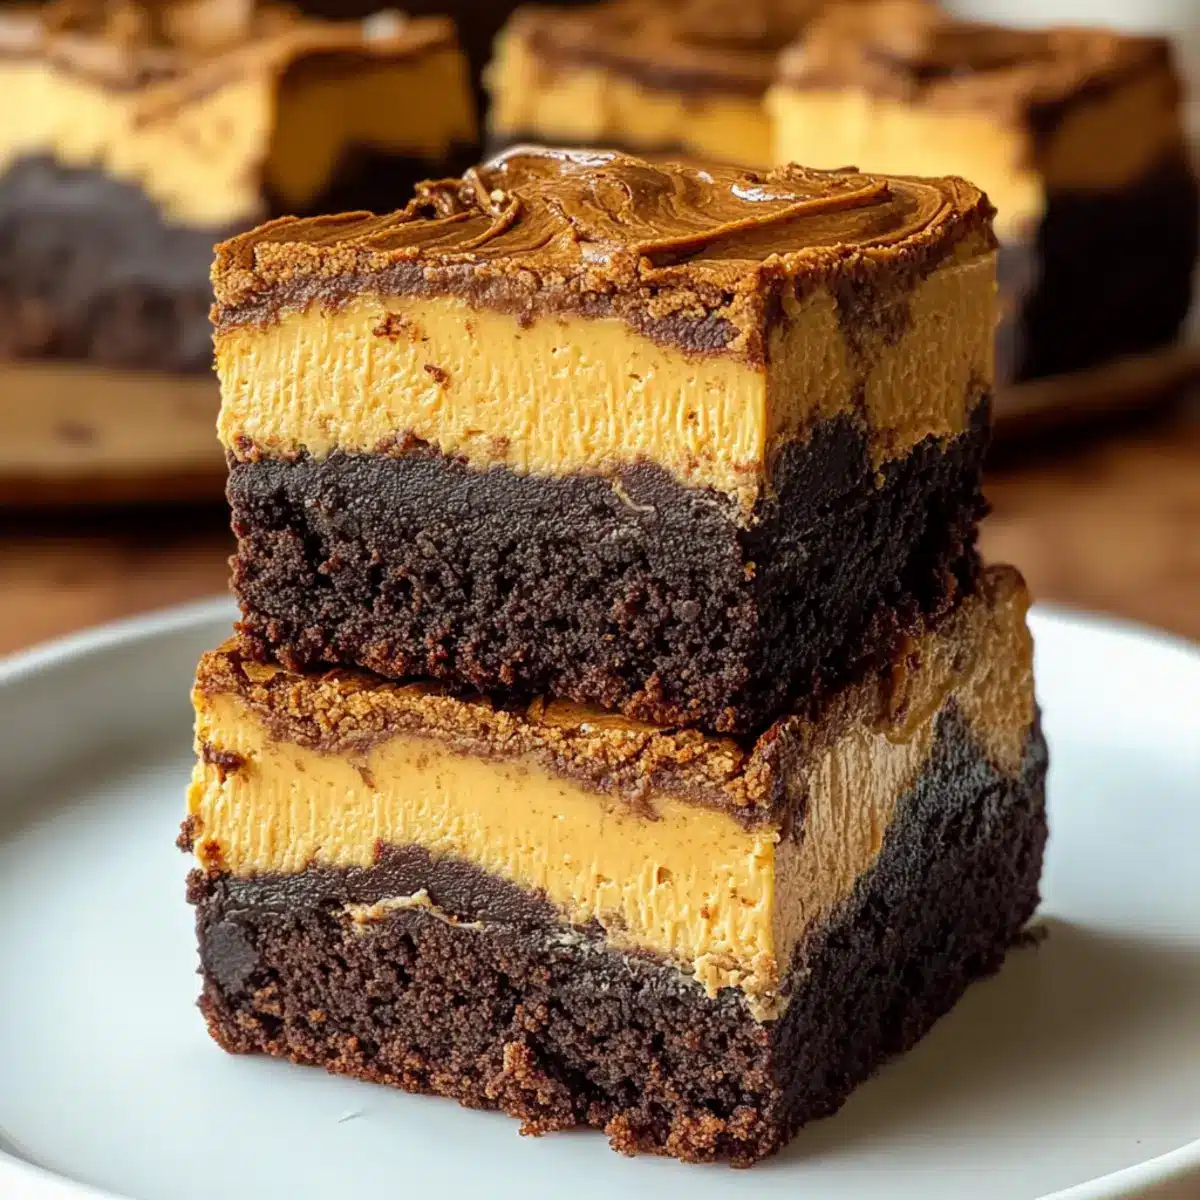
Irresistible Layers: The combination of a buttery Biscoff crust, fudgy brownie, and creamy cheesecake creates a multi-dimensional flavor that will delight your taste buds.
Quick and Easy: This recipe allows you to impress guests without spending all day in the kitchen—your new go-to for gatherings or quiet nights in!
Customization Possibilities: Feel free to get creative! Swap in chocolate wafer cookies or add nuts for extra crunch, tailoring the treat to your preferences.
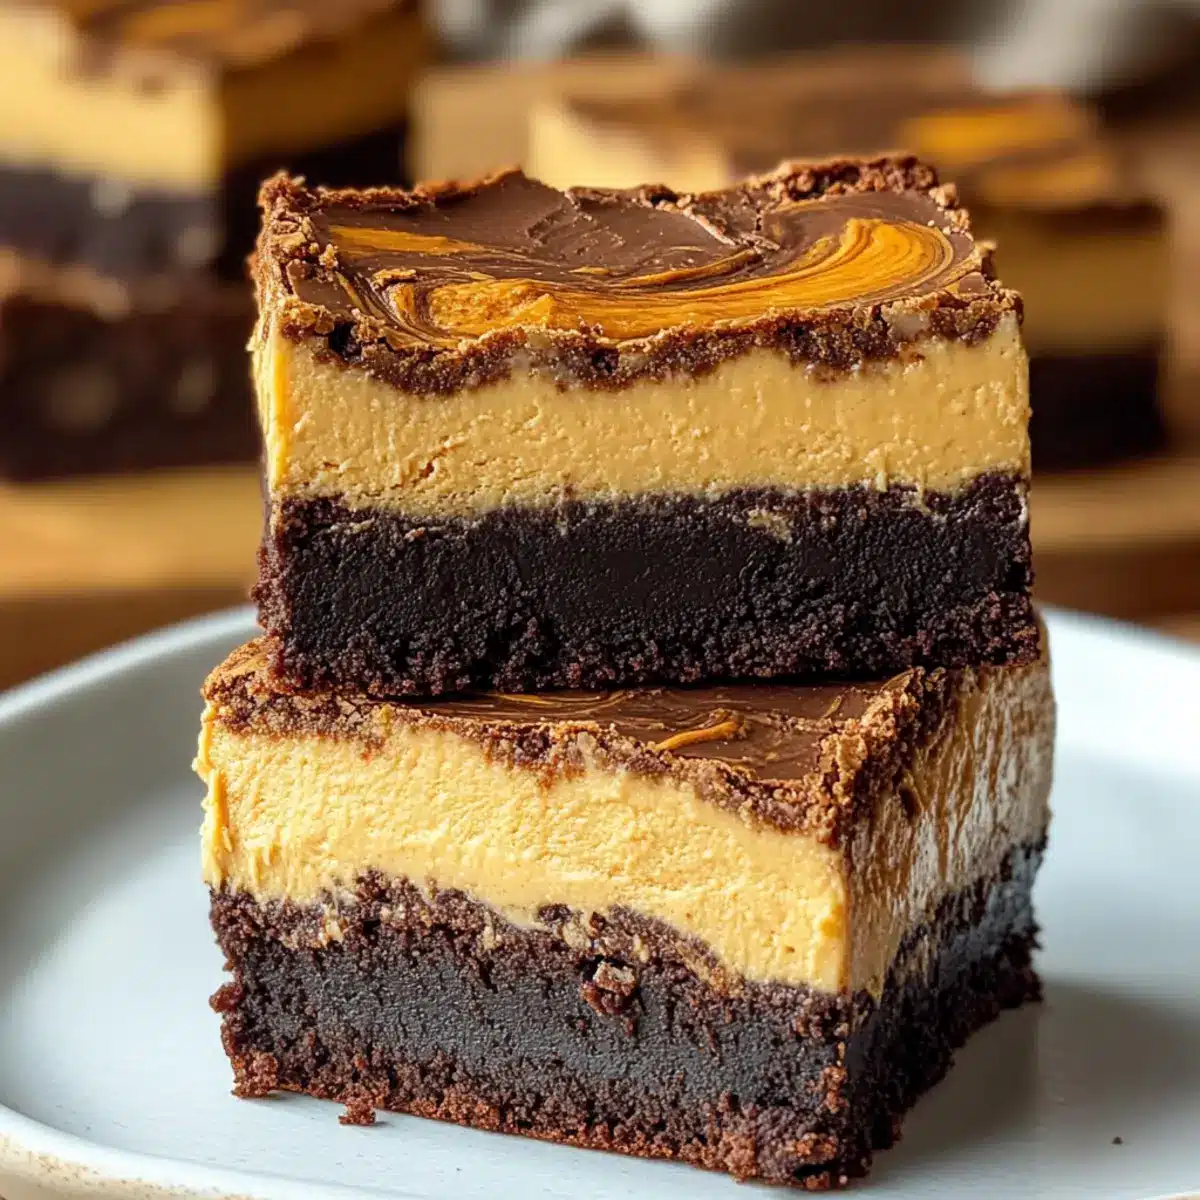
Total Crowd-Pleaser: Rich, indulgent, and visually stunning, these brownies are sure to steal the show at any event—perfect for parties or potlucks!
Perfect for Any Occasion: Whether it’s a cozy dinner at home or a holiday celebration, these brownies fit the bill every time. For a seasonal twist, try a Pumpkin Cheesecake Gingersnap version.
Indulge in the magic of this dessert and share the experience with loved ones!
Biscoff Cheesecake Brownie Ingredients
For the Crust
• Biscoff Cookies – serves as the delicious base layer; you can swap for chocolate wafer cookies or Oreos for a different twist.
• Unsalted Butter – enriches the crust and binds the ingredients; make sure to melt it first for an even mixture.
For the Brownie Layer
• Granulated Sugar – adds the necessary sweetness to the fudgy brownie layer.
• Brown Sugar – brings moisture and a deeper, richer flavor profile.
• Large Eggs – vital for providing structure and richness in your brownie.
• All-Purpose Flour – helps create the desired structure for the brownie base.
• Unsweetened Cocoa Powder – ensures a rich chocolate flavor; the quality of this ingredient makes a big difference!
• Biscoff Spread – incorporates the iconic cookie flavor into the brownie; feel free to substitute with any cookie butter you love.
For the Cheesecake Layer
• Cream Cheese – a key player in the creamy cheesecake layer; using it at room temperature ensures a smooth texture.
• Heavy Cream – infuses richness into the cheesecake, making every bite heavenly.
• Powdered Sugar – sweetens the cheesecake filling to perfection.
• Vanilla Extract – enhances all the flavors; choose pure for the best outcome.
• Spices (cinnamon, nutmeg, etc.) – add delightful warmth and complexity to your cheesecake.
• Salt – the secret ingredient that balances the sweetness across all the layers.
Step‑by‑Step Instructions for Biscoff Cheesecake Brownie Recipe: The Ultimate Dessert Combo
Step 1: Preheat the Oven
Begin by preheating your oven to 350°F (177°C). This ensures that the temperature is just right for baking your layers to perfection. As your oven warms up, gather your ingredients and prepare your baking pan by lightly greasing it or lining it with parchment paper for easy removal.
Step 2: Prepare the Crust
In a mixing bowl, combine crushed Biscoff cookies with melted unsalted butter until you achieve a sandy texture. Press this mixture firmly into the bottom of your prepared baking pan, creating an even layer. Bake the crust for about 10 minutes, or until it’s lightly golden, and then remove it from the oven to cool slightly.
Step 3: Make the Brownie Batter
In a large mixing bowl, whisk together granulated sugar and brown sugar with large eggs until the mixture is smooth and creamy. Gradually add in all-purpose flour and unsweetened cocoa powder, mixing until just combined. Finally, swirl in the Biscoff spread, ensuring you have luscious bites of cookie butter in your brownie layer.
Step 4: Layer the Brownies
Pour the brownie batter evenly over the cooled Biscoff cookie crust, using a spatula to spread it out evenly. Bake your layered creation for about 25–30 minutes, or until the edges are set but the center remains slightly jiggly. This will create a fudgy texture in your Biscoff Cheesecake Brownie.
Step 5: Prepare the Cheesecake Layer
While the brownie layer bakes, mix the cream cheese in a separate bowl until smooth and creamy. Gradually blend in heavy cream, powdered sugar, vanilla extract, and a pinch of spices. Beat this cheesecake mixture until it is perfectly smooth, ensuring it is well combined and mimics a beautiful creamy consistency.
Step 6: Combine the Layers
Once the brownie layer has baked and cooled slightly, pour the cheesecake mixture over the top, spreading it evenly with a spatula. Bake the entire dessert at 300°F (150°C) for about 30–35 minutes, or until the cheesecake is just set. Avoid overbaking to maintain that creamy texture.
Step 7: Cooling and Chilling
After baking, remove the Biscoff Cheesecake Brownie from the oven and allow it to cool completely in the pan. Once cooled, refrigerate the dessert overnight. This chilling time allows the flavors to meld beautifully and achieves the perfect sliceable texture.
Step 8: Slice and Serve
Using a warm knife, carefully slice the brownies into squares for clean edges. Serve your decadent Biscoff Cheesecake Brownie chilled, perhaps topped with a dollop of whipped cream or a drizzle of caramel sauce for an extra touch of indulgence.
What to Serve with Biscoff Cheesecake Brownie?
Delight in the perfect accompaniments that elevate your dessert experience to a whole new level.
-
Whipped Cream: Light and airy, a dollop adds a creamy contrast that balances the richness of the brownies.
-
Caramel Sauce: Drizzle on top for a sweet, indulgent touch that enhances the Biscoff flavor with warm sweetness.
-
Fresh Berries: A handful of raspberries or strawberries provides a burst of freshness and acidity, cutting through the richness.
-
Coffee or Espresso: The bold bitterness of coffee perfectly contrasts the layers of sweetness, making each bite of brownie even more enjoyable.
-
Vanilla Ice Cream: Serve warm brownies with a scoop of vanilla ice cream to create a delightful melty combination that’s simply irresistible.
-
Chocolate Sauce: If you can’t get enough chocolate, a rich sauce will complement the brownie and cheesecake layers beautifully.
-
Chopped Nuts: Sprinkle some toasted pecans or walnuts on top for a crunchy texture that contrasts with the creamy layers.
-
Mint Leaves: Garnish with a sprig of mint for a refreshing finish that brightens the indulgent flavors.
-
Milk or Almond Milk: A cold glass of milk provides a comforting pairing, enhancing the dessert’s rich chocolatey notes.
How to Store and Freeze Biscoff Cheesecake Brownie
Fridge: Keep your Biscoff Cheesecake Brownies in an airtight container in the refrigerator for up to 5 days to maintain freshness and flavor.
Freezer: For long-term storage, freeze the brownies wrapped tightly in plastic wrap and foil for up to 1 month. Make sure to cool completely before wrapping.
Thawing: When ready to enjoy, thaw your frozen brownies in the fridge overnight for the best texture or at room temperature for a few hours.
Reheating: If you prefer a warm treat, gently reheat individual slices in the microwave for about 10-15 seconds, or until warmed through, ensuring not to overheat.
Biscoff Cheesecake Brownie Recipe Variations
Feel free to get creative and make this Biscoff Cheesecake Brownie your own with these delightful variations!
-
Nutty Crunch: Add chopped pecans or walnuts to the brownie layer for a delightful crunch. This will create a wonderful textural contrast, enhancing the overall flavor experience with each bite.
-
Pumpkin Spice: Stir in a few tablespoons of pumpkin puree into the cheesecake layer for an autumn-inspired treat. The spices combined with pumpkin create a cozy, seasonal flavor profile that pairs beautifully with the Biscoff.
-
Mini Muffins: For a fun twist, bake the batter in a muffin tin instead of a pan. Adjust the baking time to about 18-20 minutes for these adorable, individually-sized treats that are perfect for sharing!
-
Chocolate Lovers: Swap out some brownie batter with melted dark chocolate for a richer chocolate experience. The added chocolate elevates the fudginess and creates an indulgent depth of flavor.
-
S’mores Style: Top off the brownie with mini marshmallows and a dusting of crushed graham crackers before the final cheesecake layer. This twist brings a campfire favorite to your dessert table!
-
Minty Fresh: Add a teaspoon of peppermint extract to the brownie batter for a refreshing mint flavor. The combination of chocolate, Biscoff, and mint is a delightful winter treat!
-
Fruit Infusion: Add chopped strawberries or raspberries to the cheesecake layer. The bursts of fruity sweetness complement the richness of the cheesecake beautifully.
-
Drizzle and Decorate: After cooling, drizzle melted chocolate or caramel sauce on top for a stunning finish. This not only looks fantastic but adds an extra layer of deliciousness.
Explore these variations and find your family’s new favorite version of this delightful dessert! If you’re looking for other tasty treats, the Pumpkin Pie Cheesecake and Strawberry Cheesecake Protein recipes may inspire you as well!
Expert Tips for Biscoff Cheesecake Brownie
-
Cool Layers: Allow each layer to cool before adding the next. This prevents the cheesecake layer from sinking into the brownie, ensuring a beautiful presentation.
-
Chill Overnight: For the best flavor and texture, refrigerate your Biscoff Cheesecake Brownie overnight. This helps the layers set and flavors meld beautifully.
-
Avoid Runny Cheesecake: Ensure your cheesecake layer is baked just until set. If underbaked, it could become runny; keep an eye on it during the final bake.
-
Storage Done Right: Store leftovers in an airtight container in the fridge for up to 5 days. For longer storage, these brownies can be frozen for up to 1 month.
-
Slicing Technique: Use a warm knife to slice your brownies. This will give you cleaner edges and keep the layers intact, enhancing the dessert’s presentation.
Make Ahead Options
These Biscoff Cheesecake Brownies are a fantastic make-ahead treat for busy home cooks! You can prepare the crust and brownie layer up to 24 hours in advance, simply refrigerate them in an airtight container after baking. For optimal quality, cool the layers completely before wrapping to prevent sogginess. The cheesecake layer can also be made ahead and assembled; just chill it in the fridge for up to 3 days before you bake. Once you’re ready to enjoy, simply layer the cheesecake on top of the brownie and bake as directed for a delicious, indulgent dessert that tastes freshly made!
Biscoff Cheesecake Brownie Recipe FAQs
What should I look for when selecting Biscoff cookies?
Absolutely! When choosing Biscoff cookies for the crust, look for ones that are crisp with no dark spots or humidity damage. They should be fresh and aromatic, ensuring that your crust turns out flavorful and crunchy. If you can’t find Biscoff, chocolate wafer cookies or Oreos also make a fantastic crust alternative!
How do I store leftover Biscoff Cheesecake Brownies?
I recommend storing your leftover brownies in an airtight container in the refrigerator for up to 5 days. This keeps them fresh and delicious! For added flavor, you might want to place a piece of parchment paper in between layers to prevent sticking.
Can I freeze Biscoff Cheesecake Brownies?
Absolutely! For freezing, cool the brownies completely and then wrap each piece tightly in plastic wrap followed by aluminum foil. This way, they can last for up to 1 month in the freezer. When you’re ready to enjoy, let them thaw overnight in the fridge for the best texture!
My cheesecake layer turned out runny—what could I have done wrong?
Very important! If your cheesecake layer is runny, it may be due to underbaking. Always check that it’s just set in the middle before removing it from the oven—it should have only a slight jiggle. Another tip is to make sure your cream cheese is fully blended and at room temperature; this ensures a smoother batter that adequately bakes.
Are there any dietary considerations I should be aware of?
For those with allergies, be cautious as this recipe contains gluten (from flour) and dairy (from cream cheese and butter). If you’re serving others, it’s a great idea to have a few alternative treats on hand! If you want to make it gluten-free, consider using a gluten-free flour blend and check that your Biscoff cookies meet gluten-free standards.
Can I customize this recipe?
The more the merrier! Feel free to experiment with various flavors. Add chopped nuts like pecans or walnuts for extra crunch or incorporate seasonal flavors like pumpkin puree into the cheesecake mix. You could even make these as cute individual servings in muffin tins; just adjust the baking times accordingly!
Biscoff Cheesecake Brownie Recipe: The Ultimate Dessert Nirvana
Ingredients
Equipment
Method
- Preheat your oven to 350°F (177°C). Prepare your baking pan by lightly greasing it or lining it with parchment paper.
- In a mixing bowl, combine crushed Biscoff cookies with melted unsalted butter until sandy. Press into the prepared baking pan and bake for about 10 minutes. Cool slightly.
- Whisk together granulated sugar, brown sugar, and eggs until smooth. Gradually mix in flour and cocoa powder, then swirl in Biscoff spread.
- Pour brownie batter over the cooled crust and bake for 25–30 minutes until edges are set and center jiggles slightly.
- Mix cream cheese until smooth, then blend in heavy cream, powdered sugar, vanilla, and spices. Beat until smooth.
- Pour the cheesecake mixture over the brownie layer and bake at 300°F (150°C) for 30–35 minutes until just set.
- Allow to cool completely in the pan, then refrigerate overnight for optimal flavor and texture.
- Slice into squares using a warm knife and serve chilled, optionally topped with whipped cream or caramel sauce.
Leave a Reply