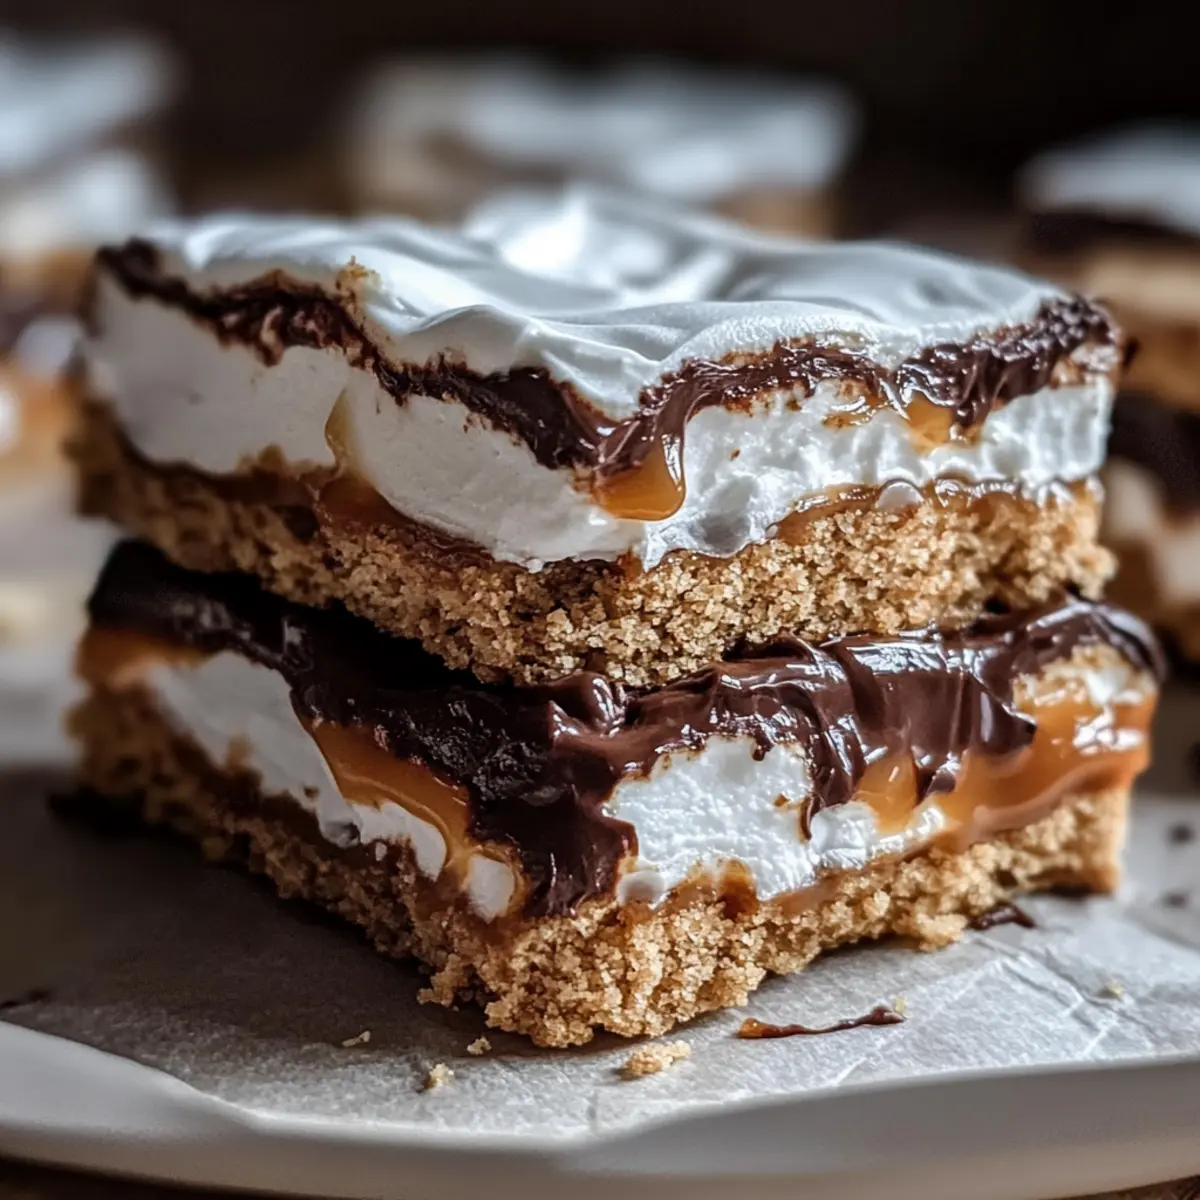
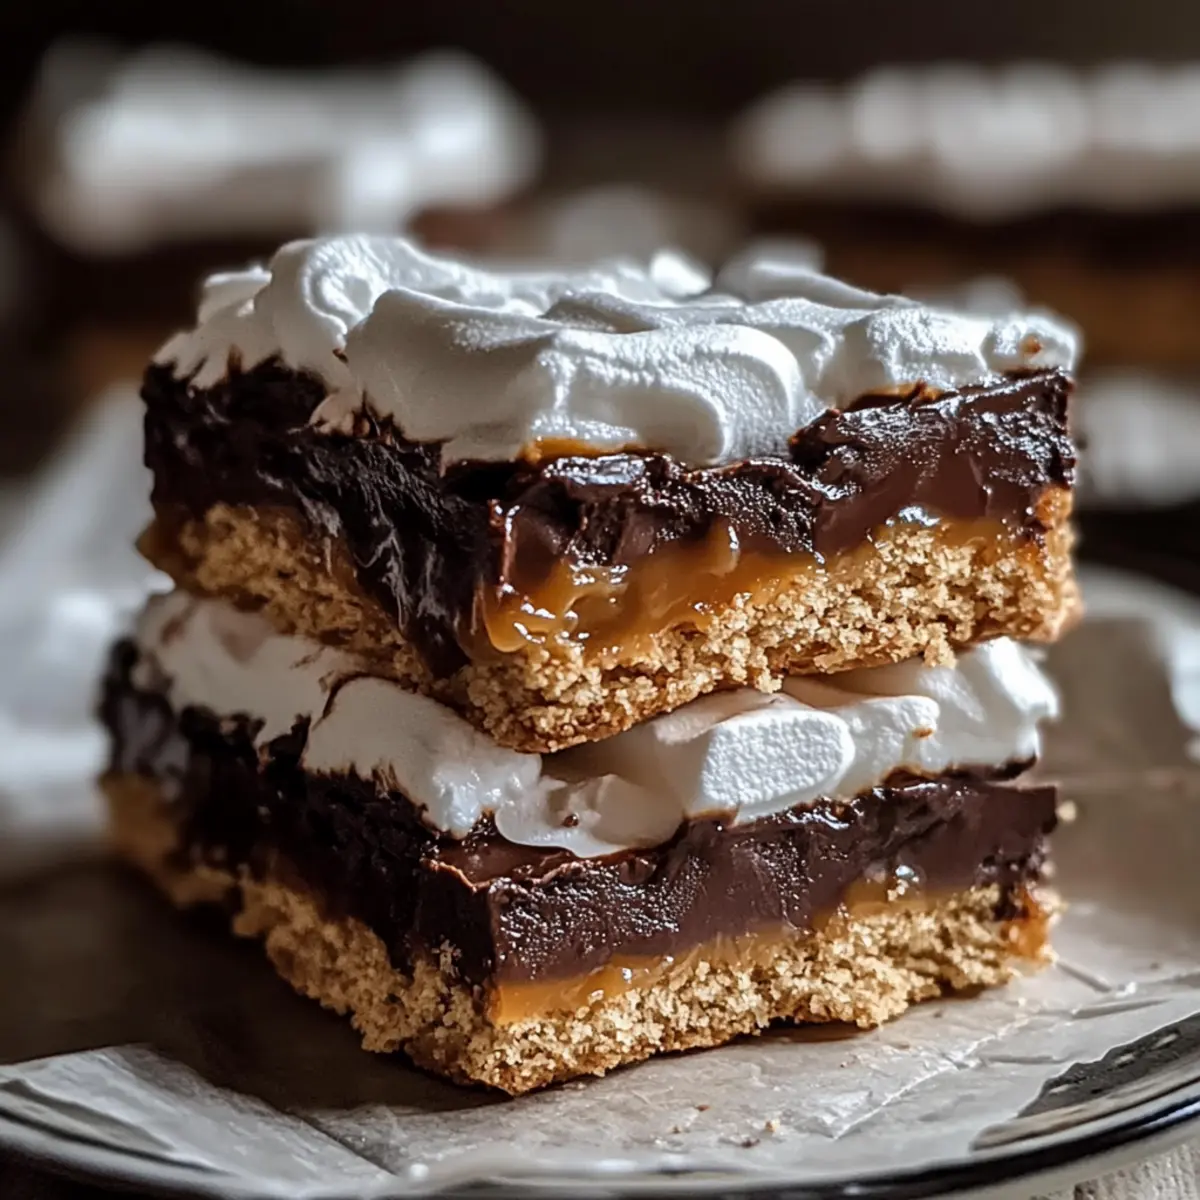
The sound of crackling firewood and the sweet scent of toasted marshmallows always take me back to summer nights spent under the stars. These Bonfire Bars capture that nostalgic essence, presenting the beloved flavors of s’mores in a delightful, easy-to-share format. With a crunchy graham cracker crust, a rich chocolate caramel layer, and a fluffy marshmallow topping, they bring warmth and comfort to any gathering or cozy night in. Not only are these dessert bars simple to whip up, but they’re also endlessly customizable, allowing you to add your favorite toppings or twist to suit your cravings. Curious about how to make these irresistible treats? Let’s dive into the deliciousness!
Why Make These Bonfire Bars?
Nostalgic flavors of s’mores shine through each bite, whisking you back to cherished summer nights. Easy to customize, these bars invite your creativity; try adding nuts or different chocolates for a unique twist. Perfect for sharing, they are a hit at gatherings or cozy nights alike. For those who love hands-on desserts, serve them alongside chocolate fondue for an interactive experience! If you’re also looking for something delightful yet simple, check out these Harvest Marble Bars.
Bonfire Bars Ingredients
• Unleash your culinary creativity with these homemade Bonfire Bars!
For the Crust
- Graham Cracker Crumbs – The foundation of your bars, adding a satisfying crunch. Use gluten-free graham crackers for a gluten-free option.
- Flour – Provides structure and binds the base; swap with almond flour for a gluten-free alternative.
- Brown Sugar – Brings moisture and sweetness; light brown sugar works beautifully as a substitute.
- Salt – Essential to enhance the flavors; always include for balanced sweetness.
- Cold Butter – Creates a crumbly texture in the base; unsalted is preferred for better control over saltiness.
For the Chocolate Filling
- Evaporated Milk – Adds creaminess to the chocolate layer; can be swapped with sweetened condensed milk for a richer taste.
- Heavy Cream – Enriches the filling and adds richness; half-and-half can be used for a lighter option.
- Corn Syrup – Ensures sweetness and gives the filling a beautiful glossy finish.
- Granulated Sugar – Adds sweetness to the chocolate filling.
- Unsweetened Chocolate – The heart of the chocolate layer; dark chocolate can elevate the flavor for those who crave extra richness.
For the Marshmallow Topping
- Gelatin – Crucial for achieving that fluffy texture in the marshmallow topping; agar-agar can be used for a vegetarian alternative.
- Water – Necessary for blooming gelatin and dissolving sugar.
These Bonfire Bars invite indulgence with each sweet, s’mores-like bite!
Step‑by‑Step Instructions for Bonfire Bars
Step 1: Preheat the Oven
Begin by preheating your oven to 350°F (175°C). Prepare a baking dish (around 9×13 inches) by greasing it with cooking spray or lining it with parchment paper for easy removal later. Setting the right temperature is crucial for achieving the perfect texture in your Bonfire Bars, ensuring they bake evenly and have that delightful crunch on the crust.
Step 2: Make the Graham Cracker Crust
In a large bowl, combine graham cracker crumbs, flour, brown sugar, and salt. Mix these dry ingredients well before using your fingertips or a pastry cutter to incorporate the cold, cubed butter until the mixture resembles coarse crumbs. Evenly press the crumbly mixture into the bottom of your prepared baking dish. It should be firm and slightly golden at the edges after baking.
Step 3: Prepare the Chocolate Filling
In a medium saucepan over medium heat, combine evaporated milk, heavy cream, granulated sugar, corn syrup, and the remaining cubed butter. Stir until the mixture is smooth and begins to simmer—this should take about 5 minutes. Remove the pan from the heat and stir in the unsweetened chocolate until completely melted and the mixture looks glossy. Pour this luscious chocolate filling over the crust layer and let it set slightly while you move to the next step.
Step 4: Bloom the Gelatin
In a small bowl, sprinkle gelatin over cold water to bloom it for about 5 minutes. Meanwhile, in a saucepan, combine sugar, corn syrup, honey, and water, heating it over medium-high until it reaches the soft ball stage (240°F). Once ready, pour this sugar syrup over the bloomed gelatin and whisk vigorously until the mixture becomes thick and fluffy—this should take about 5-6 minutes.
Step 5: Spread the Marshmallow Topping
Gently spread the fluffy marshmallow mixture over the chocolate layer using a spatula, ensuring an even distribution. This topping will add that nostalgic marshmallow flavor reminiscent of s’mores and give your Bonfire Bars a delightful texture. Once spread, place the baking dish in the fridge and chill for at least 1-2 hours, or until the topping is set and firm.
Step 6: Slice and Serve
Once chilled and set, remove the Bonfire Bars from the fridge. Using a sharp knife, slice into squares or rectangles, cleaning the knife with a damp cloth between cuts for neat edges. These bars will have layers of chewy chocolate and fluffy marshmallow, embodying the essence of s’mores. Serve them at room temperature and watch as they become a crowd favorite!
Make Ahead Options
These Bonfire Bars are fantastic for meal prep enthusiasts looking to save time during busy weeks! You can prepare the graham cracker crust up to 24 hours in advance by pressing it into the baking dish and storing it, covered, in the refrigerator. The chocolate filling can also be made a day ahead; simply refrigerate it in an airtight container after allowing it to cool. When you’re ready to serve, spread the marshmallow topping over the chilled chocolate and allow it to set for at least 1-2 hours before slicing. This way, you’ll maintain that fluffy texture while enjoying the same delicious flavors!
Expert Tips for Bonfire Bars
• Quality Ingredients: Using high-quality chocolate and fresh ingredients makes a noticeable difference in flavor, enhancing your Bonfire Bars.
• Cool Completely: Allow the bars to cool fully before cutting. This step helps maintain the structure and ensures clean, beautiful squares.
• Experiment with Toppings: Don’t hesitate to add your favorite nuts, sea salt, or even crushed candy bars on top for added texture and flavor.
• Avoid Overbaking: Check your bars towards the end of baking; they should remain soft in the middle for the perfect chewy texture.
• Marshmallow Technique: Whisk the marshmallow topping until it’s fluffy and thick. This will ensure a luscious topping that perfectly complements the layers below.
Storage Tips for Bonfire Bars
Room Temperature: Keep Bonfire Bars stored in an airtight container at room temperature for up to 3 days. This allows for easy accessibility while maintaining their delightful texture.
Fridge: For longer freshness, store in the refrigerator where they’ll stay tasty for up to one week. Just ensure they are covered to prevent them from drying out.
Freezer: Wrap individual bars tightly in plastic wrap or aluminum foil for freezing. They can be stored for up to 3 months, allowing you to enjoy the taste of s’mores-inspired goodness anytime!
Reheating: If you prefer them warm, pop the bars in the microwave for 10 to 15 seconds. This can bring back that delightful gooeyness, especially the marshmallow topping!
What to Serve with Bonfire Bars
Dive into an indulgent experience that pairs deliciously with the rich, layered flavors of these s’mores-inspired treats!
-
Fresh Fruit Salad: The bright, juicy flavors of seasonal fruits offer a refreshing contrast to the sweetness of Bonfire Bars.
-
Chocolate Fondue: A fun and interactive choice, guests can dip their bars in warm chocolate for an indulgent twist.
-
Vanilla Ice Cream: Creamy ice cream balances the chewy texture, adding a cool element to your dessert experience.
-
Coffee or Espresso: A rich cup of coffee enhances the chocolatey flavors, making for a comforting after-dinner treat that feels cozy and complete.
-
Nutty Trail Mix: A crunchy, salty trail mix provides a satisfying contrast that enhances the sweetness of your bars.
-
Toasted Coconut Flakes: These add a delightful crunch and tropical flair, beautifully complementing the flavors of the bars.
-
Sparkling Water with Lemon: A refreshing, fizzy drink that cleanses the palate and enhances the overall experience of sweet treats.
-
Caramel Sauce Drizzle: A warm drizzle of caramel brings another layer of sweetness and sophistication to each bite, accentuating the bars’ richness.
Bonfire Bars: Endless Customization
Dive into a world of flavor as you customize these Bonfire Bars to suit your cravings and delight your guests!
- Nuts: Add chopped nuts like pecans or walnuts to the crust for extra crunch and flavor. They elevate the texture and add a delightful nutty taste.
- Chocolate Variety: Mix in milk, dark, or white chocolate into the filling. Each chocolate brings its own character, making your bars even more indulgent.
- Top with Coconut: Sprinkle toasted coconut on the marshmallow topping for a tropical twist. The sweetness of coconut pairs beautifully with the rich chocolate and graham cracker base.
- Candy Bars: Crush your favorite candy bars and sprinkle them on top before chilling. This gives your Bonfire Bars a fun, crunchy topping and adds unique flavors.
- Spicy Twist: Add a pinch of cayenne pepper to the chocolate for a surprising kick. The heat enhances the chocolate’s richness and offers a delightful contrast.
- Pumpkin Spice: For a seasonal twist, mix in pumpkin pie spice with the crust. This adds a warm, cozy flavor perfect for fall gatherings.
- Fruit Infusion: Top with sliced strawberries or bananas for a fresh, fruity burst that contrasts beautifully with the smooth chocolate layers.
Feeling inspired? You can also check out these delicious Harvest Marble Bars for more creative baking ideas.
Bonfire Bars Recipe FAQs
What are the best graham crackers to use for the crust?
Absolutely! The best graham crackers for your Bonfire Bars are classic brands that provide a balance of sweetness and crunch. If you’re looking for a gluten-free option, gluten-free graham crackers work beautifully. Always check the label to make sure they meet your dietary preferences.
How should I store my Bonfire Bars?
To keep your Bonfire Bars fresh, store them in an airtight container at room temperature for up to 3 days. If you want to extend their shelf life, refrigerate them for up to one week. Just make sure they’re covered to prevent them from drying out.
Can I freeze Bonfire Bars?
Yes, you can! Wrap individual bars tightly in plastic wrap or aluminum foil and store them in a freezer-safe container. They will keep well for up to 3 months. When you’re ready to enjoy, simply thaw them in the refrigerator overnight or microwave them for 10 to 15 seconds for a warm treat!
What should I do if my marshmallow topping isn’t fluffy?
If your marshmallow topping isn’t fluffing up, it could be due to not whisking long enough or not reaching the proper temperature during the sugar syrup stage. Make sure to vigorously whisk the gelatin mixture after adding the syrup for about 5-6 minutes until it thickens and becomes fluffy. Also, be sure that your sugar mixture reaches the soft ball stage (240°F) for the best results!
Are Bonfire Bars suitable for people with dietary restrictions?
Very! You can easily customize Bonfire Bars to meet various dietary needs. For a gluten-free version, use gluten-free graham crackers and almond flour. To make them vegetarian, substitute agar-agar for gelatin in the marshmallow topping. Just be mindful of any allergies your guests may have, and adjust the ingredients accordingly!
Savor Homemade Bonfire Bars: S'mores Delight in Every Bite
Ingredients
Equipment
Method
- Preheat your oven to 350°F (175°C) and prepare a baking dish by greasing it or lining it with parchment paper.
- Combine graham cracker crumbs, flour, brown sugar, and salt in a bowl. Incorporate cubed butter until the mixture resembles coarse crumbs. Press into the bottom of the dish.
- In a saucepan, combine evaporated milk, heavy cream, granulated sugar, corn syrup, and butter. Heat until smooth and simmering, then stir in unsweetened chocolate.
- Bloom the gelatin in cold water for 5 minutes. In a saucepan, heat sugar, corn syrup, and water until soft ball stage. Pour over bloomed gelatin and whisk until thick and fluffy.
- Spread the marshmallow mixture over the chocolate layer. Chill in the fridge for at least 1-2 hours until set.
- Slice the chilled bars into squares using a sharp knife, cleaning the knife between cuts for neat edges.
Leave a Reply