As the holiday season unfolds, I find myself constantly drawn to cheerful gatherings filled with laughter and festive treats. These No-Bake Christmas Cheesecake Bites have quickly become a favorite in our home, effortlessly marrying the rich, creamy texture of classic cheesecake with the vibrant joy of the holidays. Not only are they incredibly simple to whip up, but these delightful bites are also vegetarian and can be made gluten-free, making them perfect for every guest. With the added perk of being a make-ahead option, you can focus on enjoying the season rather than spending hours in the kitchen. So, why not sweeten your celebrations and impress your loved ones with these colorful, delicious bites? Trust me, you’ll want to keep this recipe on hand throughout the festive season!
Why Are These Cheesecake Bites Irresistible?
Simplicity: With straightforward preparation, you can easily whip up these treats without any baking fuss.
Creamy Delight: The rich cream cheese base ensures every bite is decadently smooth, satisfying your cheesecake cravings.
Versatile Ingredients: Feel free to substitute with Greek yogurt for a lighter bite or gluten-free graham crackers for inclusive gatherings.
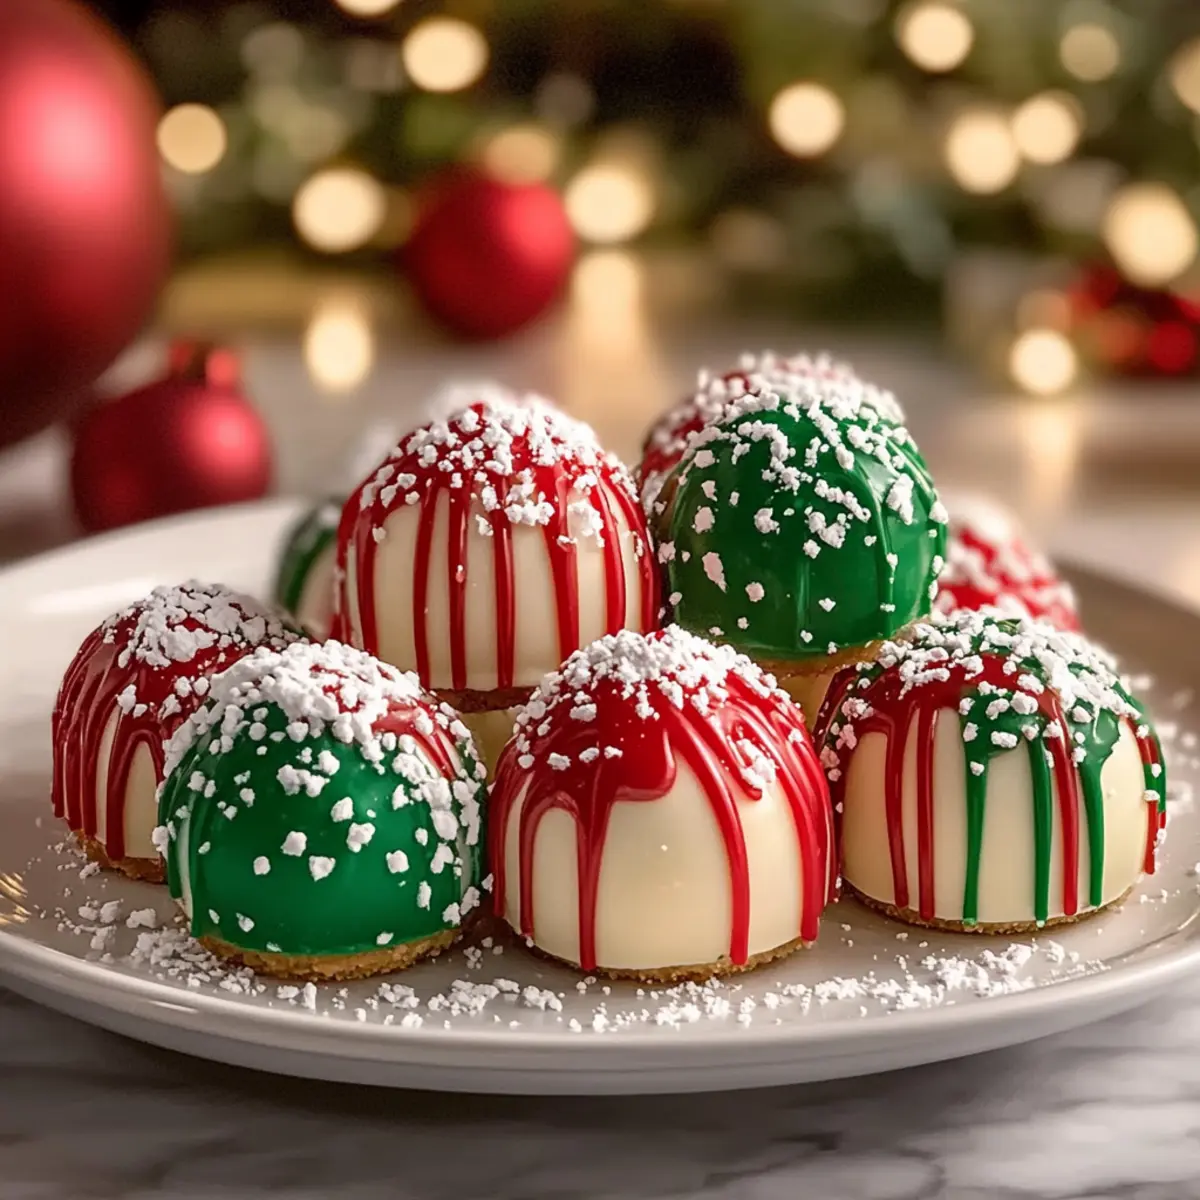
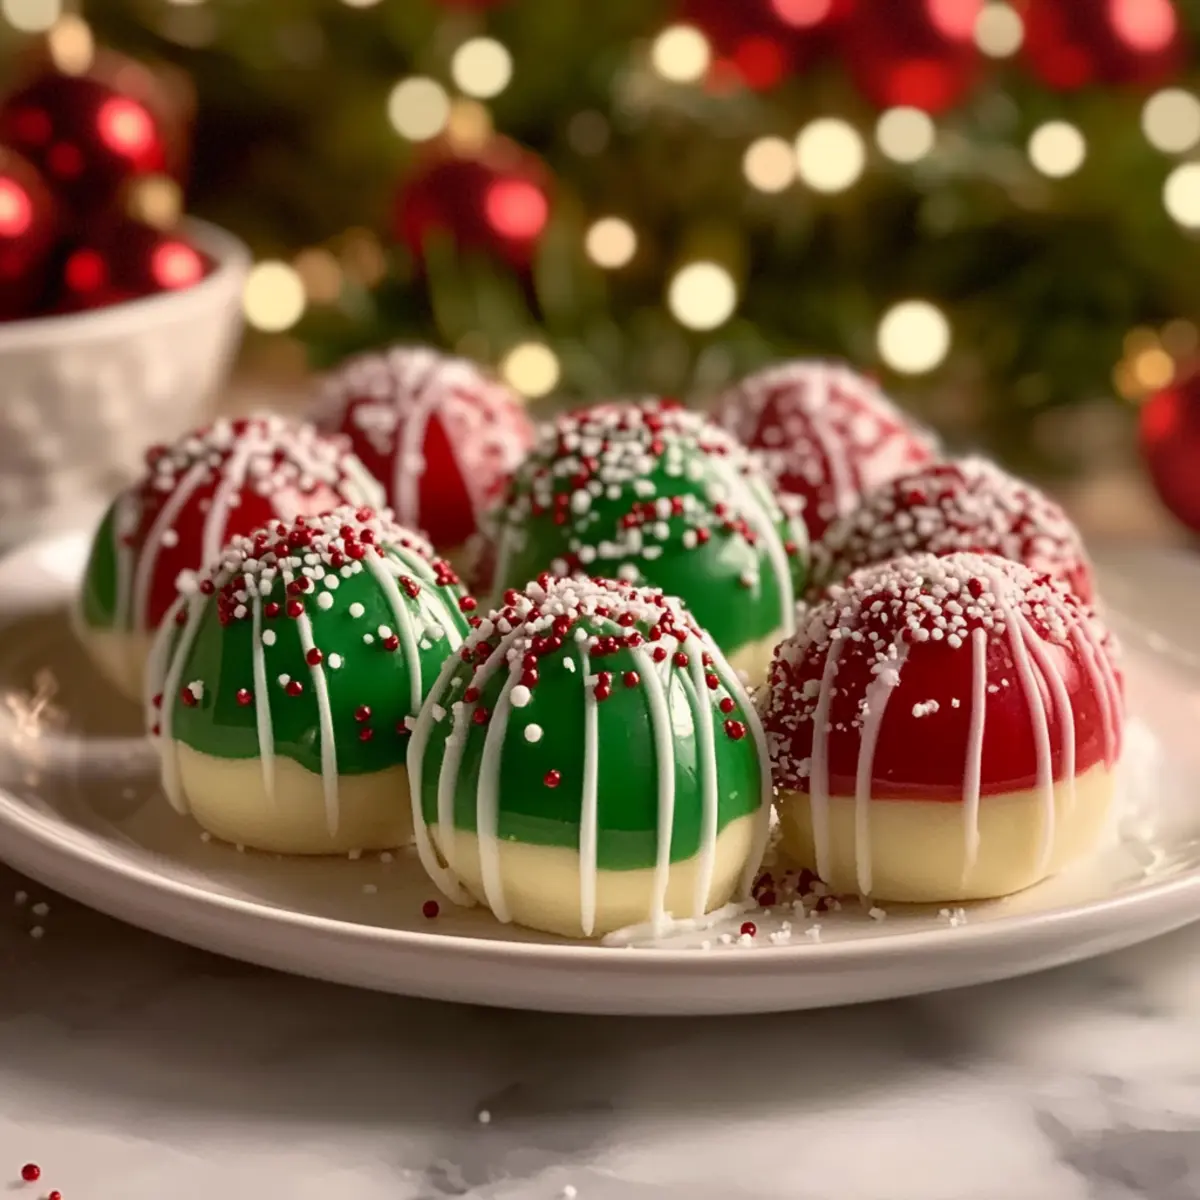
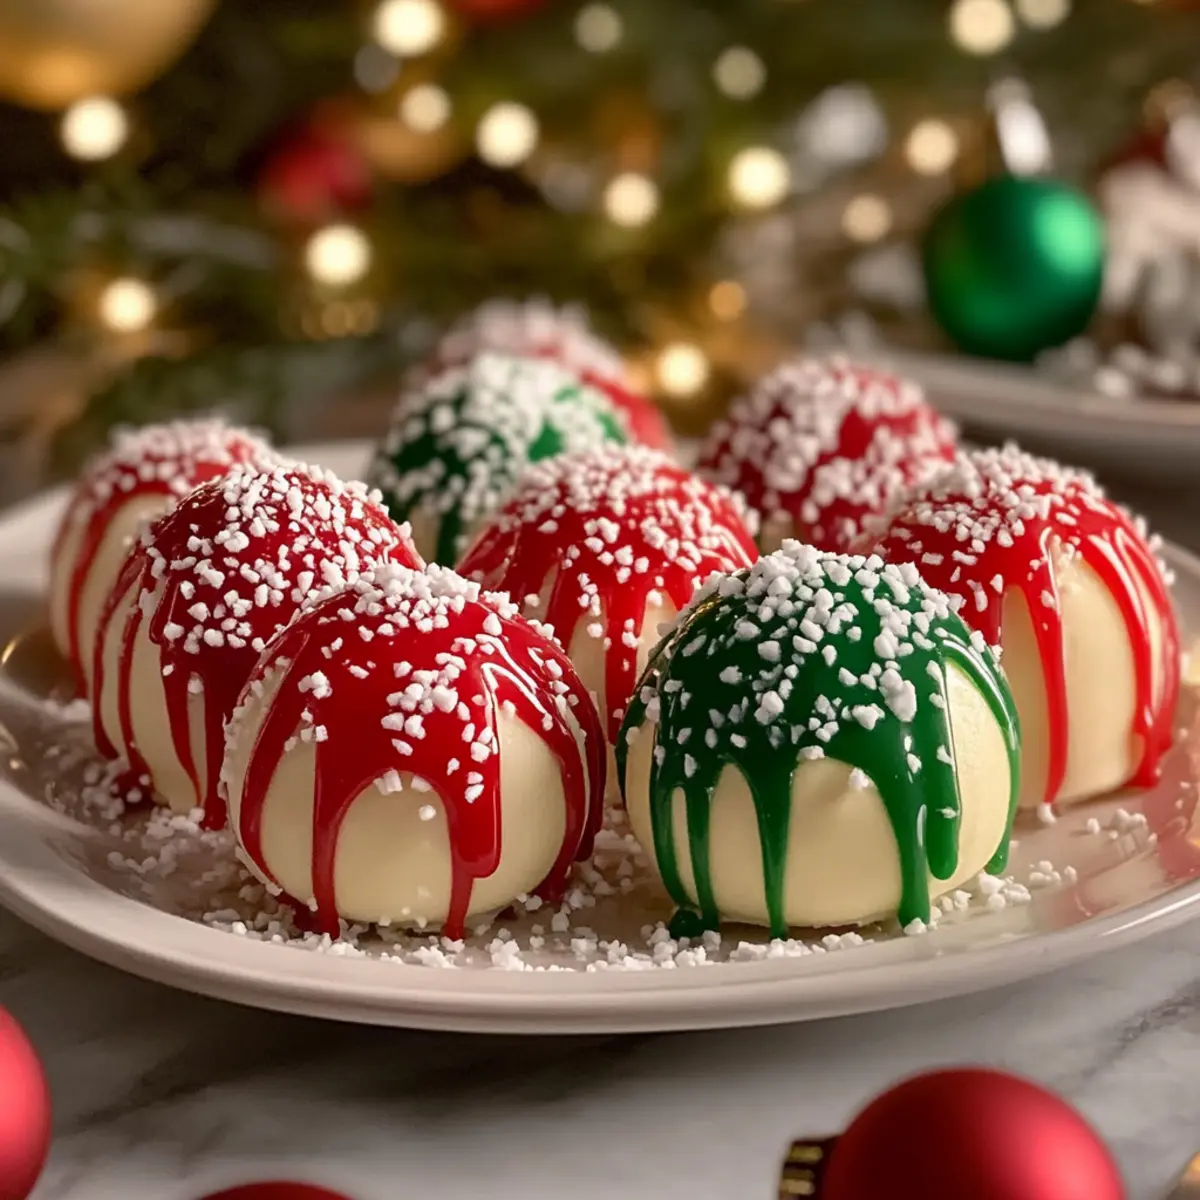
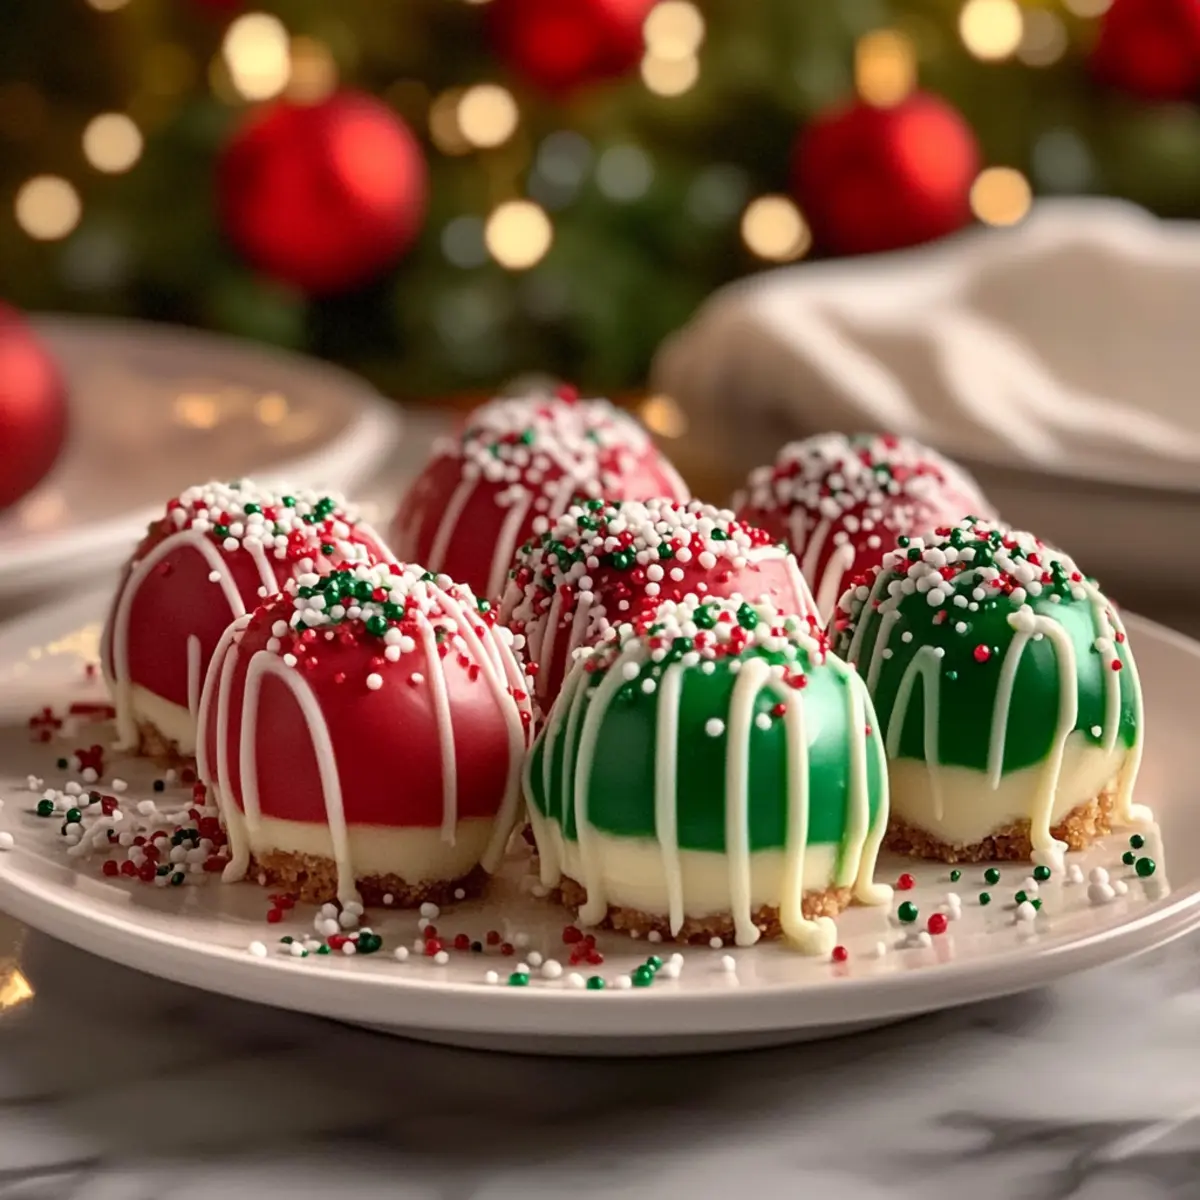
Festive Presentation: The colorful candy coating makes these bites a visually stunning addition to your holiday spread, reminiscent of treasured ornaments.
Make-Ahead Convenience: You can prepare these bites 2-3 days in advance, giving you more time to enjoy the festivities. Serve them chilled, and watch your guests smile!
No-Bake Christmas Cheesecake Bites Ingredients
For the Cheesecake Mixture
- Cream Cheese – Provides the creamy base and richness; for a lighter version, try Greek yogurt or silken tofu.
- Powdered Sugar – Adds sweetness and creates a smooth texture; no direct substitute recommended.
- Vanilla Extract – Enhances flavor depth; almond extract can add a different twist.
- Graham Crackers or Cookie Crumbs – Adds texture and structure; opt for gluten-free versions if needed.
- Whipped Topping – Incorporates air for a lighter texture; substitute with coconut whipped cream for a dairy-free option.
For the Chocolate Coating
- White Chocolate Chips – Melts into a silky coating that enriches the bites; use dark chocolate for a more robust taste.
- Candy Melts (Red and Green) – Provides festive color and sweetness in the coating; chocolate-based coatings can be a great alternative.
These delightful No-Bake Christmas Cheesecake Bites are bound to become a staple for your holiday gatherings!
Step‑by‑Step Instructions for No-Bake Christmas Cheesecake Bites
Step 1: Cream the Base
In a large mixing bowl, use a hand mixer to beat 8 ounces of softened cream cheese until it becomes smooth and creamy—this should take about 2 minutes on medium speed. Make sure there are no lumps, as a uniform texture is crucial for your No-Bake Christmas Cheesecake Bites.
Step 2: Add Sweetness and Flavor
Next, incorporate 1 cup of powdered sugar and 1 teaspoon of vanilla extract into the cream cheese mixture. Blend everything together until combined, approximately 1 to 2 minutes, ensuring a velvety consistency. This mixture will serve as the delicious base for your creamy bites.
Step 3: Melt the Chocolate
In a microwave-safe bowl, melt 1 cup of white chocolate chips by microwaving in 20-second intervals, stirring in between until smooth—this should take about 1 to 2 minutes. Allow the melted chocolate to cool slightly to avoid curdling when mixed with the cream cheese.
Step 4: Combine Ingredients
Once cooled, add the melted white chocolate into the cream cheese blend. Mix gently on low speed until fully integrated, creating a rich and creamy mixture that will be the filling of your No-Bake Christmas Cheesecake Bites.
Step 5: Add Texture
Carefully fold in 1 cup of crushed graham crackers or cookie crumbs into the mixture using a spatula. This will add delightful texture to your bites. Make sure the crumbs are evenly distributed, giving every bite a little crunch alongside the smooth cheesecake.
Step 6: Fold in Whipped Topping
Next, incorporate 1 cup of whipped topping into the mixture by gently folding it in. This step is crucial as it adds lightness to the cheesecake filling. Be careful to maintain the airy texture; stop folding when you no longer see streaks of whipped topping.
Step 7: Chill the Mixture
Cover the bowl tightly with plastic wrap and place it in the refrigerator for about 30 to 40 minutes. This chilling time allows the mixture to firm up, making it easier to scoop and shape your No-Bake Christmas Cheesecake Bites later on.
Step 8: Shape the Bites
After chilling, use a tablespoon or small cookie scoop to portion out the mixture, rolling it into 1-inch balls with your hands. Place the rolled bites on a parchment-lined baking sheet, ensuring they’re spaced apart to prevent sticking as they chill again.
Step 9: Prepare the Candy Coating
Melt your red and green candy melts according to the package instructions, typically in a microwave-safe bowl for 30-second intervals, stirring until smooth. Make sure the candy melts are not too hot; this will help to create a beautiful coating without melting the cheesecake filling.
Step 10: Dip the Cheesecake Bites
Dip each cheesecake ball into the melted candy, using a fork to lift it out while allowing excess coating to drip off. This step adds the festive color to your No-Bake Christmas Cheesecake Bites.
Step 11: Let Them Set
Return the coated bites to the parchment-lined baking sheet and allow them to set at room temperature or in the fridge until the candy coating is firm—this usually takes about 15 to 20 minutes. Enjoy the anticipation as your delightful holiday treats come together!
No-Bake Christmas Cheesecake Bites Variations
Get creative in the kitchen and make these delightful bites truly yours with some simple adjustments and swaps!
-
Dairy-Free: Substitute cream cheese and whipped topping with vegan cream cheese and coconut whipped cream for a delightful alternative.
-
Gluten-Free: Use gluten-free graham crackers or cookie crumbs to make this treat accessible for everyone, ensuring no one misses out on the fun!
-
Dark Chocolate: Swap white chocolate chips for dark chocolate chips to deliver a rich, bold flavor that contrasts beautifully with the creamy filling.
-
Nutty Crunch: Add 1/2 cup of finely chopped nuts, like almonds or walnuts, to the mixture for an added crunch and nutty flavor that complements the cheesecake.
-
Festive Twist: Fold in a teaspoon of peppermint extract into the cream cheese mixture for a refreshing holiday flavor. It adds a delightful zing to every bite!
-
Flavored Cookie Crust: Use flavored cookie crumbs, such as chocolate or gingerbread, to create a unique twist that changes the taste profile altogether. It’s a subtle yet exciting change!
-
Colorful Sprinkles: After dipping in the candy melts, sprinkle some festive edible glitter or holiday-themed sprinkles to give an extra pop of color and celebration, making them even more festive!
As you enjoy these No-Bake Christmas Cheesecake Bites, consider serving them alongside other festive favorites like [Christmas Rice Bites](https://recipesbymama.org/christmas-rice-krispie-treat-bites/) or [Christmas Sugar Cookie Bites](https://recipesbymama.org/christmas-sugar-cookie-bites/) for a wonderfully diverse holiday treat platter!
Make Ahead Options
These No-Bake Christmas Cheesecake Bites are perfect for busy home cooks looking to simplify holiday preparations! You can make the cheesecake mixture up to 3 days in advance; just cover it tightly with plastic wrap in the refrigerator to keep it fresh and creamy. Once you’re ready to serve, scoop and shape the bites, then dip them in the melted candy coating. To maintain their vibrant colors and texture, it’s best to coat them shortly before serving. This way, you can enjoy all the rich flavors and creamy goodness of these treats without the last-minute rush. With a little prep, you’ll have delightful bites that are just as delicious when served fresh!
Expert Tips for No-Bake Christmas Cheesecake Bites
-
Perfectly Chilled: Ensure the mixture is chilled for at least 30-40 minutes. This step helps the cheesecake bites firm up for easier handling and shaping.
-
Melt Smartly: When melting chocolate, allow it to cool slightly before mixing it with cream cheese. This prevents curdling and keeps your No-Bake Christmas Cheesecake Bites creamy.
-
Texture Matters: For the best crunch, ensure your graham crackers or cookie crumbs are finely crushed. Uneven crumbs can affect both texture and appearance.
-
Colorful Coating: Melt candy melts in separate bowls to avoid color mixing. This helps maintain the vibrant red and green festive appearance of your bites.
-
Taste Variation: Feel free to experiment with different flavored extracts, like almond or peppermint, to create unique twists on your No-Bake Christmas Cheesecake Bites!
Storage Tips for No-Bake Christmas Cheesecake Bites
-
Fridge: Store your No-Bake Christmas Cheesecake Bites in an airtight container in the refrigerator for up to 7 days. This ensures they stay fresh and delicious throughout the festive season.
-
Freezer: For longer storage, these bites can be frozen for up to 3 months. Place them in a single layer on a baking sheet to freeze before transferring them to a freezer bag; this prevents sticking.
-
Thawing: When you’re ready to enjoy your frozen cheesecake bites, simply transfer them to the fridge the night before to thaw gently. Avoid using a microwave, as it may affect their texture.
-
Serving: Always serve the bites chilled for the best flavor and texture. If they’ve been frozen, allow them to sit at room temperature for about 10-15 minutes before serving to soften slightly.
What to Serve with No-Bake Christmas Cheesecake Bites
As the festive spirit fills the air, it’s time to pair these creamy bites with delightful accompaniments that will elevate your holiday gatherings.
-
Gingerbread Cookies: Their spiced sweetness provides a perfect contrast to the creamy bites, bringing a warm holiday flavor to the table.
-
Peppermint Hot Chocolate: The coolness of peppermint complements the creamy richness, making this drink a comforting choice for seasonal celebrations.
-
Fresh Fruit Salad: A vibrant mix of berries and citrus will add a refreshing burst, balancing the richness of the cheesecake bites beautifully.
-
Spiced Apple Cider: This warm, spiced beverage enhances the cozy atmosphere of your gathering, making it a lovely pairing for sweet treats.
-
Chocolate-Covered Pretzels: The salty crunch adds texture to the dessert experience, creating a delightful contrast to the smooth, sweet cheesecake.
-
Christmas Sugar Cookies: Decorated with festive icing, these classic cookies add a nostalgic touch that complements the colorful cheesecake bites.
-
Nutty Biscotti: Their crunchiness offers a wonderful textural variation and the nutty flavor pairs perfectly with the creamy bites.
-
Pineapple Coconut Sorbet: A refreshing, tropical touch that contrasts beautifully with the creamy bites, perfect for cleansing the palate.
-
Nutella-Drizzled Puffed Pastry: This indulgent dessert will impress guests and offers a rich, flaky texture that pairs well with the cheesecake bites.
No-Bake Christmas Cheesecake Bites Recipe FAQs
How do I choose the right cream cheese?
Absolutely! For the creamiest texture, opt for full-fat cream cheese, as it will yield the richest flavor in your No-Bake Christmas Cheesecake Bites. Make sure to let it sit at room temperature for about 30 minutes before using, as this will make it easier to blend smoothly.
How should I store my cheesecake bites?
To keep your No-Bake Christmas Cheesecake Bites fresh, store them in an airtight container in the refrigerator for up to 7 days. This will ensure they remain delightful and creamy as you enjoy them throughout the festive season.
Can I freeze these cheesecake bites?
Very much! To freeze your No-Bake Christmas Cheesecake Bites, place them on a baking sheet in a single layer and freeze for about 1-2 hours until solid. Then transfer them to a freezer bag, labeling it with the date. They can be kept frozen for up to 3 months.
What’s the best way to thaw frozen bites?
When ready to enjoy your frozen cheesecake bites, take them out and move to the fridge the night before you’re planning to serve them. This gradual thawing keeps the texture intact. Avoid using a microwave to thaw, as it could make the cheesecake lose its delightful creaminess.
Are there any dietary considerations I should be aware of?
Absolutely! You can make these No-Bake Christmas Cheesecake Bites vegetarian-friendly by using the suggested substitutes like silken tofu or Greek yogurt for the cream cheese and coconut whipped cream for the topping. For gluten-free versions, use gluten-free graham crackers or cookie crumbs. It’s a festive treat for everyone at the table!
What should I do if the chocolate coating doesn’t stick?
If you find that the candy coating isn’t adhering properly, try chilling the cheesecake bites for an additional 15-30 minutes after shaping them but before dipping. Also, ensure that your melted candy melts aren’t too hot, as this can make them runny and less effective for coating.
Delightful No-Bake Christmas Cheesecake Bites for Festive Fun
Ingredients
Equipment
Method
- In a large mixing bowl, use a hand mixer to beat 8 ounces of softened cream cheese until smooth and creamy, about 2 minutes.
- Incorporate 1 cup of powdered sugar and 1 teaspoon of vanilla extract into the cream cheese mixture and blend until combined, about 1-2 minutes.
- In a microwave-safe bowl, melt 1 cup of white chocolate chips in 20-second intervals, stirring until smooth, about 1-2 minutes.
- Once cooled, add melted white chocolate into the cream cheese blend and mix gently until fully integrated.
- Fold in 1 cup of crushed graham crackers or cookie crumbs into the mixture using a spatula.
- Carefully fold in 1 cup of whipped topping until streaks are no longer visible.
- Cover and chill the mixture in the refrigerator for about 30 to 40 minutes.
- After chilling, use a tablespoon or small cookie scoop to portion and roll into 1-inch balls.
- Melt red and green candy melts according to package instructions and set aside to cool slightly.
- Dip each cheesecake ball into the melted candy and use a fork to lift it out, allowing excess coating to drip off.
- Place coated bites back on parchment-lined baking sheet and allow to set until the coating is firm, about 15-20 minutes.
Leave a Reply