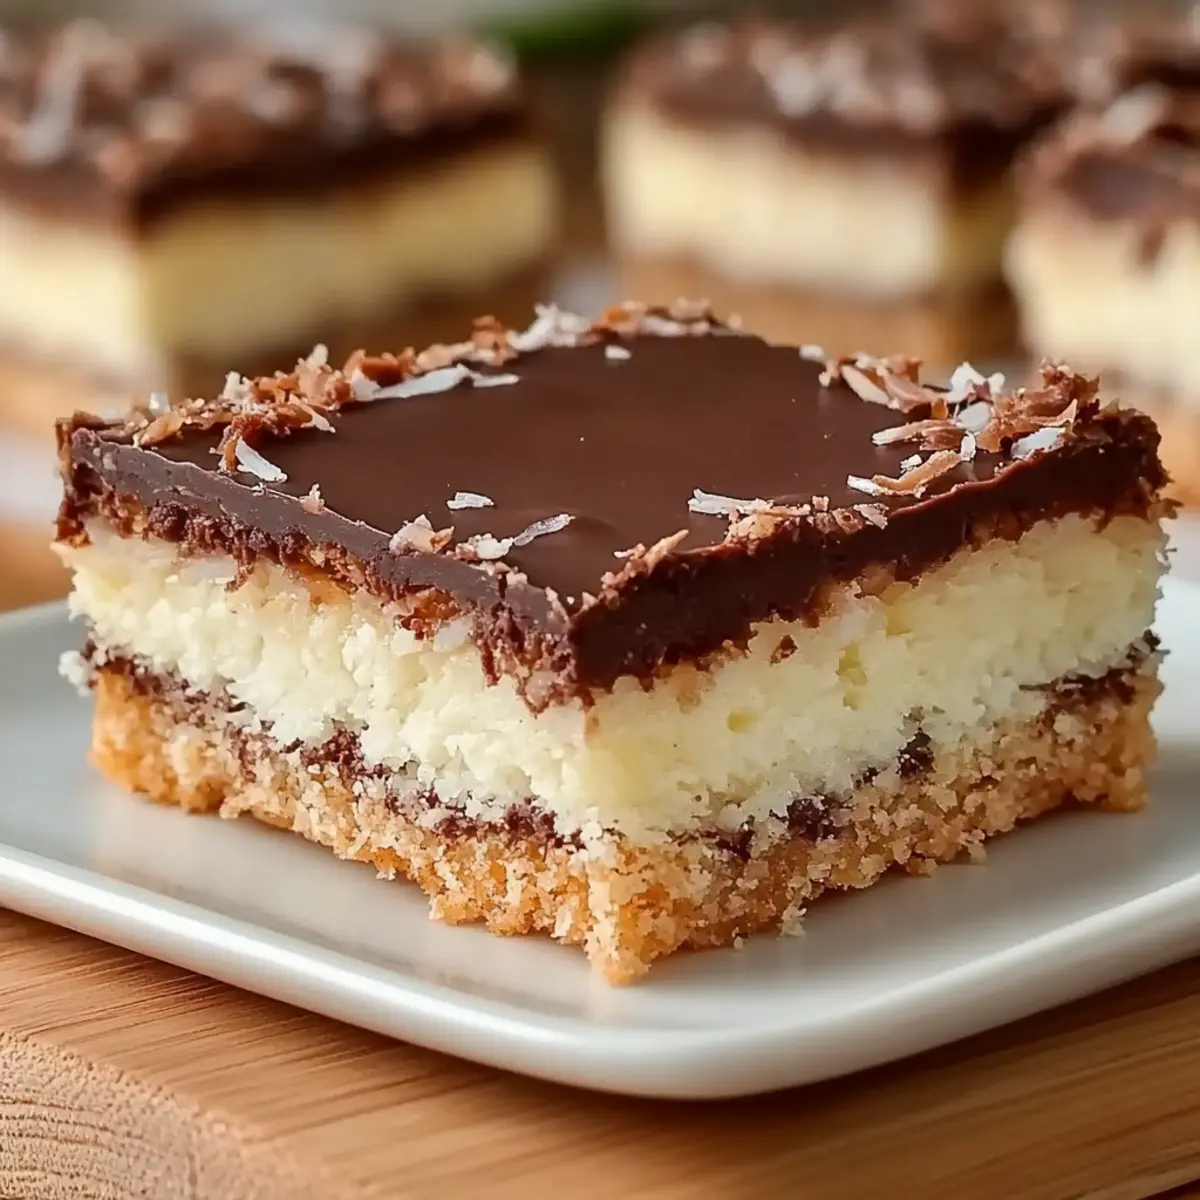
As I took my first bite of Coconut Dream Bars, I was immediately whisked away to a sun-drenched tropical beach, the warm breeze dancing around me. This Coconut Dream Bars Recipe is truly a slice of paradise, showcasing silky coconut layers atop a buttery graham cracker crust, and finished with a rich chocolate topping. Not only are these bars ridiculously easy to whip up with pantry staples, but they also cater to your sweet cravings without the guilt of fast food. Perfect for sharing at gatherings or indulging in a quiet evening at home, they embody the joy of homemade sweetness. If you’re ready to embark on a delightful baking adventure, you might just find your new favorite dessert here. Are you curious to see how these heavenly layers come together?
Why Are These Coconut Dream Bars Irresistible?
Decadent Layers: The combination of creamy coconut and rich chocolate creates a harmony that tantalizes your taste buds.
Simple to Make: With just a few pantry staples, this recipe invites everyone—regardless of baking experience—to join in on the fun!
Guilt-Free Indulgence: Want a sweet treat without the fast food regret? These bars satisfy cravings while keeping the joy of homemade desserts alive.
Versatile Serving Options: Pair them with fresh berries or a scoop of vanilla ice cream to elevate your dessert game.
Ready to explore other delightful recipes? Check out the Harvest Marble Bars for more mouthwatering goodness!
Coconut Dream Bars Ingredients
• Here’s everything you need to create your own taste of paradise!
For the Crust
- Butter – Adds richness and moisture; use unsalted for better control of salt levels.
- Graham Wafer Crumbs – Provides sturdy base structure; substitute with gluten-free graham crackers for a gluten-free version.
- Sugar – Sweetens the crust; reduce slightly if using sweetened coconut.
For the Coconut Layer
- Sweetened Condensed Milk – Acts as a sweetener and binder; can be replaced with evaporated milk for a less sweet option.
- Unsweetened Dried Coconut – Main flavor component providing texture; use fresh grated coconut for an interesting texture.
- Vanilla Extract – Enhances the overall flavor; can be substituted with almond extract for a different taste.
For the Topping
- Chocolate Chips – Adds richness on top; dark or semi-sweet chocolate enhances flavor, and you can swap for white chocolate if desired.
Now that you have your ingredients ready, let’s dive into creating these delightful Coconut Dream Bars!
Step‑by‑Step Instructions for Coconut Dream Bars Recipe
Step 1: Preheat and Prepare the Baking Pan
Begin by preheating your oven to 350°F (175°C). As the oven warms, grease a 9×9 inch baking pan and line it with parchment paper, allowing some overhang for easy removal later. This will make the perfect base for your Coconut Dream Bars, ensuring that every sweet layer can be lifted out with ease once baked.
Step 2: Make the Graham Cracker Crust
In a mixing bowl, melt ½ cup of unsalted butter until smooth. Add 1 ½ cups of graham cracker crumbs and ¼ cup of sugar, stirring well until the mixture resembles wet sand. Firmly press this crumb mixture into the bottom of your prepared baking pan, ensuring an even layer that will hold up nicely as the crust for your Coconut Dream Bars.
Step 3: Bake the Crust
Place the crust in your preheated oven and bake for about 10 minutes, or until it is lightly golden and set. Keep an eye on it to avoid over-baking, as you want a crisp yet tender foundation for your delicious Coconut Dream Bars. Once baked, remove it from the oven and allow the crust to cool slightly while you prepare the coconut layer.
Step 4: Prepare the Coconut Layer
In a separate bowl, combine one can of sweetened condensed milk, 2 cups of unsweetened dried coconut, and 1 teaspoon of vanilla extract. Stir the mixture until it thickens and becomes well combined. This coco-licious layer is the heart of your Coconut Dream Bars, adding that signature tropical flavor that everyone will love.
Step 5: Spread and Bake the Coconut Layer
Evenly spread the coconut mixture over the cooled crust, smoothing it out with a spatula for a nice, flat finish. Return the pan to the oven and bake for an additional 10–15 minutes, or until the coconut top is lightly golden brown. Keep a close watch to ensure it doesn’t dry out; you want it chewy and delicious for your Coconut Dream Bars.
Step 6: Allow to Cool
Once baked, remove the pan from the oven and let it cool completely at room temperature. Cooling is crucial, as it helps to set the layers firmly together, making your bars easier to slice and serve. This may take about an hour, allowing all those wonderful flavors to intermingle beautifully.
Step 7: Melt the Chocolate Topping
While the coconut layer cools, melt 1 cup of chocolate chips with 1 tablespoon of butter or cream in a microwave-safe bowl. Heat in 30-second intervals, stirring frequently, until the mixture is smooth and glossy. This luscious chocolate topping will add a rich finish to your Coconut Dream Bars and elevate them even further.
Step 8: Pour and Set the Chocolate Layer
Once melted, carefully pour the chocolate mixture over the cooled coconut layer, using a spatula to spread it evenly across the top. Make sure to cover every bit of coconut for a decadent finish. Set the pan aside for at least one hour, or refrigerate it to expedite the setting process, ensuring a lovely chocolate layer.
Step 9: Slice and Serve
After the chocolate has set, gently lift the Coconut Dream Bars from the pan using the parchment overhang. Place on a cutting board and slice into squares or bars, as preferred. Serve these tropical delights with fresh berries or a scoop of vanilla ice cream to complement their richness, and watch as everyone enjoys this sweet homemade treat!
Make Ahead Options
These Coconut Dream Bars are perfect for busy cooks looking to save time during hectic weeks! You can prepare the graham cracker crust and the coconut layer up to 24 hours in advance. Simply follow the initial steps, cool the crust, and spread the coconut mixture over the top, but hold off on baking. Cover tightly and refrigerate. When you’re ready to serve, bake the layers as directed, then melt the chocolate topping to drizzle on top. This way, you maintain that fresh and delicious quality that makes these bars irresistible, ensuring they taste just as delightful as if made the same day!
Expert Tips for Coconut Dream Bars
Chill Before Cutting: Allow the Coconut Dream Bars to cool completely before slicing. This ensures cleaner cuts and maintains the beautiful layers.
Avoid Over-Baking: Keep an eye on the coconut layer during baking; over-baking can lead to a dry texture. You’re aiming for a golden brown finish!
Use Parchment Paper: Generously line your baking pan with parchment paper. This makes lifting the bars out much easier and avoids sticking.
Gooey Chocolate Layer: For that perfect chocolate topping, consider reheating the bars briefly in the microwave before serving to make the chocolate ultra gooey.
Adjust Coconut Sweetness: If using sweetened coconut, reduce the sugar in the crust slightly. You want the flavors of your Coconut Dream Bars to balance beautifully.
Coconut Dream Bars Recipe Variations
Customize your Coconut Dream Bars to make them uniquely yours, adding your personal touch to this delightful treat!
-
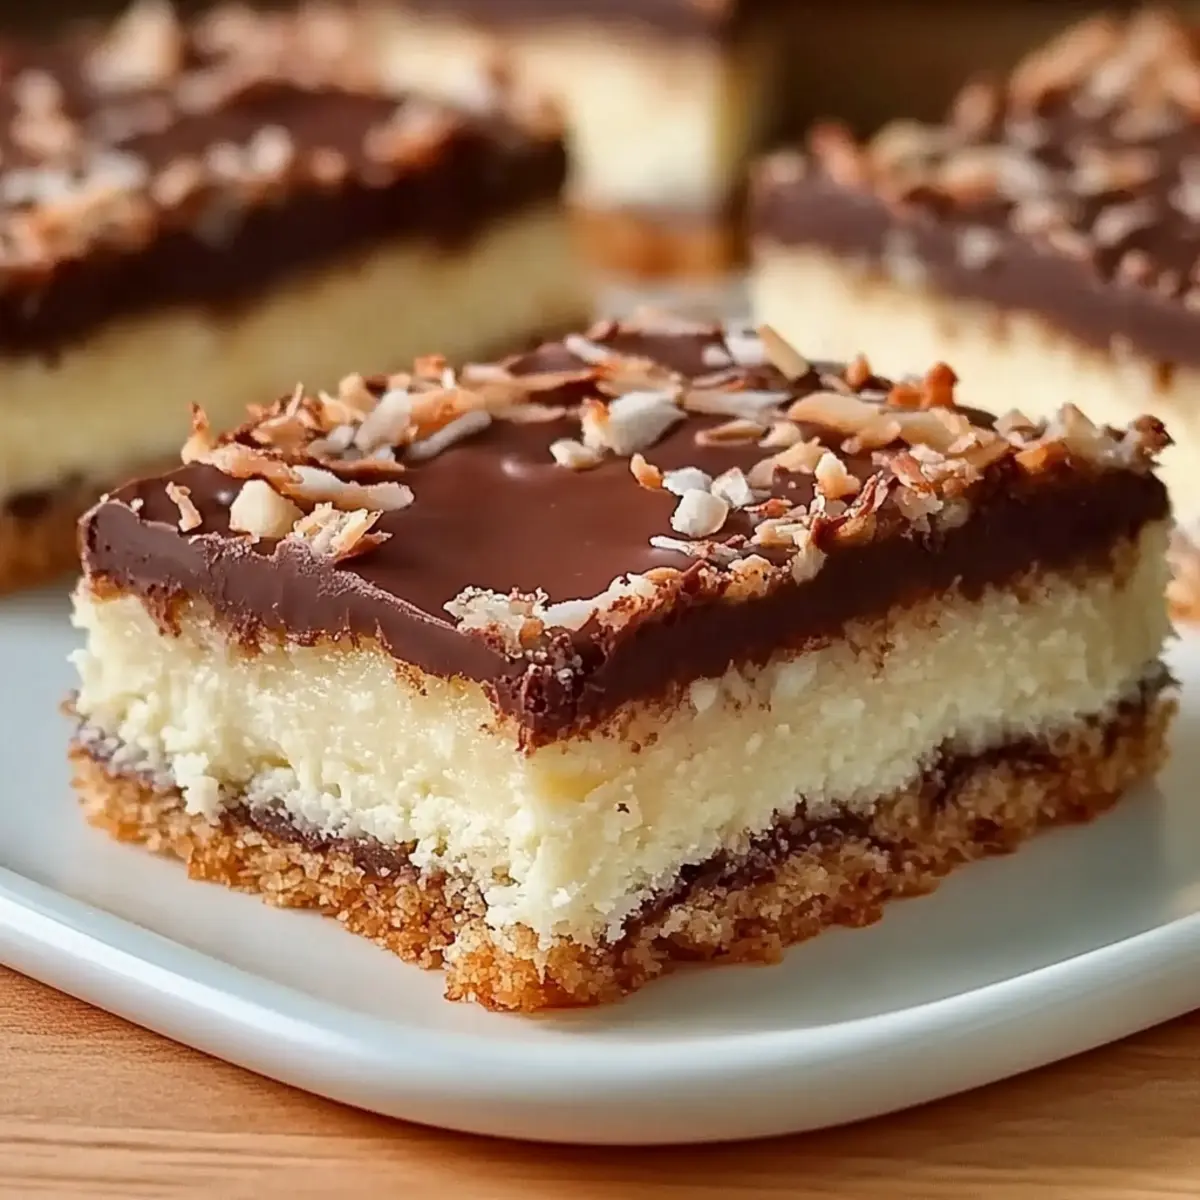
Toasted Coconut: Add a sprinkle of toasted coconut on top for a delightful crunch that elevates each bite. The warm, nutty flavor pairs perfectly with the rich layers.
-
Chocolate Drizzle: Drizzle white chocolate over the top for an elegant finish; the sweetness balances the coconut nicely. It’s a simple way to add a touch of elegance to your bars!
-
Nutty Crunch: Incorporate chopped almonds or walnuts into the coconut layer for added texture and a nutty flavor that complements the coconut wonderfully. The wholesome crunch brings new depth to your bars.
-
Fruit Twist: Mix in some dried or fresh fruits like pineapple or mango into the coconut layer for a burst of tropical flavor. This tropical medley will make each bite even more enchanting!
-
Dairy-Free Delight: Substitute the sweetened condensed milk with coconut cream to create a dairy-free version that’s just as rich and satisfying. It’s perfect for those who are lactose intolerant but still want to enjoy a dessert!
-
Spiced Coconut: Add a pinch of cinnamon or nutmeg to the coconut layer for a warm, spiced flavor that adds comforting warmth to your delicious bars. This twist can remind you of cozy nights by the fire.
-
Dark Chocolate Layer: Swap the chocolate chips for dark chocolate for a richer chocolate experience; it pairs beautifully with the sweetness of the coconut. The deeper flavor profile makes this variation a must-try!
-
Flavored Extracts: Experiment with adding different extracts, such as almond or coconut extract, to the coconut layer for an intensified flavor. These subtle hints can take your bars to a whole new level!
Feeling inspired? Alongside these variations, why not try serving your Coconut Dream Bars with fresh berries or a scoop of vanilla ice cream? And if you’re in the mood for more delightful sweetness, explore the Harvest Marble Bars or the comforting warmth of Chili Cozy Nights.
How to Store and Freeze Coconut Dream Bars
Room Temperature: Store your Coconut Dream Bars in an airtight container at room temperature for up to 4 days to maintain their chewy texture and delightful taste.
Fridge: If you want to prolong freshness, refrigerate the bars in an airtight container for up to one week, keeping them cool and delicious.
Freezer: For longer storage, freeze the bars for up to 3 months. Place parchment paper between layers to prevent sticking, and seal in an airtight container.
Reheating: When ready to enjoy, let them thaw at room temperature or pop them in the microwave briefly to savor that gooey chocolate layer again!
What to Serve with Coconut Dream Bars
Treat your taste buds to the perfect meal pairing that elevates the joy of indulgence.
- Fresh Berries: The brightness of strawberries or raspberries adds a refreshing contrast to the rich textures of the bars.
- Vanilla Ice Cream: Creamy and cool, ice cream perfectly balances the chewy bars, creating a delightful melt-in-your-mouth experience.
- Greek Yogurt: A dollop of tangy Greek yogurt cuts through the sweetness, providing a creamy, decadent contrast that enhances each bite.
- Toasted Coconut: Amplify the tropical flavor by topping with toasted coconut for a crunchy texture that complements the softness of the bars.
- Iced Tea or Lemonade: Quench your thirst and cleanse your palate between bites with a glass of refreshing iced tea or zesty lemonade.
- Chocolate Drizzle: Add a decadent touch with a warm chocolate drizzle over the bars for an extra layer of indulgence that chocolate lovers will adore.
These combos promise to enhance the flavor journey of your Coconut Dream Bars while celebrating the sweet moments of shared desserts!
Coconut Dream Bars Recipe FAQs
What type of coconut should I use for Coconut Dream Bars?
Absolutely! For the best flavor and texture, use unsweetened dried coconut, as it provides that lovely chewiness. If you’re feeling adventurous, fresh grated coconut can also add a delightful texture, making your bars even more amazing!
How should I store Coconut Dream Bars?
You can store your Coconut Dream Bars in an airtight container at room temperature for up to 4 days. If you’d like to extend their shelf life, refrigerate them for up to one week. Keeping them cool helps preserve that chewy goodness everyone loves!
Can I freeze Coconut Dream Bars?
Very! Freezing is a fantastic option for longer storage. To freeze your Coconut Dream Bars, place parchment paper between the layers to prevent sticking, then seal them in an airtight container. They can stay fresh in the freezer for up to 3 months! When you’re ready to indulge, simply allow them to thaw at room temperature or reheat briefly in the microwave.
How can I ensure my Coconut Dream Bars don’t turn out dry?
To avoid dryness, make sure to keep an eye on the baking time, especially during the coconut layer baking step—you’re looking for a lightly golden top! If it starts turning too dark, it’s time to take it out. Also, letting the bars cool completely helps them set properly without drying out.
Are Coconut Dream Bars safe for those with nut allergies?
Great question! This Coconut Dream Bars Recipe is nut-free, making it a safe dessert option for guests with nut allergies. However, always double-check ingredient labels, especially for chocolate chips, as some brands may process in facilities that handle nuts.
Can I make these bars gluten-free?
Absolutely! To whip up gluten-free Coconut Dream Bars, simply substitute the graham cracker crumbs with gluten-free graham crackers. This allows everyone to enjoy this tropical treat without worry!
Deliciously Easy Coconut Dream Bars Recipe to Delight You
Ingredients
Equipment
Method
- Preheat your oven to 350°F (175°C). Grease a 9x9 inch baking pan and line with parchment paper.
- Melt ½ cup of unsalted butter until smooth. Add 1 ½ cups of graham cracker crumbs and ¼ cup of sugar, stirring until resembling wet sand. Press into the bottom of the pan.
- Bake the crust for about 10 minutes until lightly golden and set. Allow to cool slightly.
- In a bowl, combine one can of sweetened condensed milk, 2 cups of unsweetened dried coconut, and 1 teaspoon of vanilla extract. Stir until thick and well combined.
- Spread the coconut mixture evenly over the cooled crust and bake for an additional 10-15 minutes until lightly golden.
- Remove from oven and let cool completely to set the layers, about an hour.
- Melt 1 cup of chocolate chips with 1 tablespoon of butter in a microwave-safe bowl, stirring until smooth.
- Pour the melted chocolate over the coconut layer, spreading evenly and allow at least one hour to set.
- Once set, lift the bars from the pan using the parchment overhang and slice into squares or bars.
Leave a Reply