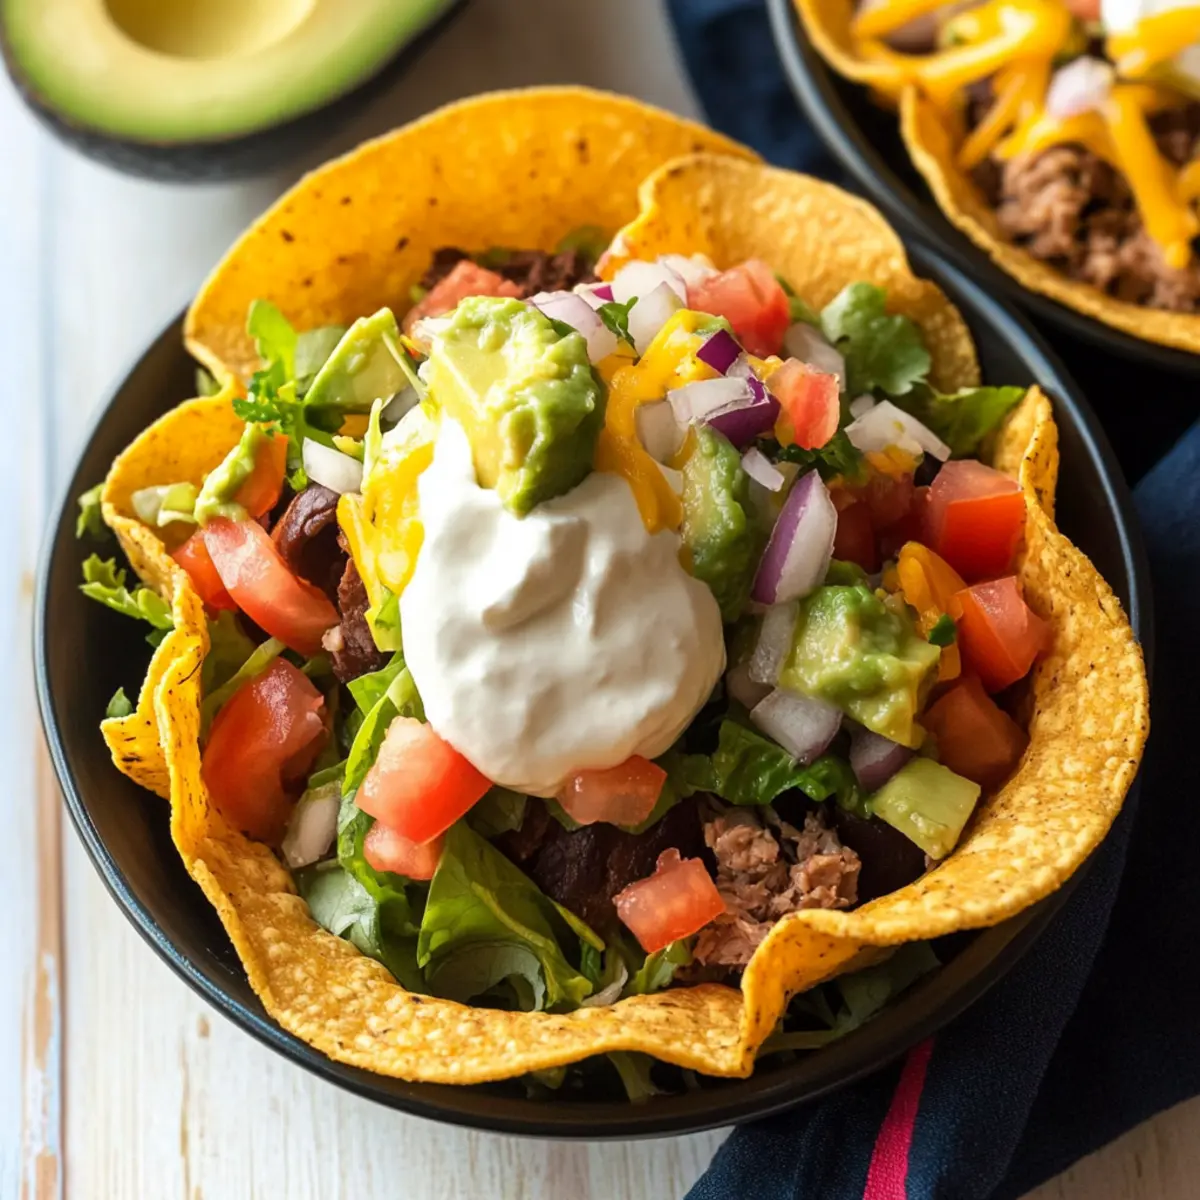
As I was flipping through my favorite cookbooks, it struck me just how satisfying it is to create something mouthwatering from scratch. That’s when I decided to bring a fun twist to taco night with these delightful Bubbly Taco Salad Bowls. This Bubbly Taco Salad Bowl recipe transforms ordinary tortillas into ultra-crispy, airy vessels that hold all your favorite toppings, combining convenience with gourmet flair. Best of all, they’re quick to make and guilt-free, so you can enjoy taco night without feeling weighed down. Whether you’re feeding a crowd or just indulging yourself, these bowls are customizable and full of vibrant flavors. Ready to master taco night with a homemade touch? Let’s dive in!
Why Will You Love This Recipe?
Irresistible Flavor Experience: The combination of fresh toppings and crispy bowls makes every bite a delight.
Quick & Easy: With just a few simple steps, you’ll have gourmet taco bowls ready to impress.
Customizable Goodness: Fill them with your favorite ingredients—choose from grilled chicken, fresh veggies, or even a classic Cheese Chicken Salad for a delicious twist.
Guilt-Free Indulgence: Enjoy a satisfying meal that’s both light on calories and full of flavor.
Perfect for Any Occasion: Whether it’s a casual dinner or a festive gathering, these bowls are sure to be a hit! Explore more vibrant salad options like the Delightful Honeycrisp Broccoli Salad to complement your meal.
Bubbly Taco Salad Bowl Ingredients
For the Tortilla Bowls
- Flour Tortillas (10-12 inch) – The ideal base for forming your crispy bowls; gluten-free substitution with corn tortillas is an option, but they won’t puff as much.
- Vegetable Oil – Crucial for pan-frying to achieve that bubbly, crispy texture; any flavorless oil will do as a substitute.
For the Filling
- Chopped Greens – Fresh, vibrant greens add crunch and nutrition to each bowl.
- Seasoned Meat – Choose your favorite, like ground beef or chicken, to bring heartiness to your taco salad.
- Assorted Toppings – Include diced tomatoes, olives, avocado, and cheese to personalize each serving and elevate the flavor experience.
Get ready to dive into this Bubbly Taco Salad Bowl recipe and create a feast that’s as delicious as it is fun!
Step‑by‑Step Instructions for Bubbly Taco Salad Bowl Recipe
Step 1: Preheat the Oven
Begin by preheating your oven to 350°F (175°C). While the oven warms up, take 4 oven-safe cereal bowls and place them upside down on a large baking sheet. This will allow the tortillas to sit comfortably over the bowls as they bake, ensuring they maintain their shape.
Step 2: Heat the Oil
Next, heat a large skillet over medium heat, adding 1 tablespoon of vegetable oil. Swirl the oil to coat the bottom of the pan. Let the oil heat until it shimmers, demonstrating that it’s ready for frying your tortillas and will produce that coveted bubbly effect in the bowls.
Step 3: Fry the Tortillas
Once the oil is hot, gently swirl a flour tortilla in the oil, allowing it to fry for about 30-45 seconds on one side until it puffs up and turns a beautiful golden color. Carefully flip the tortilla and fry for another 30-45 seconds, keeping a close eye to prevent burning. You’ll know it’s ready when it’s puffy and fragrant.
Step 4: Shape the Tortilla Bowls
Using tongs, lift the fried tortilla from the skillet and gently place it over one of the upside-down cereal bowls. Press down lightly to mold it into the bowl shape while avoiding deflating the bubbles. This method creates a lovely, airy texture perfect for holding the filling of your Bubbly Taco Salad Bowl.
Step 5: Repeat the Process
Continue frying the remaining tortillas one at a time, repeating the frying and shaping process for each tortilla. Make sure to add more oil as needed to keep the frying consistent. Aim for that perfect puff and golden color with each tortilla to ensure all your Bubbly Taco Salad Bowls turn out deliciously crispy.
Step 6: Bake the Tortilla Bowls
Once all the fried tortillas are shaped over the bowls, place the entire baking sheet in the preheated oven. Bake for 9-10 minutes until the tortilla bowls are incredibly crispy and light to the touch. This baking step enhances their crunchiness, ensuring your Bubbly Taco Salad Bowl is a delight with every bite.
Step 7: Cool and Serve
After baking, carefully remove the baking sheet from the oven and allow the tortilla bowls to cool for a few minutes. This cooling time will help firm up the bowls further. Now, they are ready to be filled with your choice of vibrant ingredients, making your Bubbly Taco Salad Bowls an exciting centerpiece for any meal.
Make Ahead Options
These Bubbly Taco Salad Bowls are ideal for meal prep, allowing you to enjoy a delightful and quick dinner even on the busiest nights! You can prepare the tortilla bowls in advance; simply fry and shape them up to 24 hours before serving. Allow the bowls to cool completely and store them in an airtight container at room temperature to keep them crispy. When you’re ready to serve, just reheat in the oven for 5-7 minutes at 350°F to restore their crunch. Additionally, you can chop your filling ingredients, such as greens and toppings, up to 3 days ahead. This way, you’ll have everything prepped and ready to assemble at a moment’s notice for a fresh, homemade meal!
Expert Tips for Bubbly Taco Salad Bowls
-
Oil Coating Matters: Ensure tortillas are well-coated in oil for optimal puffiness; skipping this step may result in flat bowls.
-
Use Tongs Wisely: Use tongs when transferring fried tortillas to the bowls; this prevents the delicate bubbles from bursting.
-
Timing is Key: To maintain crispiness, serve your Bubbly Taco Salad Bowls shortly after baking. However, they can last for up to 2 days if stored properly.
-
Experiment with Sizes: Try mini tortillas for bite-sized bowls; adjusting the size adds a fun twist to your serving options.
-
Don’t Overheat the Oil: Keep an eye on the skillet—too hot can burn the tortillas while too cool prevents puffing; aim for medium heat.
What to Serve with Bubbly Taco Salad Bowls
Elevate your homemade taco experience with delightful side dishes and thirst-quenching beverages that perfectly complement these crispy creations.
-
Creamy Guacamole: The rich, creamy texture enhances the crunchy bowls while adding a refreshing, buttery flavor to each bite.
-
Zesty Mexican Rice: Fluffy rice dotted with spices adds a savory layer to the meal, balancing out the crispiness of the bowls with every mouthful.
-
Spicy Black Bean Salsa: A tangy mix of black beans, tomatoes, and cilantro brings a burst of flavor, turning up the heat and enhancing the overall taste profile.
-
Fresh Corn Salad: This vibrant medley of sweet corn, red onions, and lime adds brightness and texture, offering a crisp contrast to the taco bowls.
-
Crispy Tortilla Chips: For added crunch, pair your dinner with homemade or store-bought chips, perfect for scooping up toppings or enjoying with salsa.
-
Chilled Horchata: This sweet cinnamon-infused rice drink provides a delightful contrast to the savory bowls, refreshing your palate between bites.
-
Fruit Salad: A bright, colorful mix of seasonal fruits can offer a sweet finish to your meal, cleansing the palate after the rich flavors of the tacos.
With these pairings, your Bubbly Taco Salad Bowl experience will be transformed into a fiesta on your dining table!
Bubbly Taco Salad Bowl Recipe Variations
Feel free to let your creativity shine and customize your Bubbly Taco Salad Bowl to suit your tastes!
-
Gluten-Free: Use corn tortillas instead of flour, perfect for a gluten-free version; they will have a different texture, but still delicious!
-
Spicy Kick: Add a pinch of cayenne or chopped jalapeños to the tortilla before frying for a delightful heat that will elevate your taco night.
-
Cheesy Delight: Sprinkle shredded cheese directly onto the fried tortilla before shaping; allow it to melt slightly while baking for a fantastic cheesy crust.
-
Vegetarian: Load your bowls with grilled vegetables, beans, and your favorite Egg Roll Bowl toppings for a colorful, meat-free option.
-
Sweet Twist: Try filling the bowls with a mix of shredded lettuce, diced mango, and spicy chipotle dressing for a refreshing and tropical flavor explosion.
-
Mini Bowls: Use smaller tortillas to create cute, bite-sized versions of your salad bowls, perfect for serving at parties or as appetizers!
-
Stuffed Bowls: For a heartier meal, fill your bowls with seasoned rice first, then pile on greens and toppings for a robust dish.
-
Breakfast Variation: Transform your taco bowls into breakfast delights by using scrambled eggs, toppings like avocado, and even a drizzle of salsa, appealing to morning cravings.
Each of these variations allows for endless opportunities to make taco night feel like a gourmet experience while catering to all dietary preferences. For more delicious inspirations, consider trying the Ramsay Macaroni Salad or a Pot Cheesy Taco for your next family meal! Enjoy experimenting!
Storage Tips for Bubbly Taco Salad Bowls
- Room Temperature: Store any leftover tortilla bowls wrapped in plastic wrap at room temperature for up to 2 days to maintain their crispiness while preventing them from becoming stale.
- Fridge: If you have already filled your bowls, place them in an airtight container in the refrigerator to keep ingredients fresh for up to 1 day; consume these as soon as possible for best flavor.
- Reheating: To restore the crispiness of your Bubbly Taco Salad Bowls, reheat them in a preheated oven at 350°F (175°C) for about 5-7 minutes before serving, ensuring they regain their delightful crunch.
Bubbly Taco Salad Bowl Recipe FAQs
What type of tortillas should I use for the Bubbly Taco Salad Bowls?
I recommend using flour tortillas (10-12 inch) as they form the ideal base, offering the structure needed for crispy bowls. If you’re looking for a gluten-free option, corn tortillas work, but do keep in mind they may not puff up as much as flour tortillas.
How should I store leftover Bubbly Taco Salad Bowls?
To maintain their crunchiness, wrap any leftover tortilla bowls in plastic wrap and store them at room temperature for up to 2 days. Avoid refrigeration as it can cause them to become soggy. For filled bowls, place them in an airtight container in the fridge for up to 1 day. Enjoy them as soon as possible for the best flavor!
Can I freeze the tortilla bowls after making them?
Absolutely! To freeze your Bubbly Taco Salad Bowls, first let them cool completely after baking. Then, layer them between sheets of parchment paper in an airtight container or heavy-duty freezer bag. They can be frozen for up to 3 months. When you’re ready to enjoy them, reheat in a preheated oven at 350°F (175°C) for about 5-7 minutes to restore their crunch.
What if my tortillas don’t puff when frying?
If your tortillas aren’t puffing, it might be due to insufficient oil coating or the frying oil not being hot enough. Make sure your oil is shimmering before you begin frying, and ensure you’re swirling the tortillas in the oil thoroughly. If needed, adjust your skillet heat to medium to provide the perfect frying environment.
Are there any dietary considerations I should be aware of?
Yes! If you have gluten sensitivities, opt for corn tortillas to keep it gluten-free. Additionally, check the ingredient labels of any sauces or fillings you use to avoid allergens, especially if serving to guests. Always adapt the toppings to suit dietary preferences or restrictions, making these bowls as inclusive as possible!
Bubbly Taco Salad Bowl Recipe - Crunchy, Guilt-Free Goodness
Ingredients
Equipment
Method
- Preheat your oven to 350°F (175°C) and place 4 upside-down cereal bowls on a baking sheet.
- Heat a large skillet over medium heat and add 1 tablespoon of vegetable oil, swirling to coat the pan.
- Fry a flour tortilla in the oil for about 30-45 seconds on one side until puffy and golden, then flip and fry for another 30-45 seconds.
- Using tongs, lift the fried tortilla and press it gently over an upside-down bowl to shape it.
- Repeat the frying and shaping process for the remaining tortillas, adding oil as needed.
- Bake all shaped tortillas on the baking sheet for 9-10 minutes until crispy.
- Remove from the oven and let cool before filling with your choice of ingredients.
Leave a Reply