Stepping into my kitchen, the aroma of warm bread greeted me like an old friend. In just 18 minutes, I was transported to the sun-soaked shores of Greece with a batch of my Best Ever Greek Pita. This homemade delight is not just about airy pockets of joy; it’s incredibly versatile—perfect for wraps, gyros, or simply dipped in creamy hummus. Plus, for those seeking gluten-free options, this recipe adapts effortlessly. With its soft, pillowy texture and authentic taste, it’s bound to become a staple in your home and a delight for your loved ones. What will you whip up to pair with these heavenly pitas?
Why is homemade Greek pita a game changer?
Unmatched Freshness: There’s nothing like the aroma of warm, homemade bread wafting through your kitchen. This Best Ever Greek Pita brings the taste of Greece to your home in just 18 minutes.
Versatile Delight: Whether you’re making hearty gyros or scooping up smoky hummus, these pitas are adaptable to any dish.
Gluten-Free Friendly: You can effortlessly swap in gluten-free flour, ensuring everyone can enjoy this delightful experience.
Soft, Pillowy Texture: The lightness and chewiness of these pitas elevate any meal, making them a family favorite.
Quick and Easy: With minimal ingredients and rapid preparation, you can have fresh bread ready in no time—perfect for busy weeknights.
Indulge in the joy of homemade goodness and check out my Pecan Pie Cookies for a delightful dessert pairing!
Best Ever Greek Pita Ingredients
• Discover what makes this homemade delight irresistible!
For the Dough
- All-Purpose Flour – Provides structure and form to the pita. Substitution: Use gluten-free flour for a gluten-free option.
- Active Dry Yeast – Leavens the dough, giving it a light rise. Tip: Ensure yeast is fresh for best results.
- Kosher Salt – Enhances flavor and controls yeast activity. Note: Sea salt can be used.
- Warm Milk – Activates the yeast and adds richness. Substitution: Use unsweetened plant-based milk (oat or soy recommended).
- Warm Water – Aids in dough formation and yeast activation. Ensure water is not too hot.
- Olive Oil – Adds moisture and flavor. Tip: Use extra for cooking and greasing the bowl.
Unleash the joy of creating your Best Ever Greek Pita and celebrate the flavor of homemade goodness!
Step‑by‑Step Instructions for Best Ever Greek Pita
Step 1: Combine Dry Ingredients
In a large mixing bowl, whisk together 3 cups of all-purpose flour, 2 teaspoons of active dry yeast, and 1 teaspoon of kosher salt until well blended. This creates the foundation of your Best Ever Greek Pita. Make sure the yeast is evenly distributed to ensure a proper rise, setting the stage for pillowy bread.
Step 2: Activate the Wet Ingredients
Gently warm 1 cup of milk and ½ cup of water until it feels comfortably warm to the touch, around 100°F. Then, pour this mixture into the flour mixture while stirring with a wooden spoon. This will start to form your dough. The warmth is crucial to activate the yeast, creating that lovely rise in your pita.
Step 3: Knead the Dough
Once the mixture begins to come together, add in 2 tablespoons of olive oil. Using your hands, knead the dough on a lightly floured surface for about 8-10 minutes until it becomes smooth and elastic. As you knead, feel the dough transform into a soft and cohesive ball, which is vital for achieving that perfect texture in your Greek pita.
Step 4: Let the Dough Rise
Lightly oil a clean bowl with olive oil and place your kneaded dough inside, turning it to coat the top. Cover the bowl with a damp cloth and let it rise at room temperature for approximately 1 hour, or until it has doubled in size. This step is essential for achieving the airy pockets that make the Best Ever Greek Pita so delightful.
Step 5: Shape the Pitas
Once risen, gently punch down the dough to release excess air and transfer it onto a floured surface. Divide the dough into 8 equal pieces and roll each piece into a ball. Then, flatten each ball into a 7-8 inch round, ensuring it’s even to promote uniform cooking. This shaping is key to creating those soft, fluffy pitas.
Step 6: Cook the Pitas
Heat a cast iron skillet over high heat and add about 1 teaspoon of olive oil, spreading it evenly. Once the skillet is hot, place a pita in the skillet and cook for about 1 minute on each side, until it puffs and develops slight charring. Repeat this process for all pitas, adjusting the heat as needed to avoid burning, aiming for that signature puff.
Step 7: Enjoy Your Greek Pitas
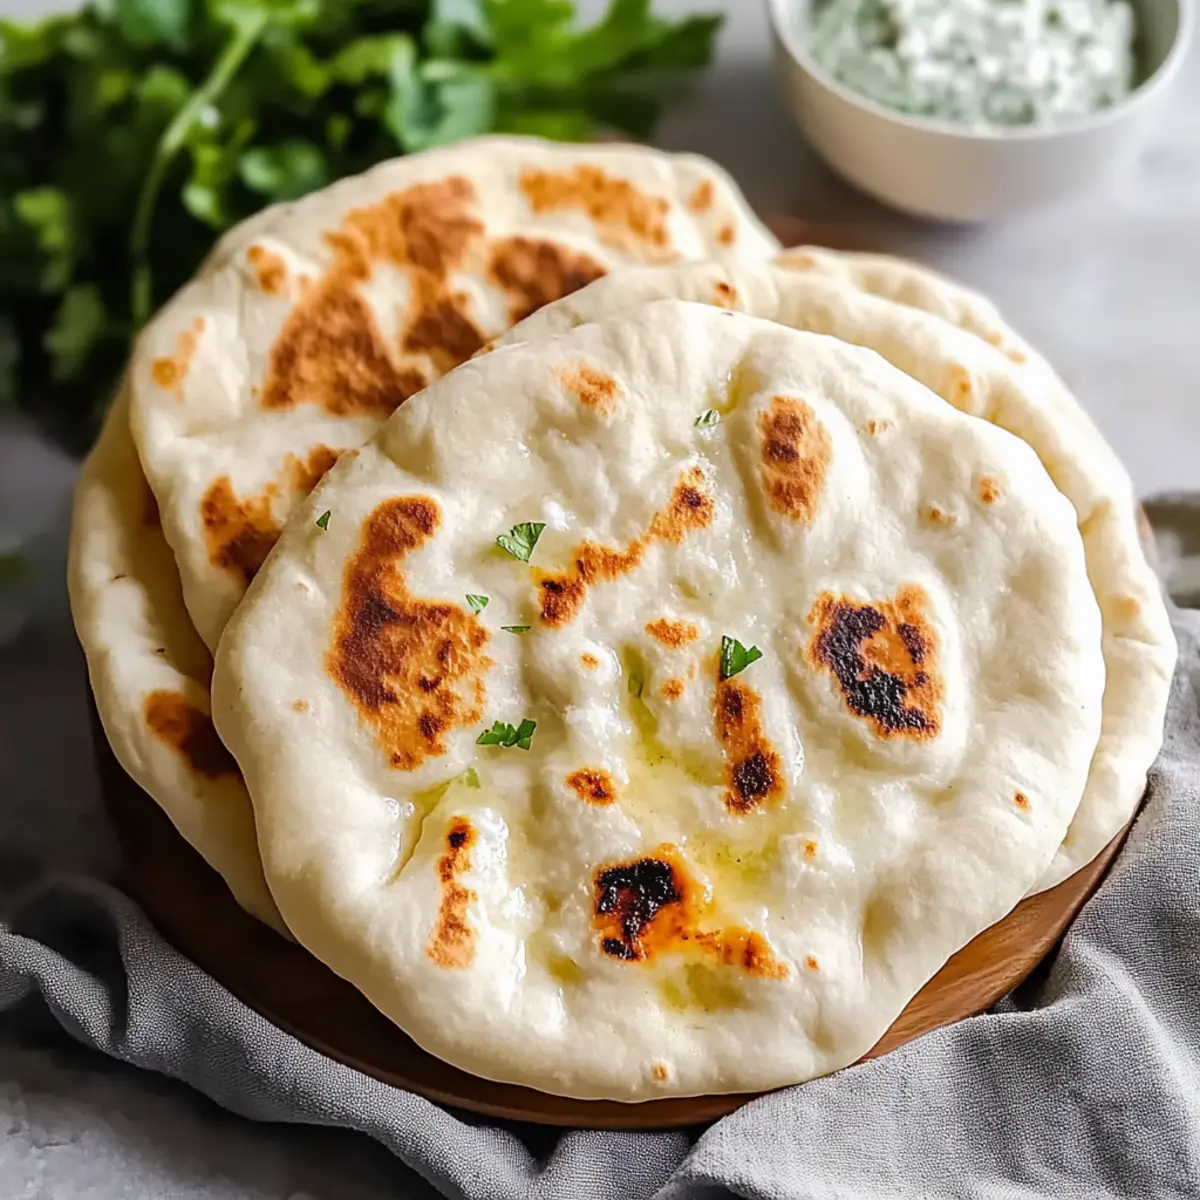
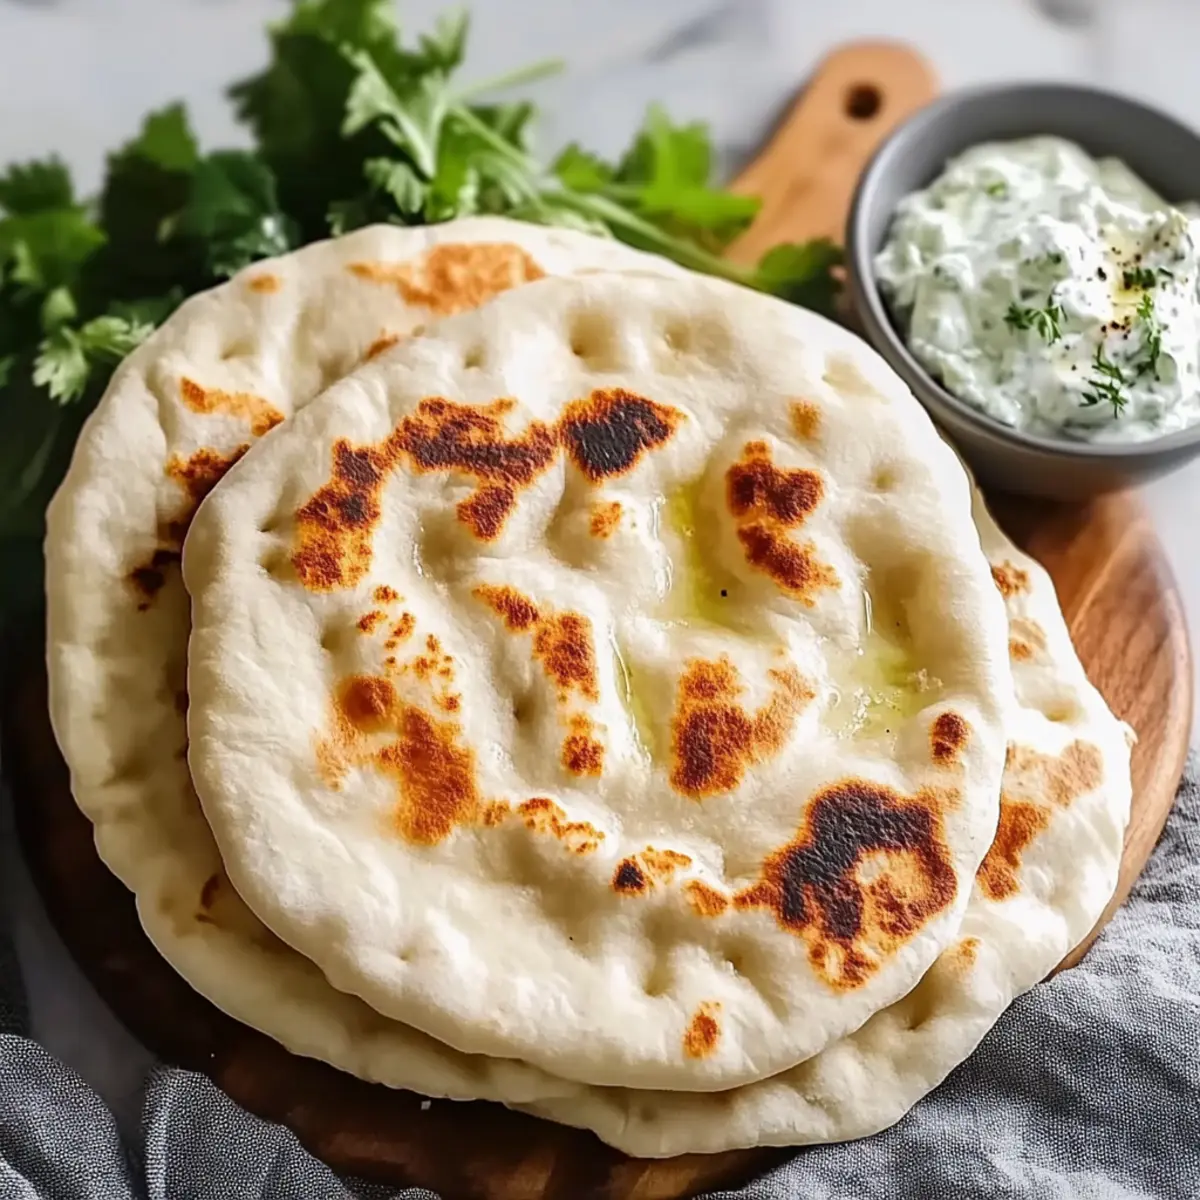
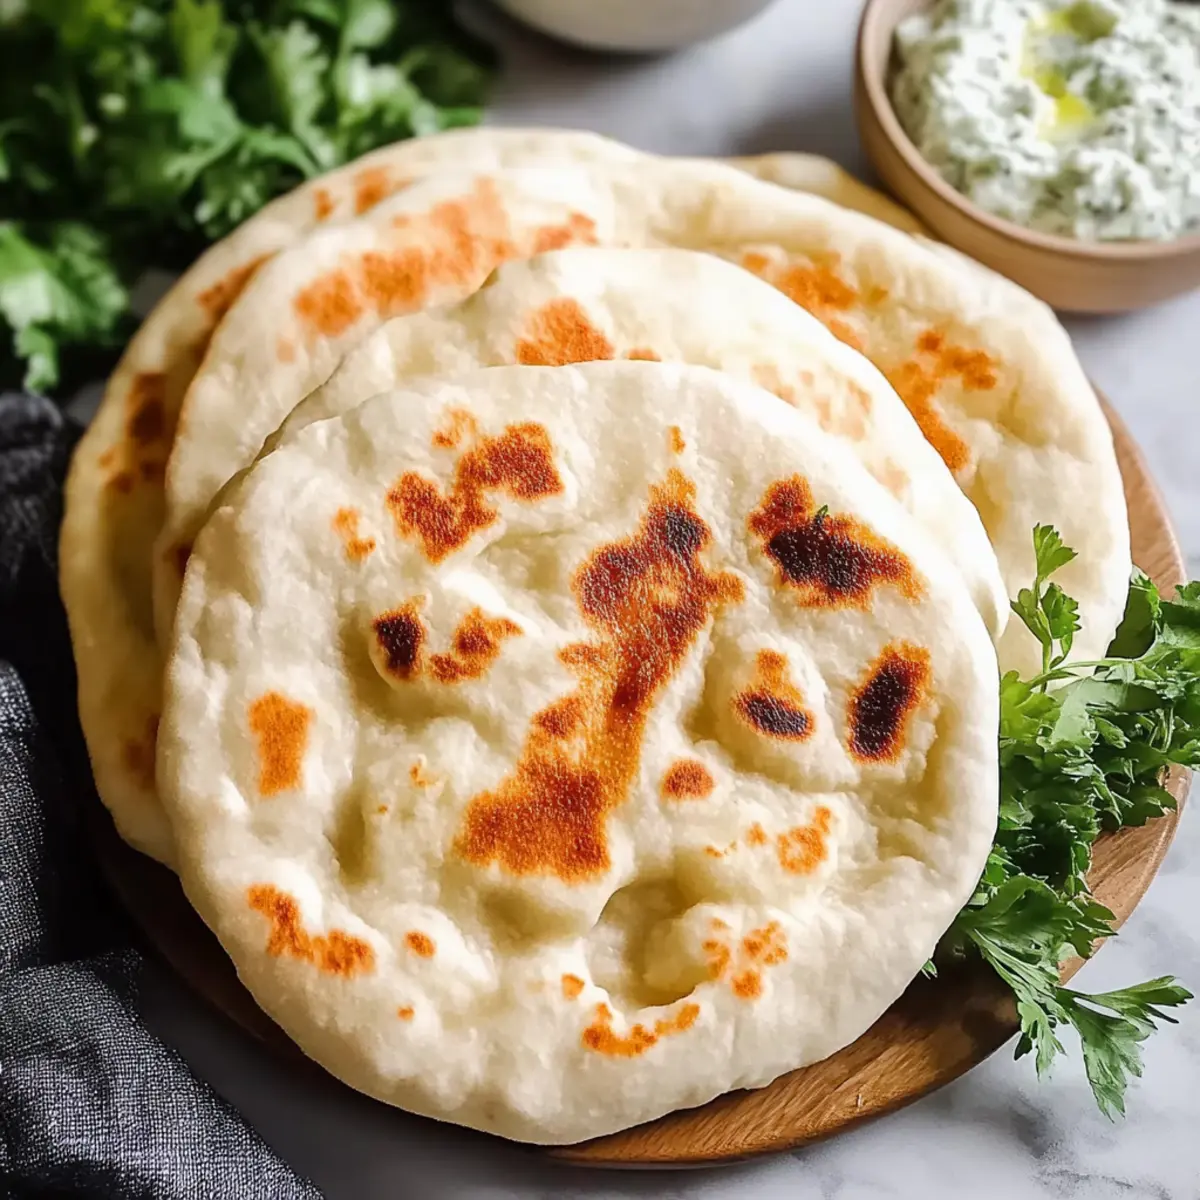
Remove the cooked pitas from the skillet and let them cool on a wire rack. This cooling step helps maintain their soft and pillowy texture. Serve your Best Ever Greek Pita warm with your favorite dips or fillings, and watch as it quickly becomes the star of your meal, bringing the essence of the Mediterranean into your home.

What to Serve with Best Ever Greek Pita
The delightful flavors and soft texture of homemade Greek pita invite a world of delicious pairings to complete your meal.
-
Creamy Hummus: This classic dip enhances the fluffy pita, creating a creamy, dreamy experience that’s simply irresistible. It’s the ultimate pairing for a warm, inviting appetizer.
-
Tzatziki Sauce: A refreshing cucumber and yogurt dip, tzatziki adds a cool contrast, elevating the flavor profile of your pita, whether stuffed or served on the side.
-
Grilled Chicken Skewers: Tender, marinated chicken perfectly complements the pita’s pillow-like softness. Enjoy a satisfying wrap filled with vibrant flavors and textures.
-
Roasted Vegetables: Seasonal roasted veggies bring a wonderful earthy sweetness to the meal, making the pitas a perfect vessel for scooping up these nutritious bites and enhancing your dining experience.
-
Feta Salad: A tangy salad with feta, olives, and tomatoes brings a burst of freshness that pairs delightfully with the soft pita, adding both color and flavor to your meal.
-
Mint Lemonade: This refreshing drink cuts through the richness and adds a refreshing twist. It enhances the Mediterranean vibe while keeping you cool and hydrated.
Enjoy experimenting with these pairings to create a spread that’s as comforting as it is delicious!
Storage Tips for Best Ever Greek Pita
- Fridge: Store your Best Ever Greek Pita in an airtight container for up to a week to maintain freshness and flavor. Make sure they’re completely cool before sealing.
- Freezer: Wrap each pita individually in plastic wrap, then place them in a freezer bag. They’ll keep well for up to three months, preserving their delightful texture for future meals.
- Reheating: When you’re ready to enjoy them again, warm the pitas in an oven at 350°F for 5-7 minutes or heat them in a skillet over medium heat. This revives their soft, pillowy goodness beautifully!
Best Ever Greek Pita Variations
Feel free to explore delicious twists that can make your Best Ever Greek Pita even more enjoyable!
- Gluten-Free: Substitute all-purpose flour with your favorite gluten-free flour blend for a delightful, inclusive option. This adjustment allows everyone at your table to savor the goodness of homemade pita.
- Plant-Based Milk: Switch out warm milk for unsweetened oat or soy milk to cater to vegan diets, ensuring a rich flavor without dairy. Your pitas will still come out soft and delicious!
- Flavor Boost: Drizzle the cooked pitas with melted herb-infused butter or garlic oil for an extra layer of flavor that transforms your pita into a gourmet treat. This simple addition elevates the entire dining experience.
- Whole Grain: Replace half of the all-purpose flour with whole wheat flour to enhance flavor and add a nutty texture while boosting nutritional value. You’ll enjoy the same delightful softness with a wholesome twist!
- Herbed Bliss: Knead fresh chopped herbs like rosemary or dill into your dough for a fragrant touch that will make every bite memorable. The aroma while cooking is absolutely irresistible.
- Spicy Kick: Add a pinch of cayenne or black pepper to the dough to pack a subtle heat that pairs beautifully with dips like hummus or tzatziki. It adds a fun surprise to each fluffy bite!
- Stuffed Pitas: Roll out larger rounds and stuff them with cheese, spinach, or cooked meats before cooking for a hearty meal option. These stuffed delights will make your pitas even more versatile and filling.
- Sweet Twist: For a sweet snack, drizzle a little honey or maple syrup over warm pitas and sprinkle with cinnamon, enjoying a dessert-like treat that complements a warm beverage. It’s a cozy indulgence you won’t want to miss!
For even more delicious recipes, why not check out my Greek Chicken Gyros or create a show-stopping Butter Board? The possibilities are endless in the world of homemade goodness!
Make Ahead Options
These Best Ever Greek Pita are perfect for meal prep enthusiasts! You can prepare the dough up to 24 hours in advance. After kneading, simply wrap the dough in plastic wrap and refrigerate it. This will allow the flavors to deepen, and it will still rise beautifully when you remove it from the fridge to return to room temperature before cooking. For even more convenience, pre-shape the pitas into rounds and refrigerate them, ensuring they’re covered with a damp cloth to prevent drying out. When you’re ready to enjoy your pitas, just heat your skillet and cook them as directed for fresh, restaurant-quality results with minimal effort!
Expert Tips for Best Ever Greek Pita
- Yeast Activation: Always check that your yeast is fresh and activated properly. If it doesn’t foam after mixing with warm liquid, your pitas won’t rise.
- High Heat Cooking: Cook the pitas on high heat to achieve that characteristic puff and lightly charred exterior. If the heat is too low, they won’t rise properly.
- Proper Cooling: Allow your pitas to cool on a wire rack to keep their soft, pillowy texture. Collapsing them in a container will lead to sogginess.
- Dough Preparation: Make the dough a day ahead and refrigerate it. Let it come to room temperature before cooking for a fresher taste.
- Versatile Substitutions: Feel free to use gluten-free flour when making your Best Ever Greek Pita, ensuring everyone at the table can join in on the deliciousness.
Best Ever Greek Pita Recipe FAQs
How do I select the best ingredients for my Greek pita?
Absolutely! For the best results, choose high-quality all-purpose flour as it provides the right structure. If using gluten-free flour, look for a blend that includes xanthan gum for improved texture. Ensure your active dry yeast is fresh, as expired yeast cannot properly leaven your dough. For milk, warm it to about 100°F—this activates the yeast.
What are the best storage methods for homemade Greek pitas?
To keep your Best Ever Greek Pita fresh, store them in an airtight container in the fridge for up to a week. Make sure they are completely cool before sealing the container to avoid condensation, which can make them soggy. If you want to enjoy them later, wrap each pita individually in plastic wrap and place them in a freezer bag. They can last up to 3 months in the freezer without losing their delightful texture.
Can I freeze my Greek pitas, and how should I do it?
Very! To freeze your Best Ever Greek Pita, after cooking and cooling them to room temperature, wrap each pita tightly in plastic wrap. Place the wrapped pitas in a freezer bag, squeezing out any excess air to prevent freezer burn. Label the bag with the date, and they will stay fresh for about three months. When ready to enjoy, thaw them for a few hours in the fridge or at room temperature, and reheat as directed.
What if my pita dough doesn’t rise properly?
No worries! If your dough doesn’t rise, it could be due to inactive yeast. Always check the expiration date before using. To troubleshoot, you can activate the yeast separately by mixing it with warm (not hot) milk and sugar, letting it foam for about 5-10 minutes before adding it to your dough mixture. If your dough seems too dry, sprinkling a little warm water while kneading can help achieve a smoother consistency.
Are there any dietary considerations I should keep in mind?
Definitely! If anyone at your table has gluten sensitivities, simply substitute the all-purpose flour with a gluten-free blend to make your Best Ever Greek Pita gluten-free. Always double-check ingredients for allergens, especially for the optional plant-based milk and olive oil, and try to use unsweetened alternatives to cater to various dietary preferences.
Best Ever Greek Pita: Soft, Homemade Heaven Awaits
Ingredients
Equipment
Method
- In a large mixing bowl, whisk together 3 cups of all-purpose flour, 2 teaspoons of active dry yeast, and 1 teaspoon of kosher salt until well blended.
- Gently warm 1 cup of milk and ½ cup of water until it feels comfortably warm to the touch, then pour this mixture into the flour mixture while stirring.
- Once the mixture begins to come together, add in 2 tablespoons of olive oil and knead the dough on a lightly floured surface for about 8-10 minutes.
- Lightly oil a clean bowl with olive oil and place your kneaded dough inside, cover with a damp cloth, and let it rise at room temperature for approximately 1 hour.
- Once risen, punch down the dough to release excess air and transfer it onto a floured surface. Divide the dough into 8 equal pieces and roll each into a ball.
- Heat a cast iron skillet over high heat, add about 1 teaspoon of olive oil, and cook each pita for about 1 minute on each side.
- Remove the cooked pitas from the skillet and let them cool on a wire rack.
Leave a Reply